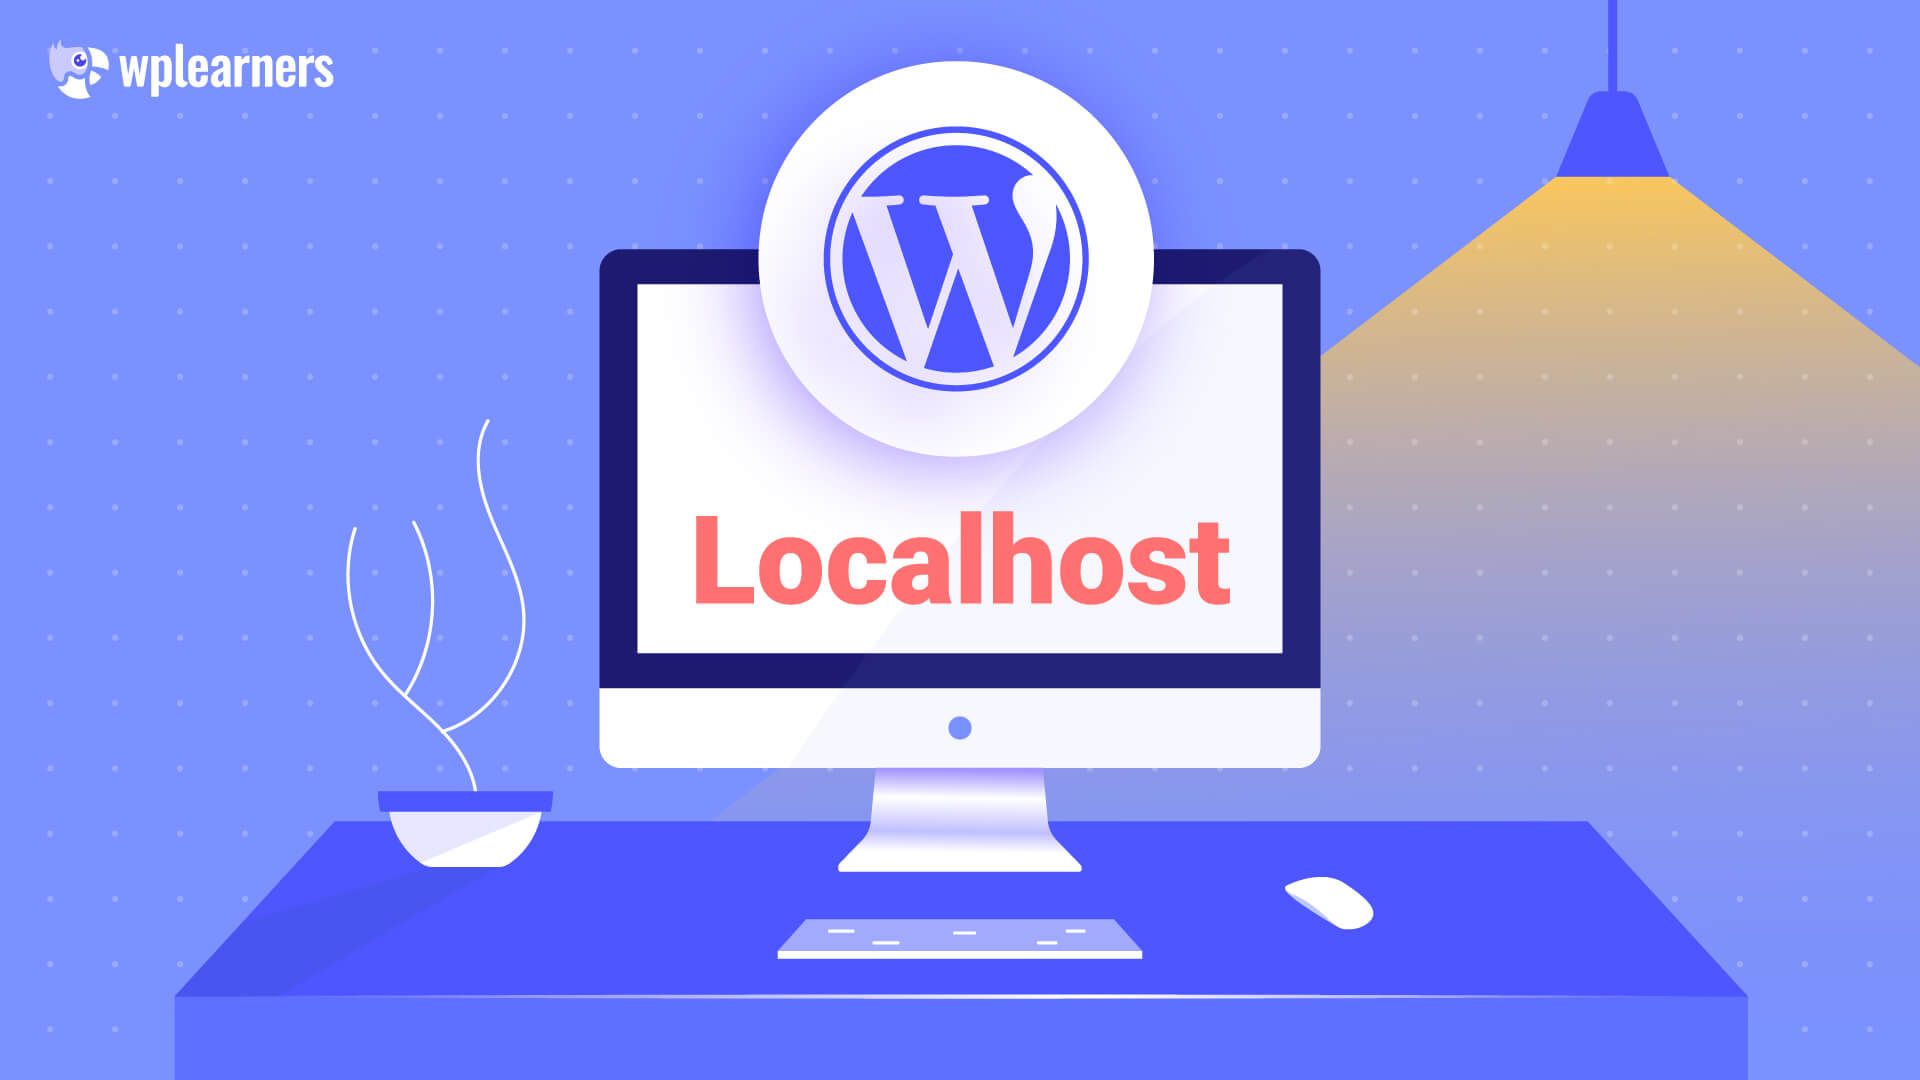
Want to learn WordPress or make a demo before you go live? But don’t know where to start? Well don’t worry, we are here for you. We will share the basic process of how to get things going. So, let’s start with installing WordPress on localhost along with AMPPS!
What is localhost?
Hosting with localhost is very much like hosting with any other service like Bluehost or DreamHost. However, if you choose localhost instead of virtual hosting, your PC will be the storage device. Therefore, you’ll need third-party software to establish a localhost setting on your PC before you can use it as a host for WordPress installations.
For example, you can use XAMPP to build a virtual hosting environment on your computer. A hosting subscription and premium domain are not required to install WordPress on your localhost.
What Are the Options to Install WordPress on Localhost?
You must install localhost software regardless of the operating system to install WordPress on a localhost server. Localhost software can be found for all operating systems.
There are now six popular platforms on which WordPress and other CMS can be installed.
Here are a few of the most common options for setting up a CMS on localhost:
- AMPPS stands for Apache, Mysql, MongoDB, PHP, Perl, Python, and Softaculous.
- LAMP stands for Linux, Apache, MySQL, and PHP.
- Local by Flywheel stands for Local WordPress development tool.
- MAMP stands for My Apache, MySQL, and PHP.
- WAMP stands for Windows, Apache, MySQL, and PHP.
- XAMPP stands for cross-platform, Apache, MySQL, PHP, and Perl.
In this article, we’ll share the process of installing WordPress on localhost with AMPPS.
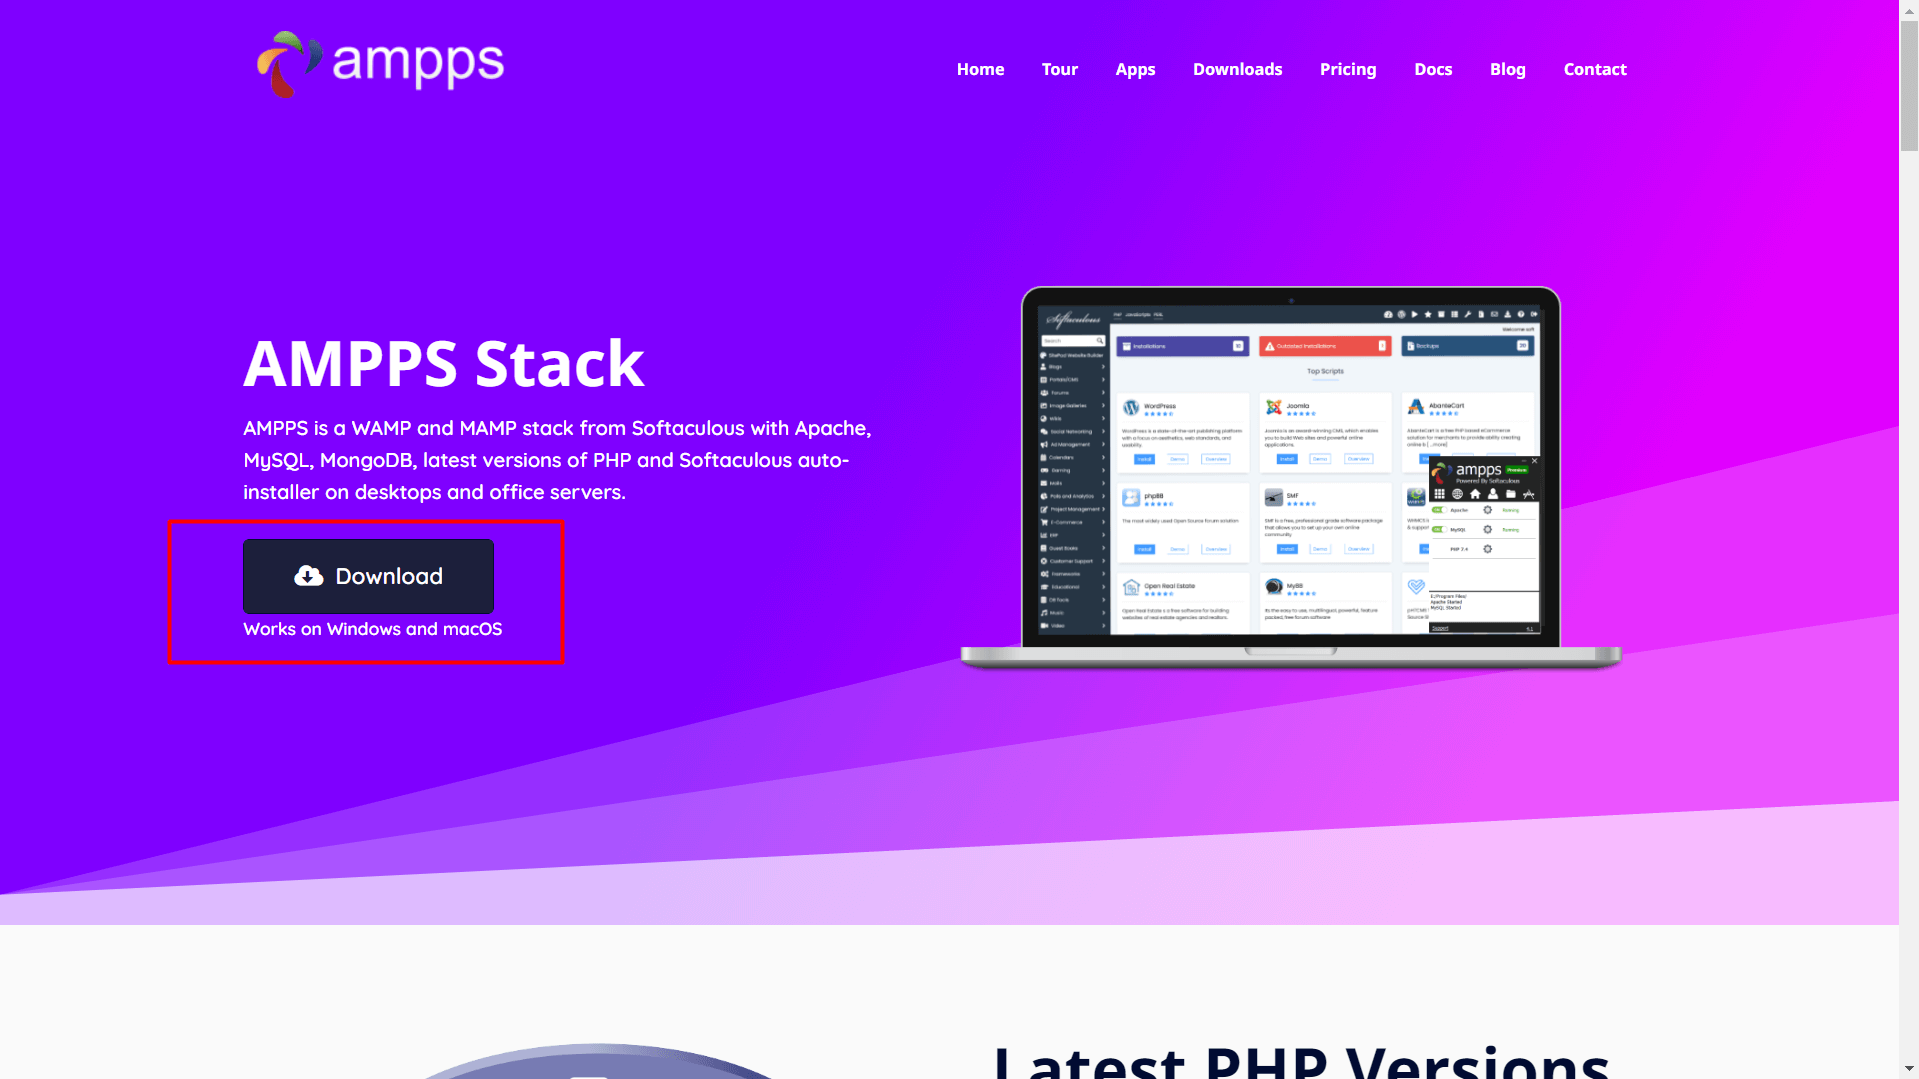
What is AMPPS- A Short Introduction
You can enable Apache, MySql, MongoDB, PHP, Perl, and Python on your PC using AMPPS from Softaculous.
AMPPS is Free to Get Easy to Use
AMPPS includes all of the tools you’ll need to build a website. Open source web apps are great ways to start. And the good part is you can get AMPPS free of cost. However there are options to migrate to a paid version of this app.
With a simple press of a button, you can conduct complex tasks like backing up your database or even backing up your whole website. With a single click, you can also upgrade your installations. So save yourself some trouble when you import your scripts or back up your website.
AMPPS by Softaculous makes things as simple and easy as they possibly can be. As a result, it is possible to finish jobs quickly without going through many stages or pages by using the same approach.
Downloading and Installing AMPPS
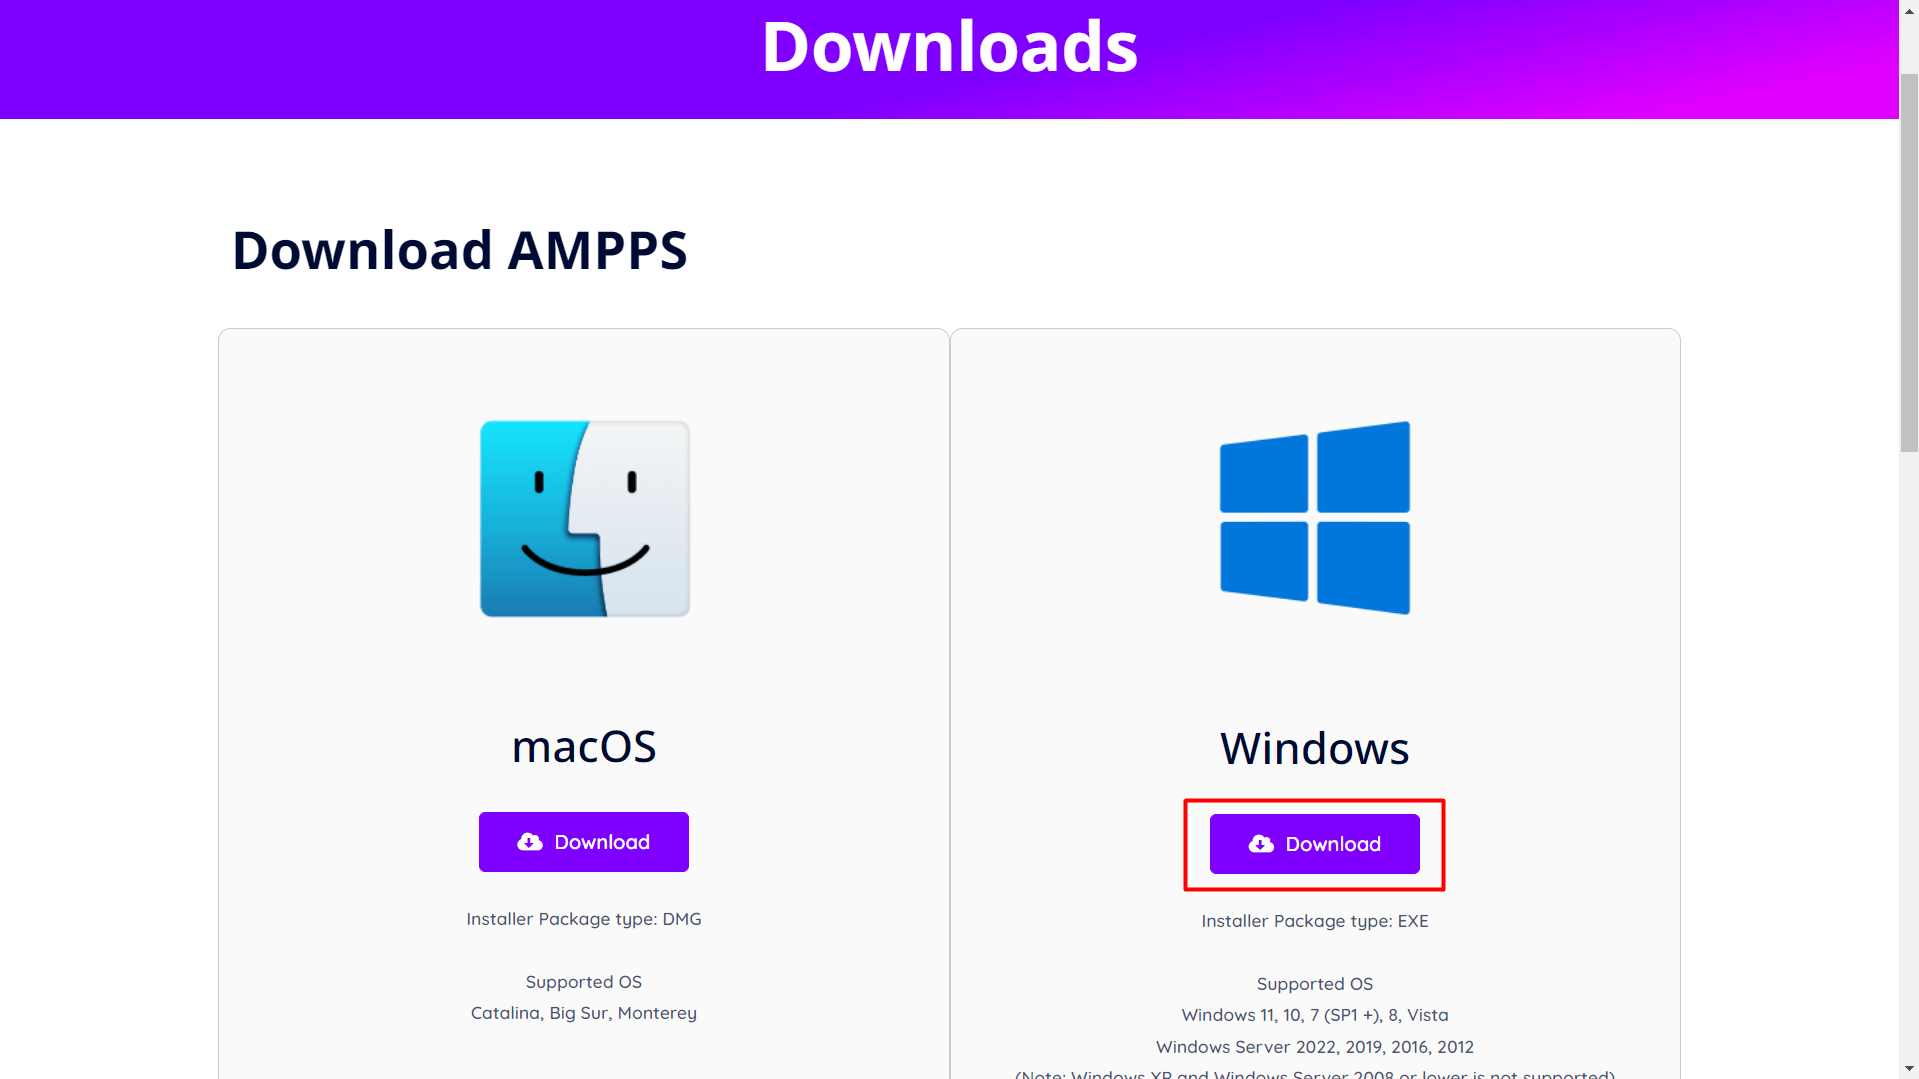
- Go to the official website of AMPPS, and download the latest version.
- You can download it for both mac and windows. We’re installing in Windows. click download and save the executable file.
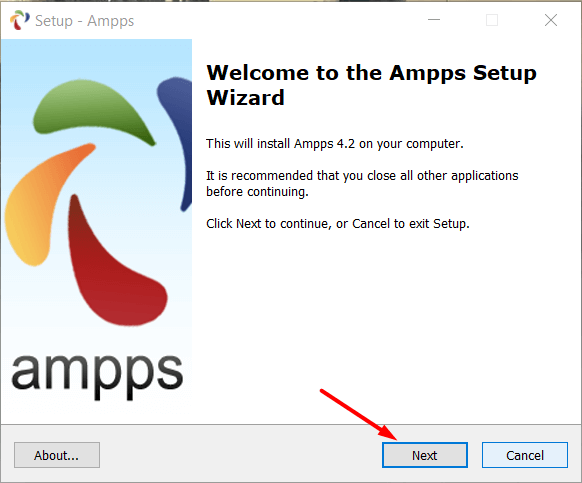
- To begin the installation of AMPPS, just double-click the executable file. The installer will start.
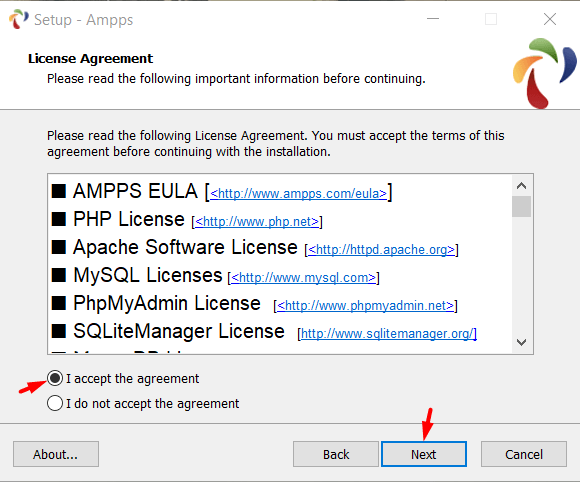
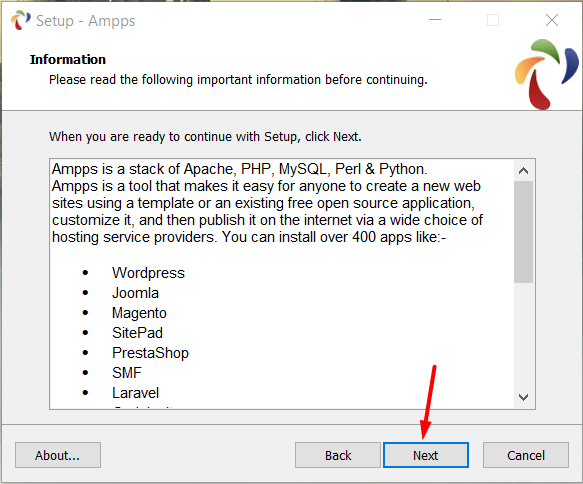
- Select I agree to the terms and conditions and click Next.
- After clicking next the install will show you some information regarding the integrated setup modules.
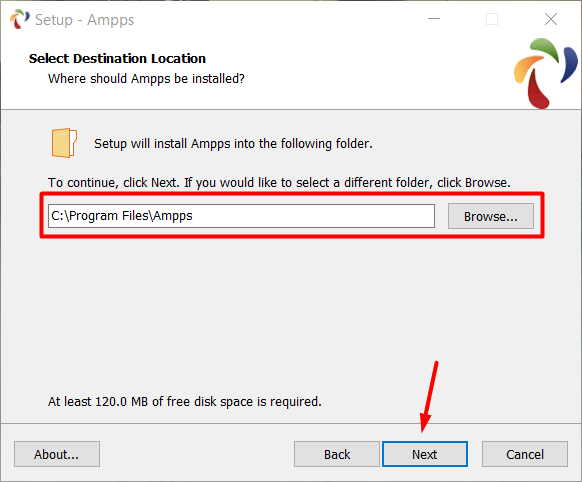
- Select the location where you want to install AMPPS
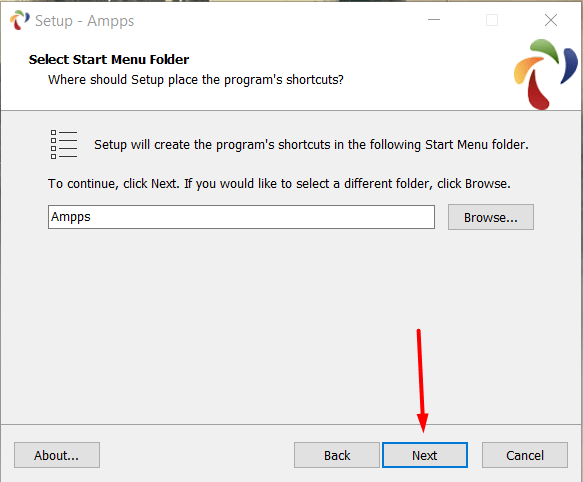
- You can create and customize the name for start menu folder.
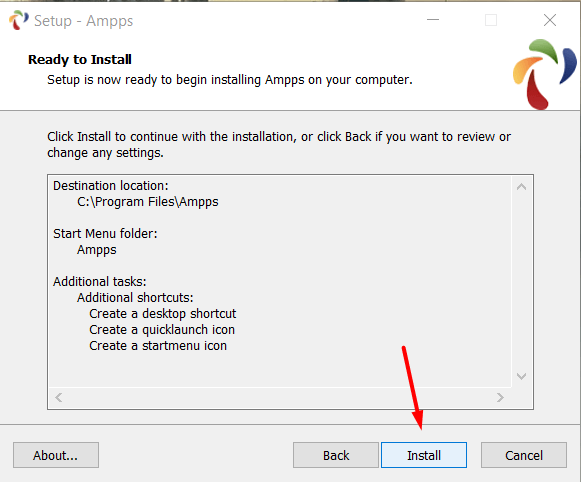
- Select whether you want AMPPS to create a shortcut on your desktop, a quick-launch icon, or an icon on the Start menu.
- To install AMPPS on your computer, click the Install button.
- While AMPPS is installed, please be patient. It shouldn’t take long.
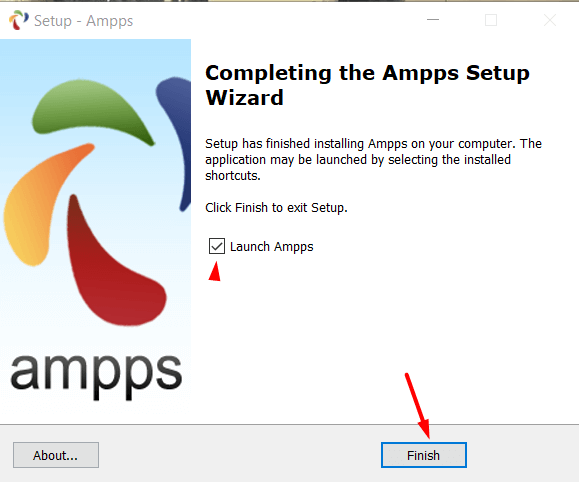
- The installation is complete. Click the Finish button after checking the Launch AMPPS option.
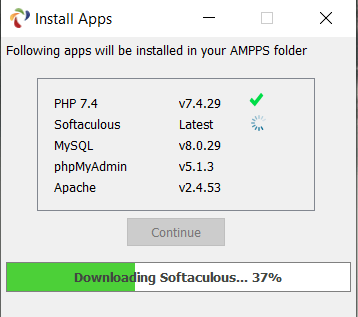
- AMPPS will then download PHP, Apache, MySQL, and Softaculous. Choose “Continue” to proceed. It might take a few minutes if you’re using a slow internet connection.
- Apache and MySQL services are now operating after AMPPS was deployed. Services may be started and stopped by clicking the On/Off buttons.
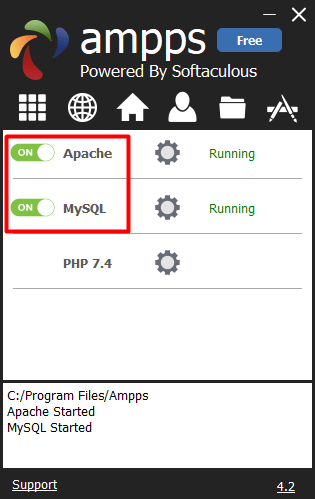
- The AMPPS control center allows you to enable/disable PHP extensions and update the configuration files for PHP, MySQL, and Apache.
Downloading and Installing WordPress on localhost
The first step is to download the WordPress.
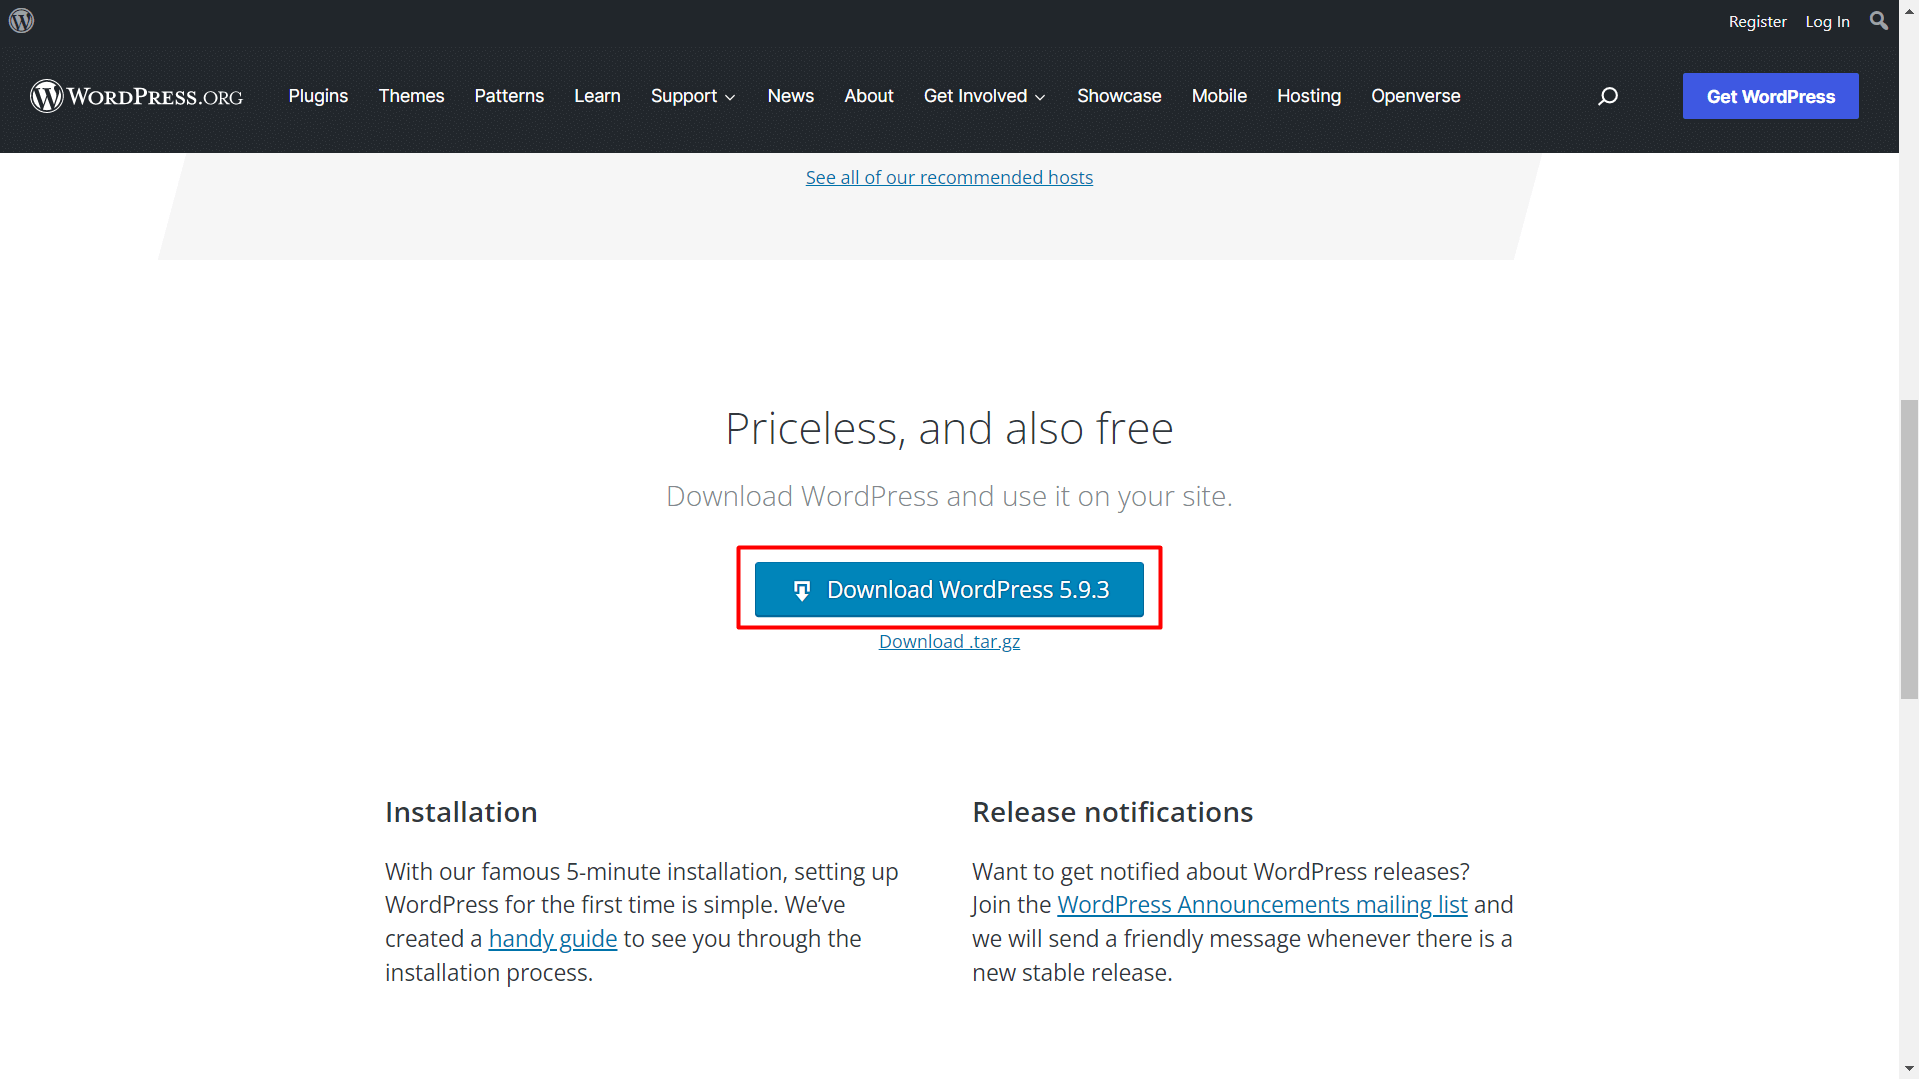
Visit official website of WordPress to download the latest version.
Install WordPress by clicking on the Install WordPress button. Then download the package.
Installing WordPress is the next step.
- The downloaded package will be in zip format. You have to unzip it. After that, you have to copy all the files in that file to the AMPPS directory.
- If you installed AMPPS in C drive, the drive path would be: “C:\Program Files\Ampps\www.”
- In this folder (www), you have to create a new folder and name it according to your choice. In this case, we will name it a “test.”
- Then open your browser, and type: “localhost/phpmyadmin.” And you’ll see a page like the following.
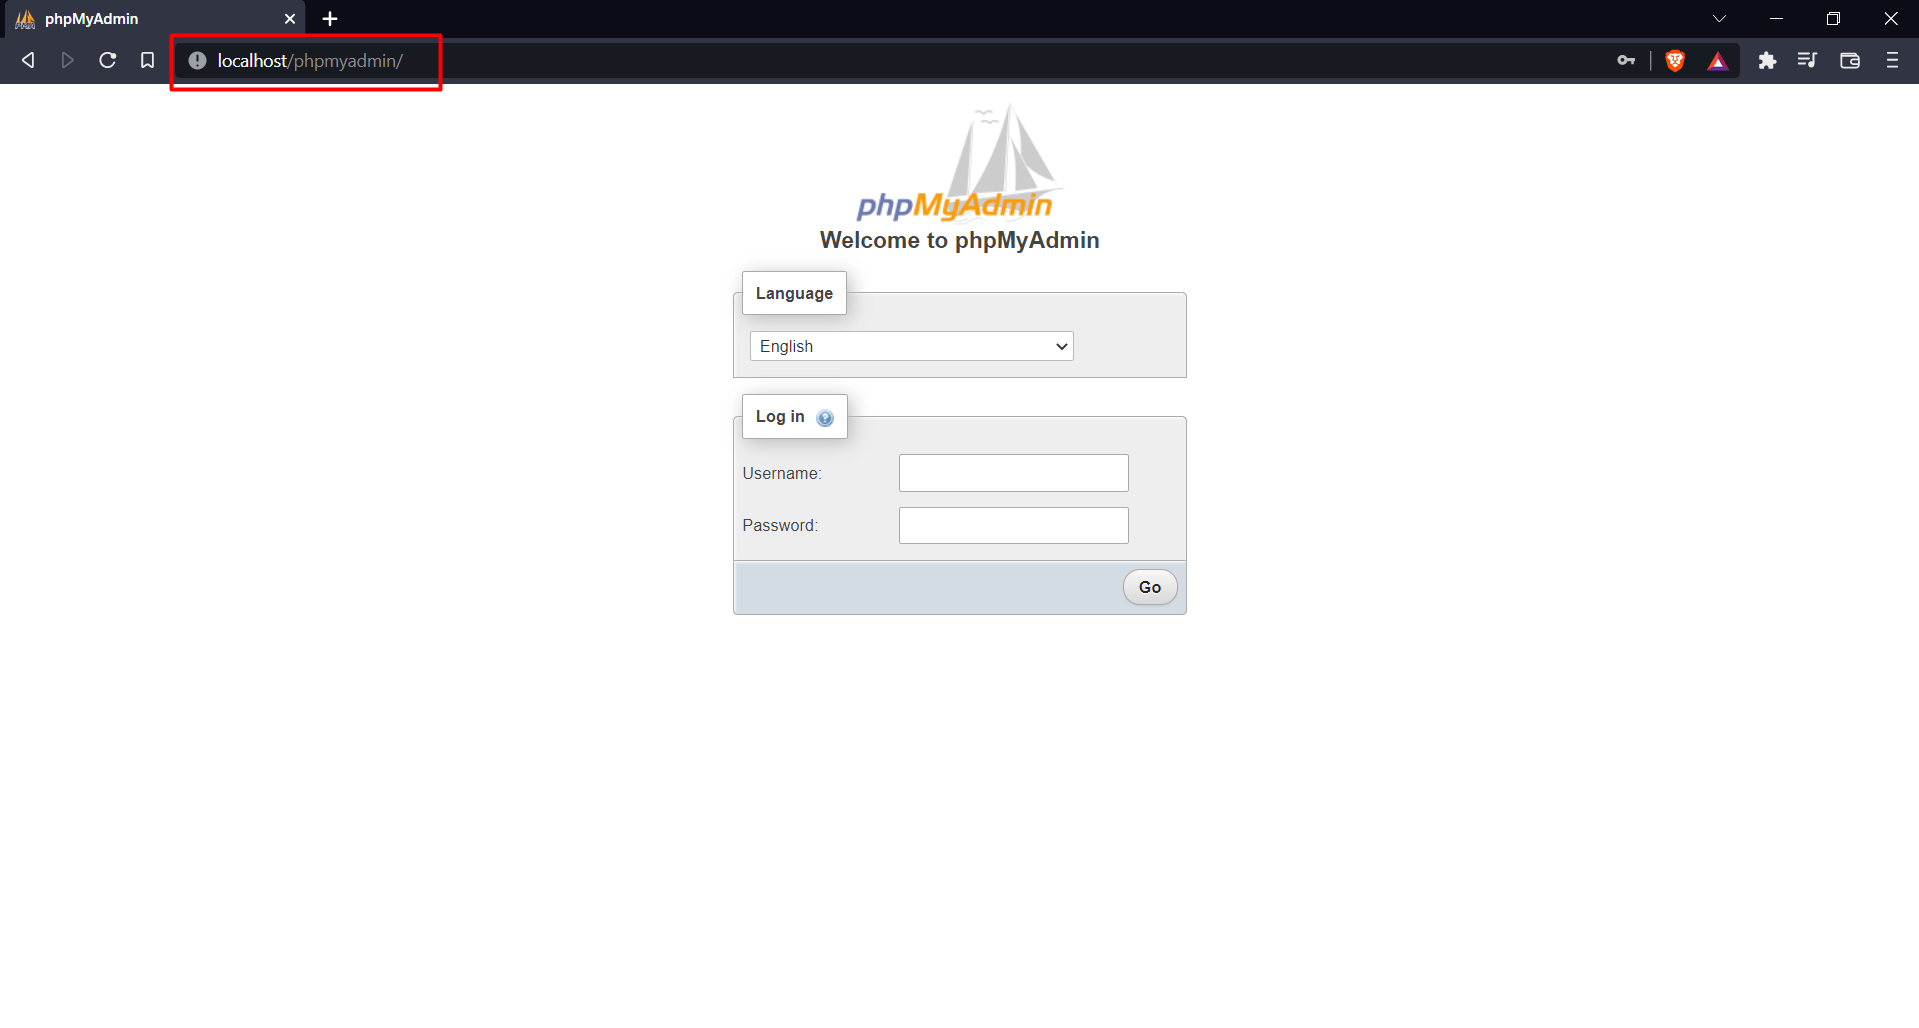
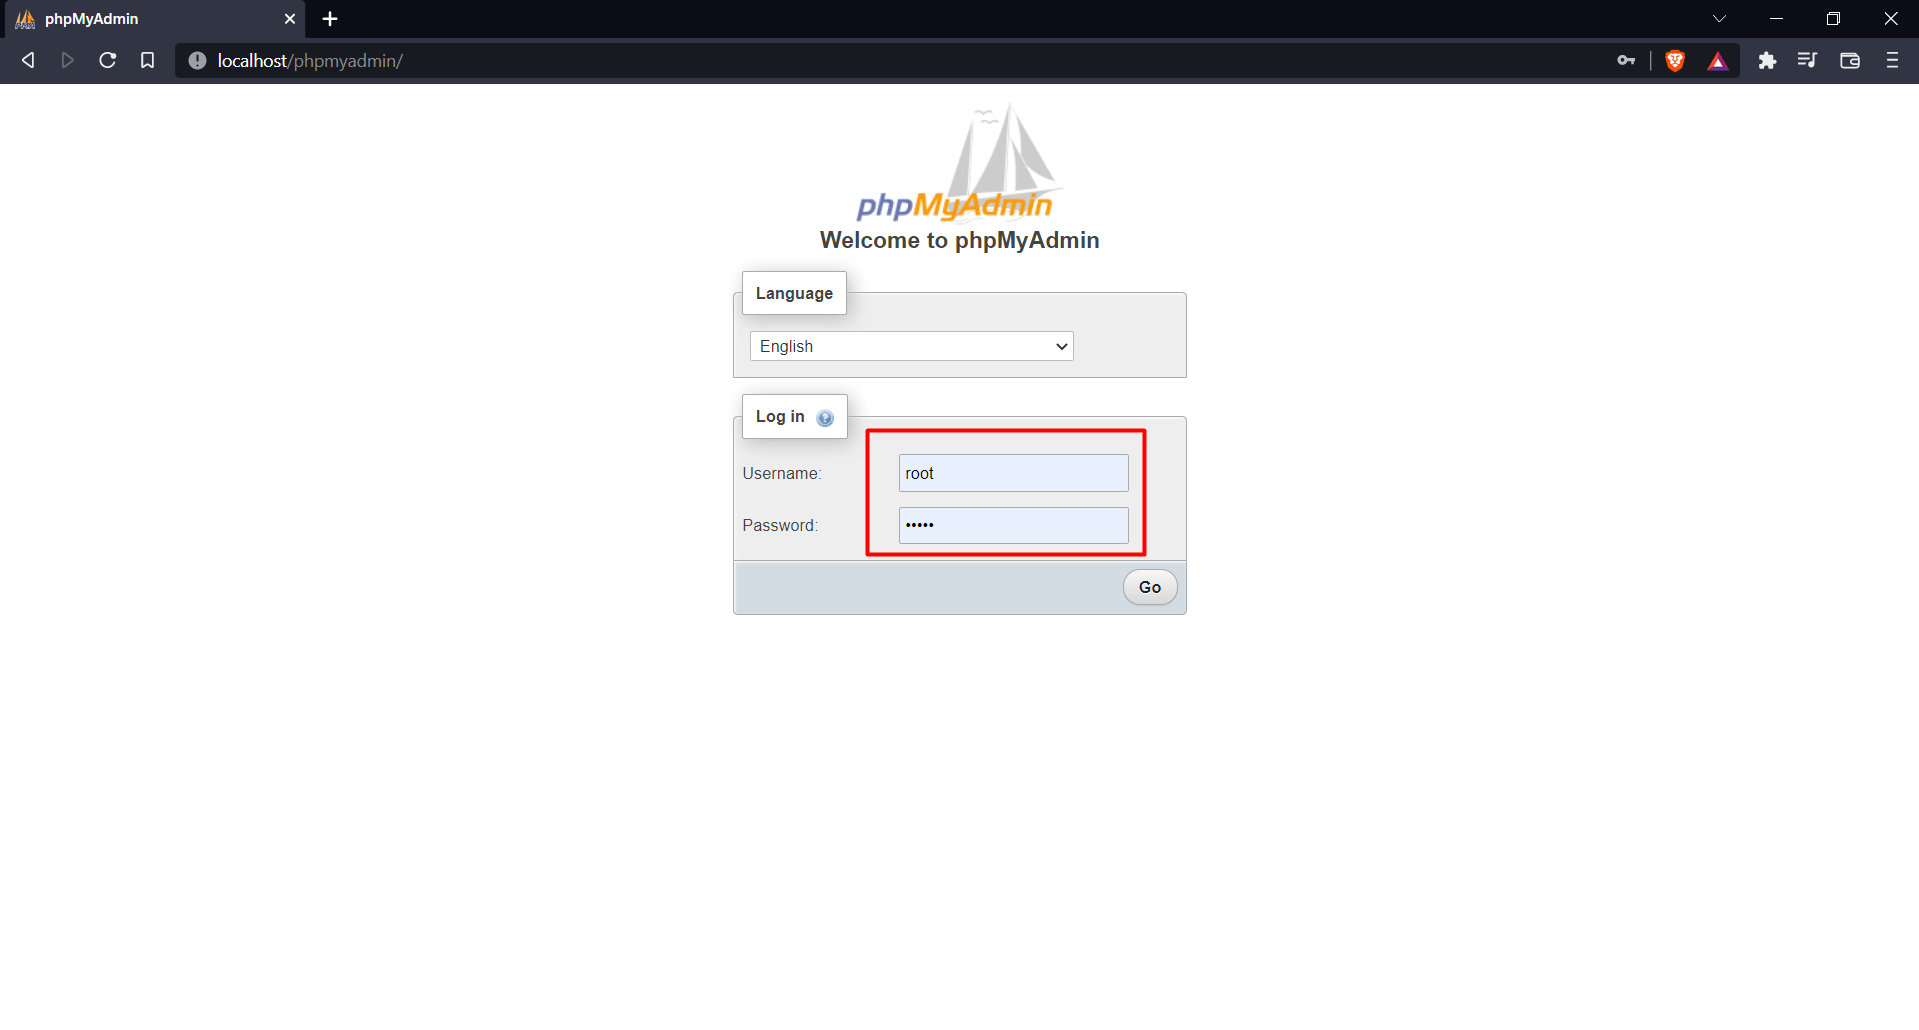
- You have to give your Username and password here.
- The default username is: “root,” and the default password is: “mysql.”
- Then you’ll see the homepage where you can edit your database.
- You have to create a new database here. We will use “test” as our database name in this case.
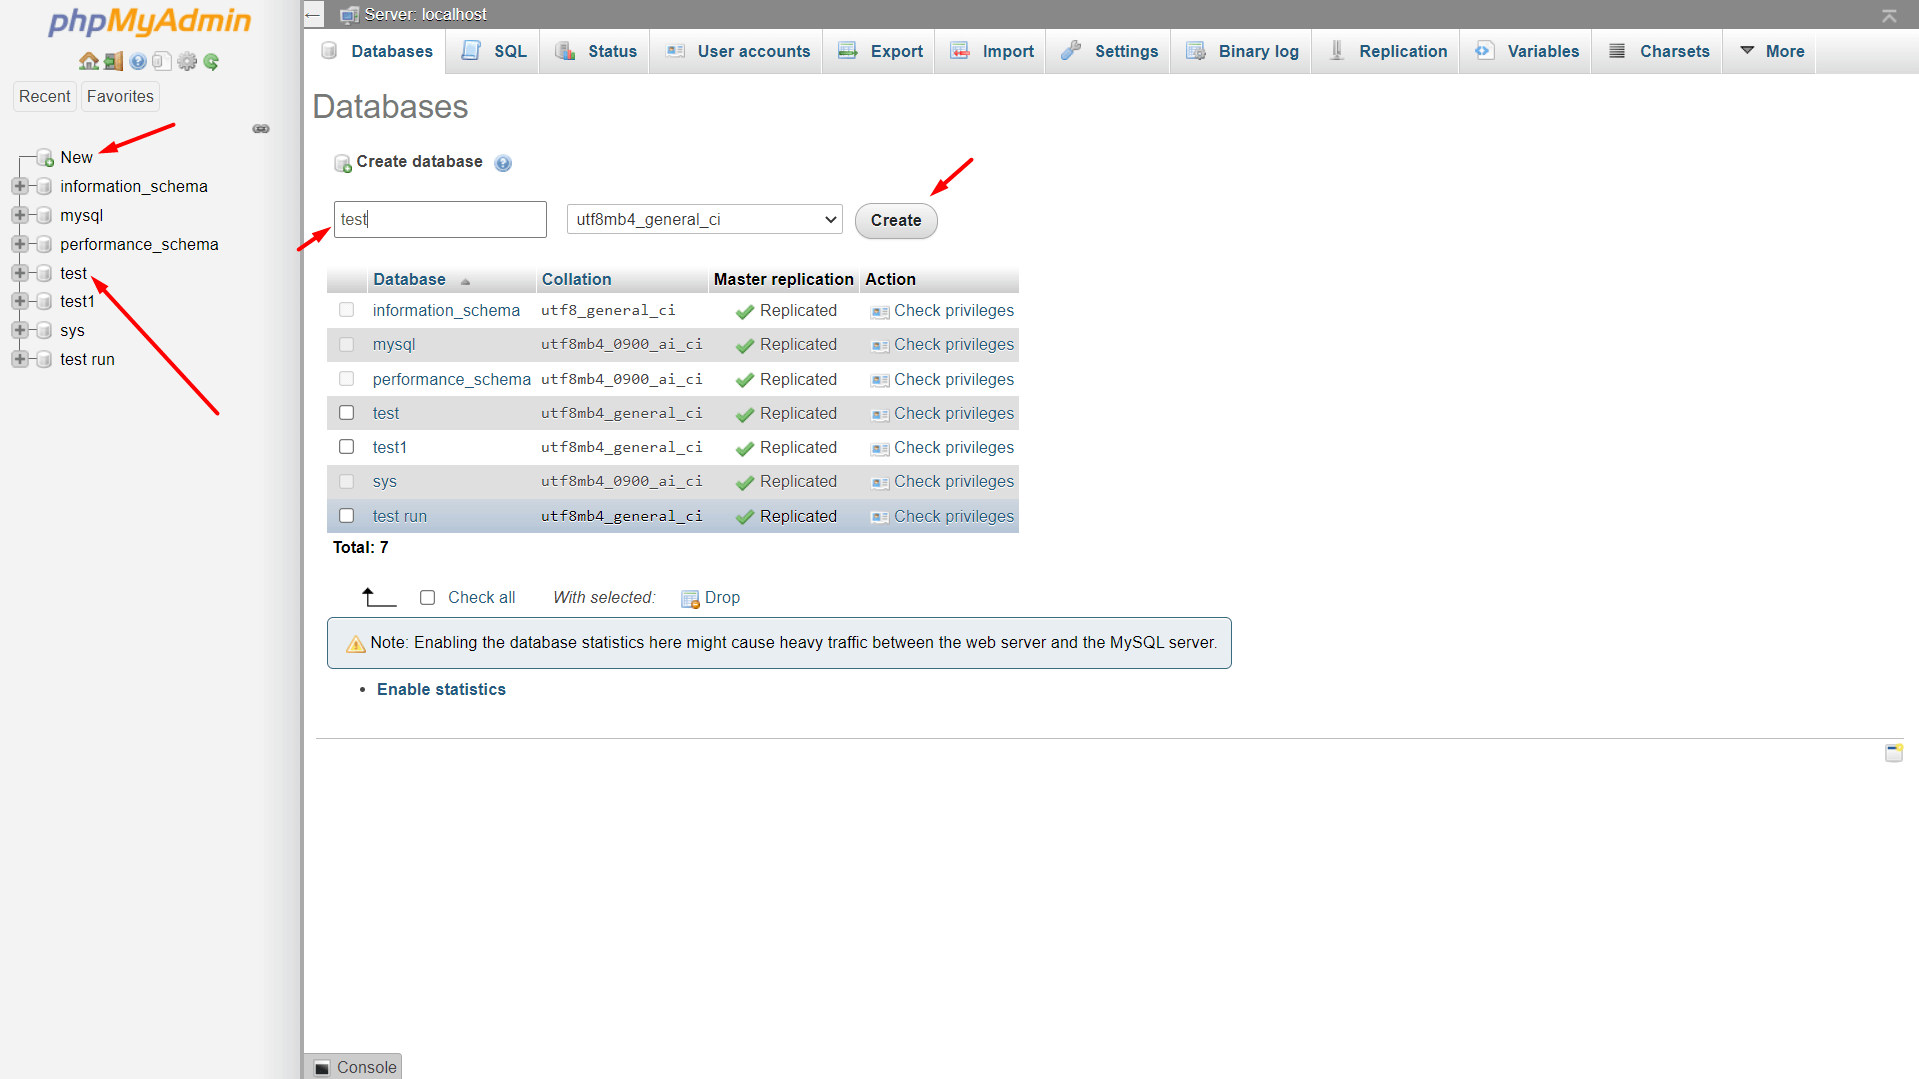
- So, click new, name your database, and press create.
- You’ll see the “test” database is created on the left panel.
- Then go to the search bar and type: “localhost/test.”
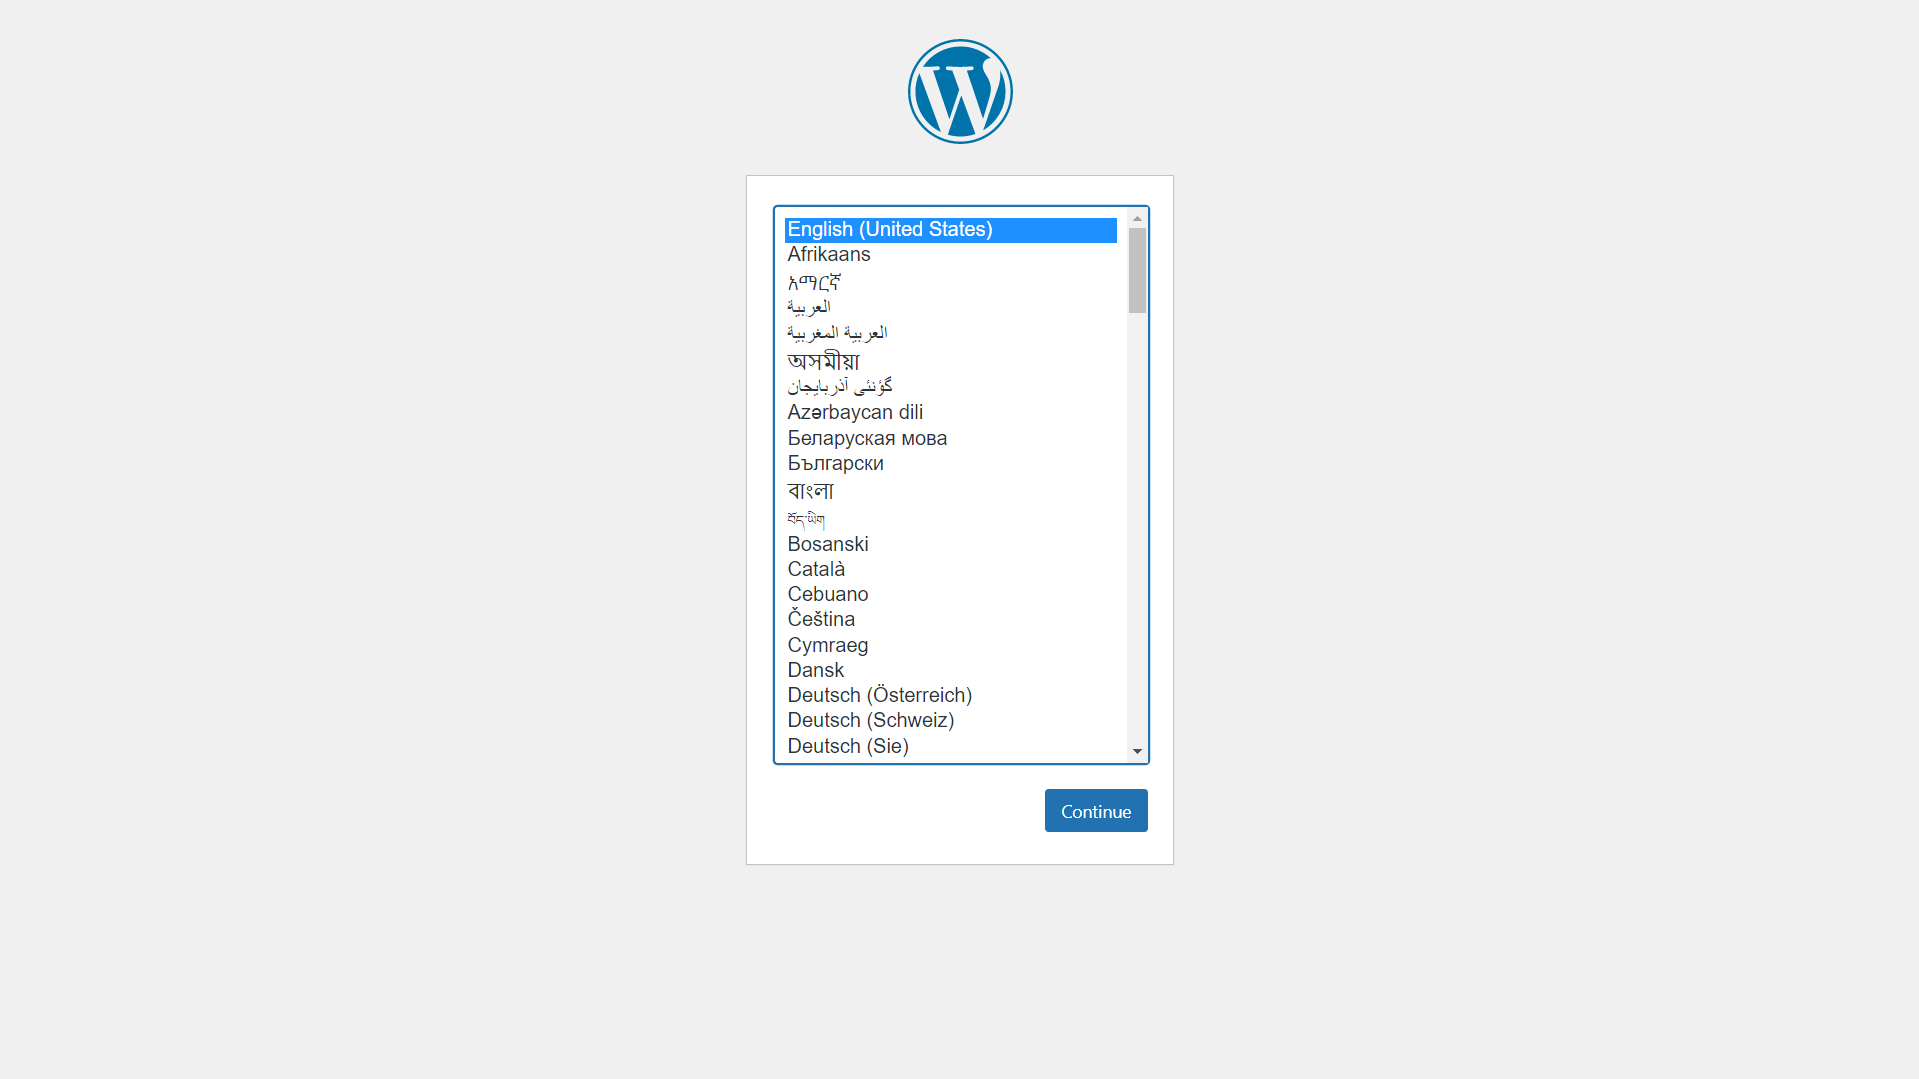
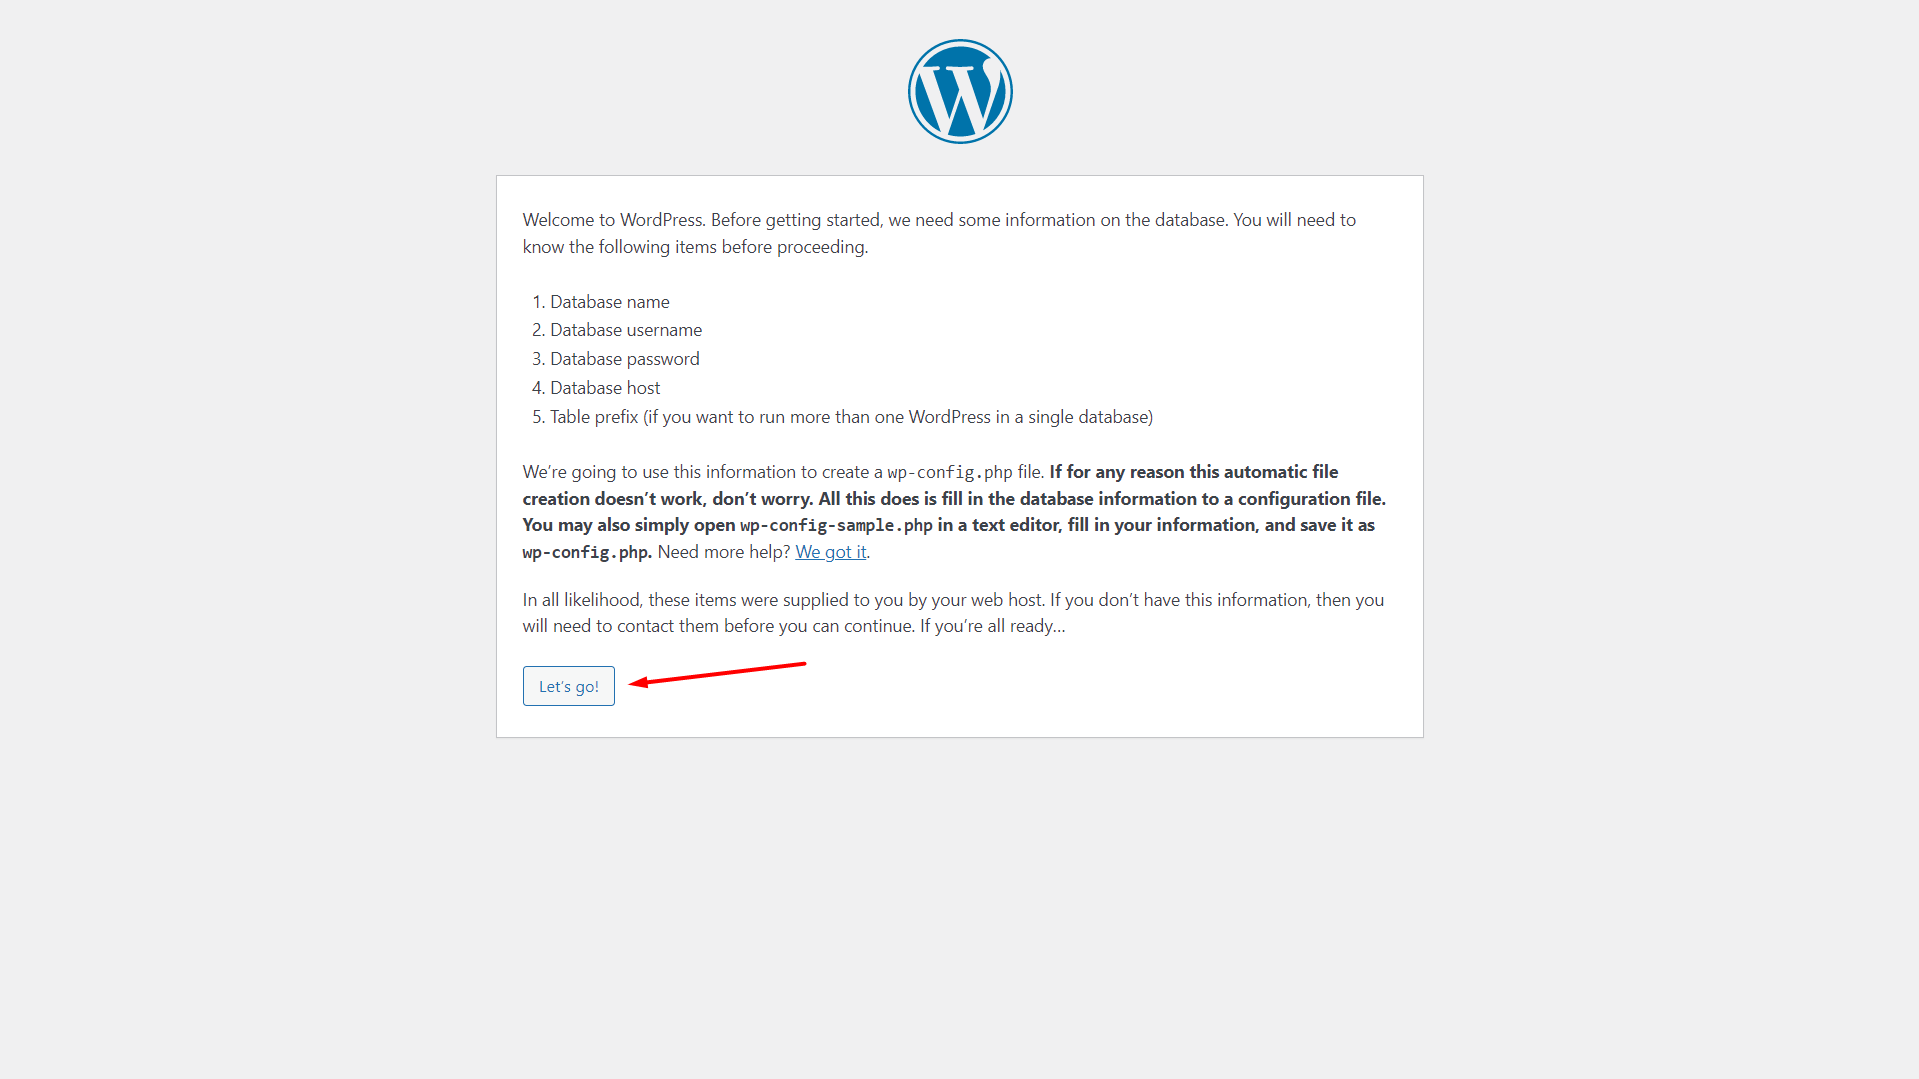
- Now the WordPress installation will start.
- First, you have to select your preferred language and click Continue.
- Then simply press the Continue button.
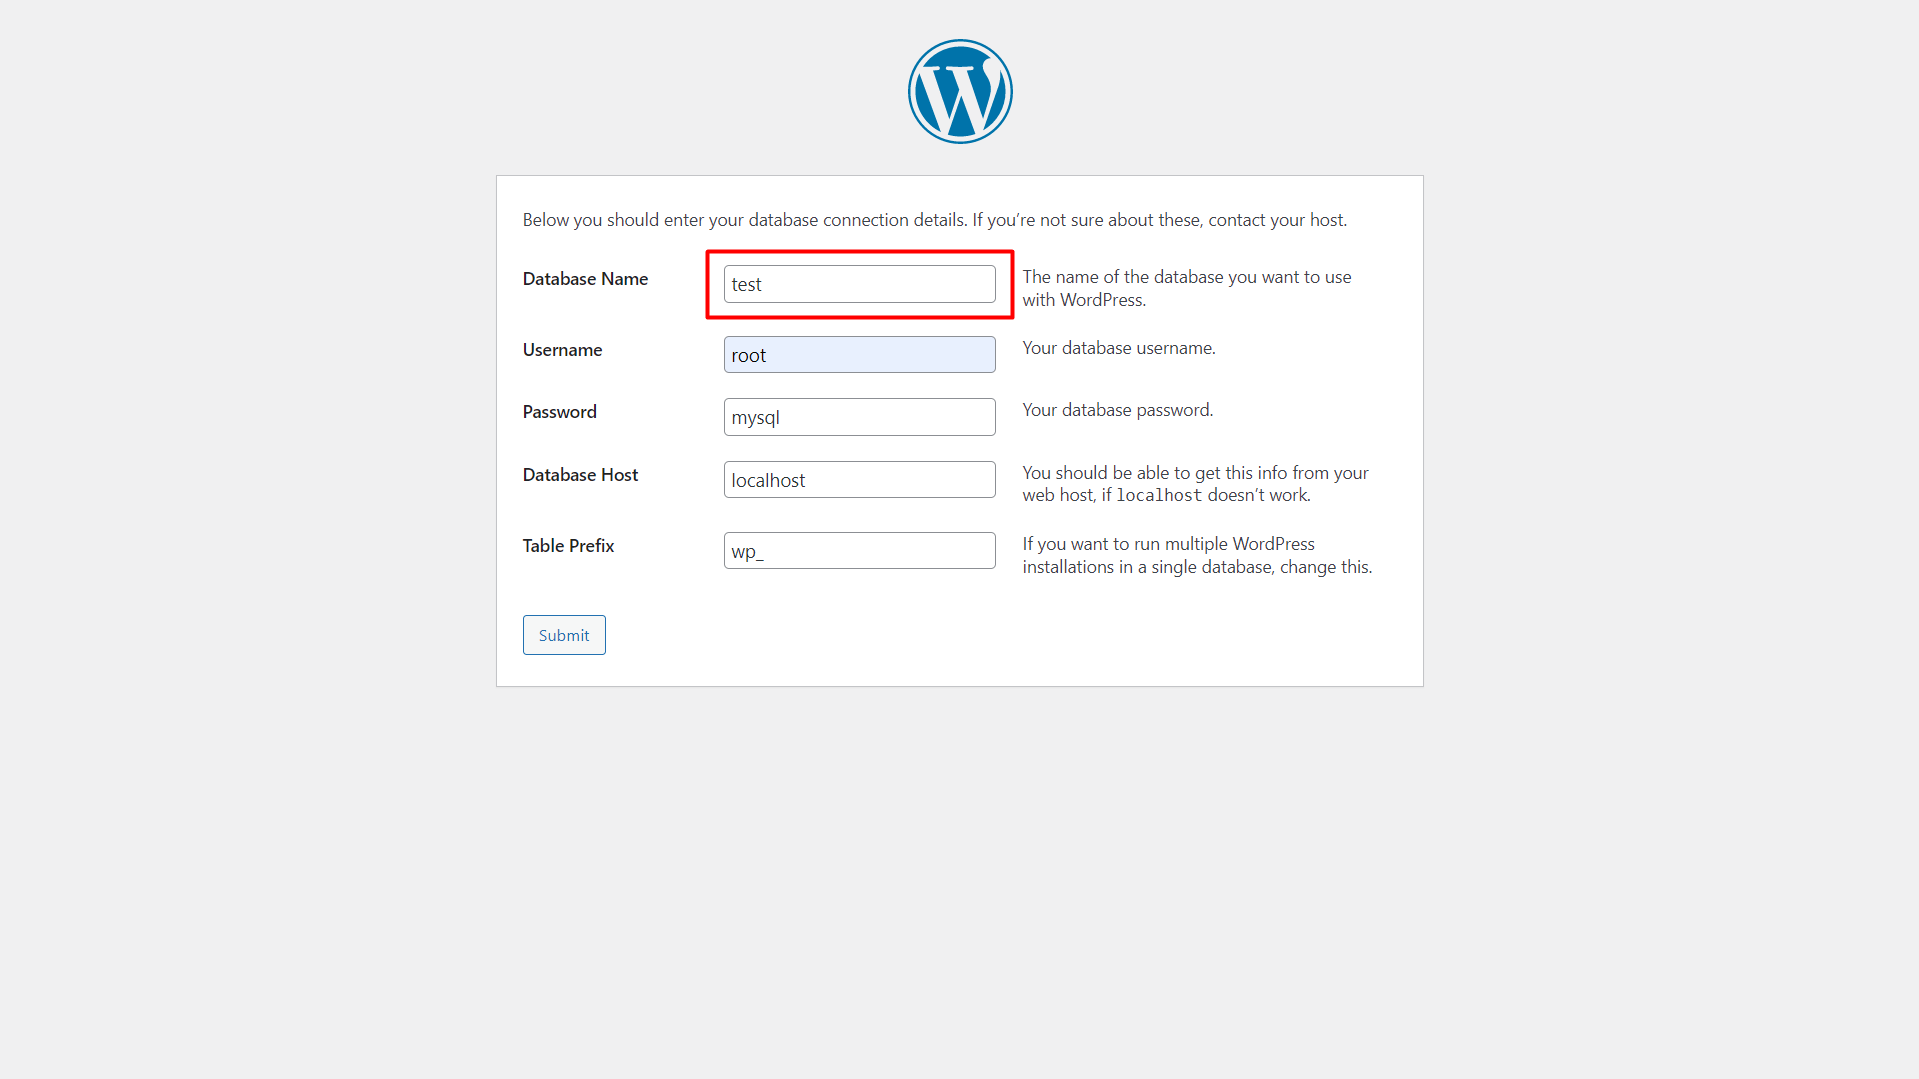
- Now you will see the information regarding automatic database creation.
- Now you have to give a Database name the same as we created in phpmyadmin database. The username and password shall be the same as the default, “root” and “mysql. Then press submit.
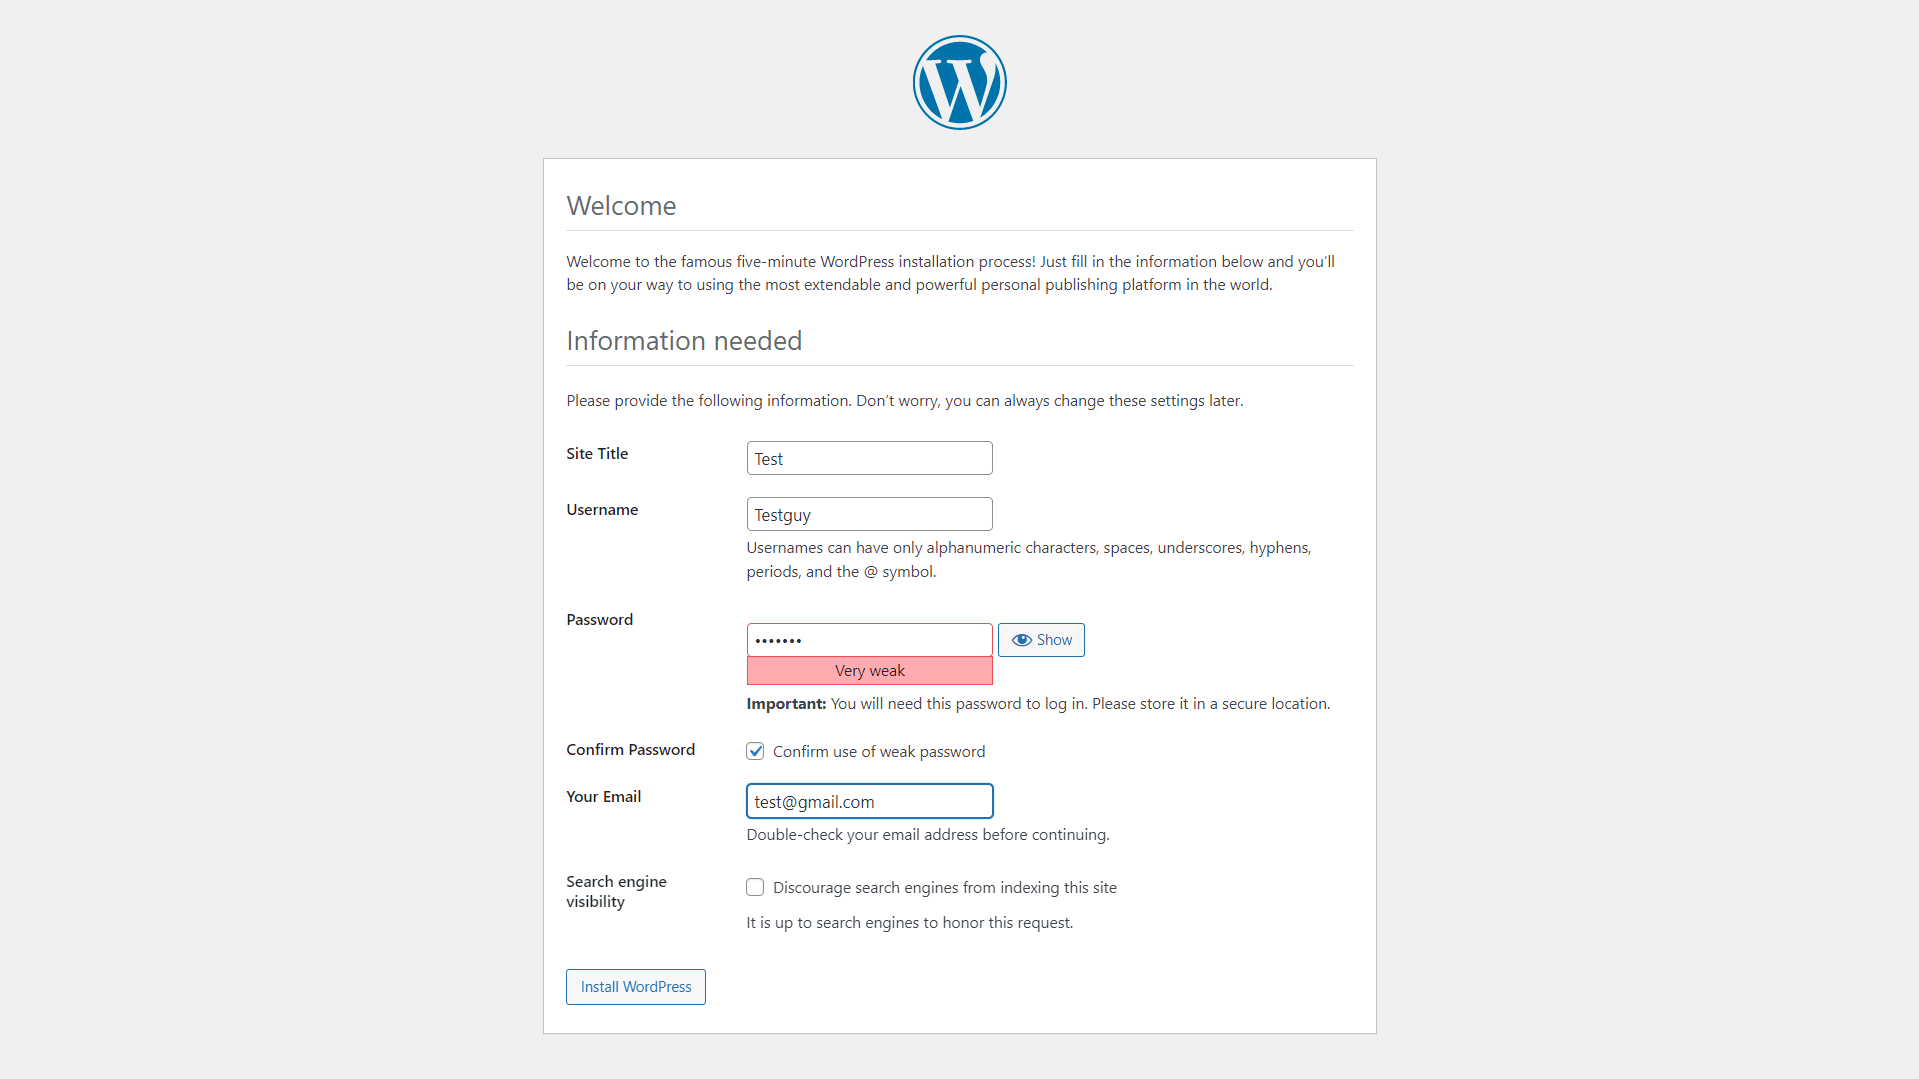
- Then you’ll see the following page where you have to give the site title name. And the site title can be anything, but for example, we have given the title as “test.” After that, give your personal information such as Username, Password, Email. Then click Install WordPress.
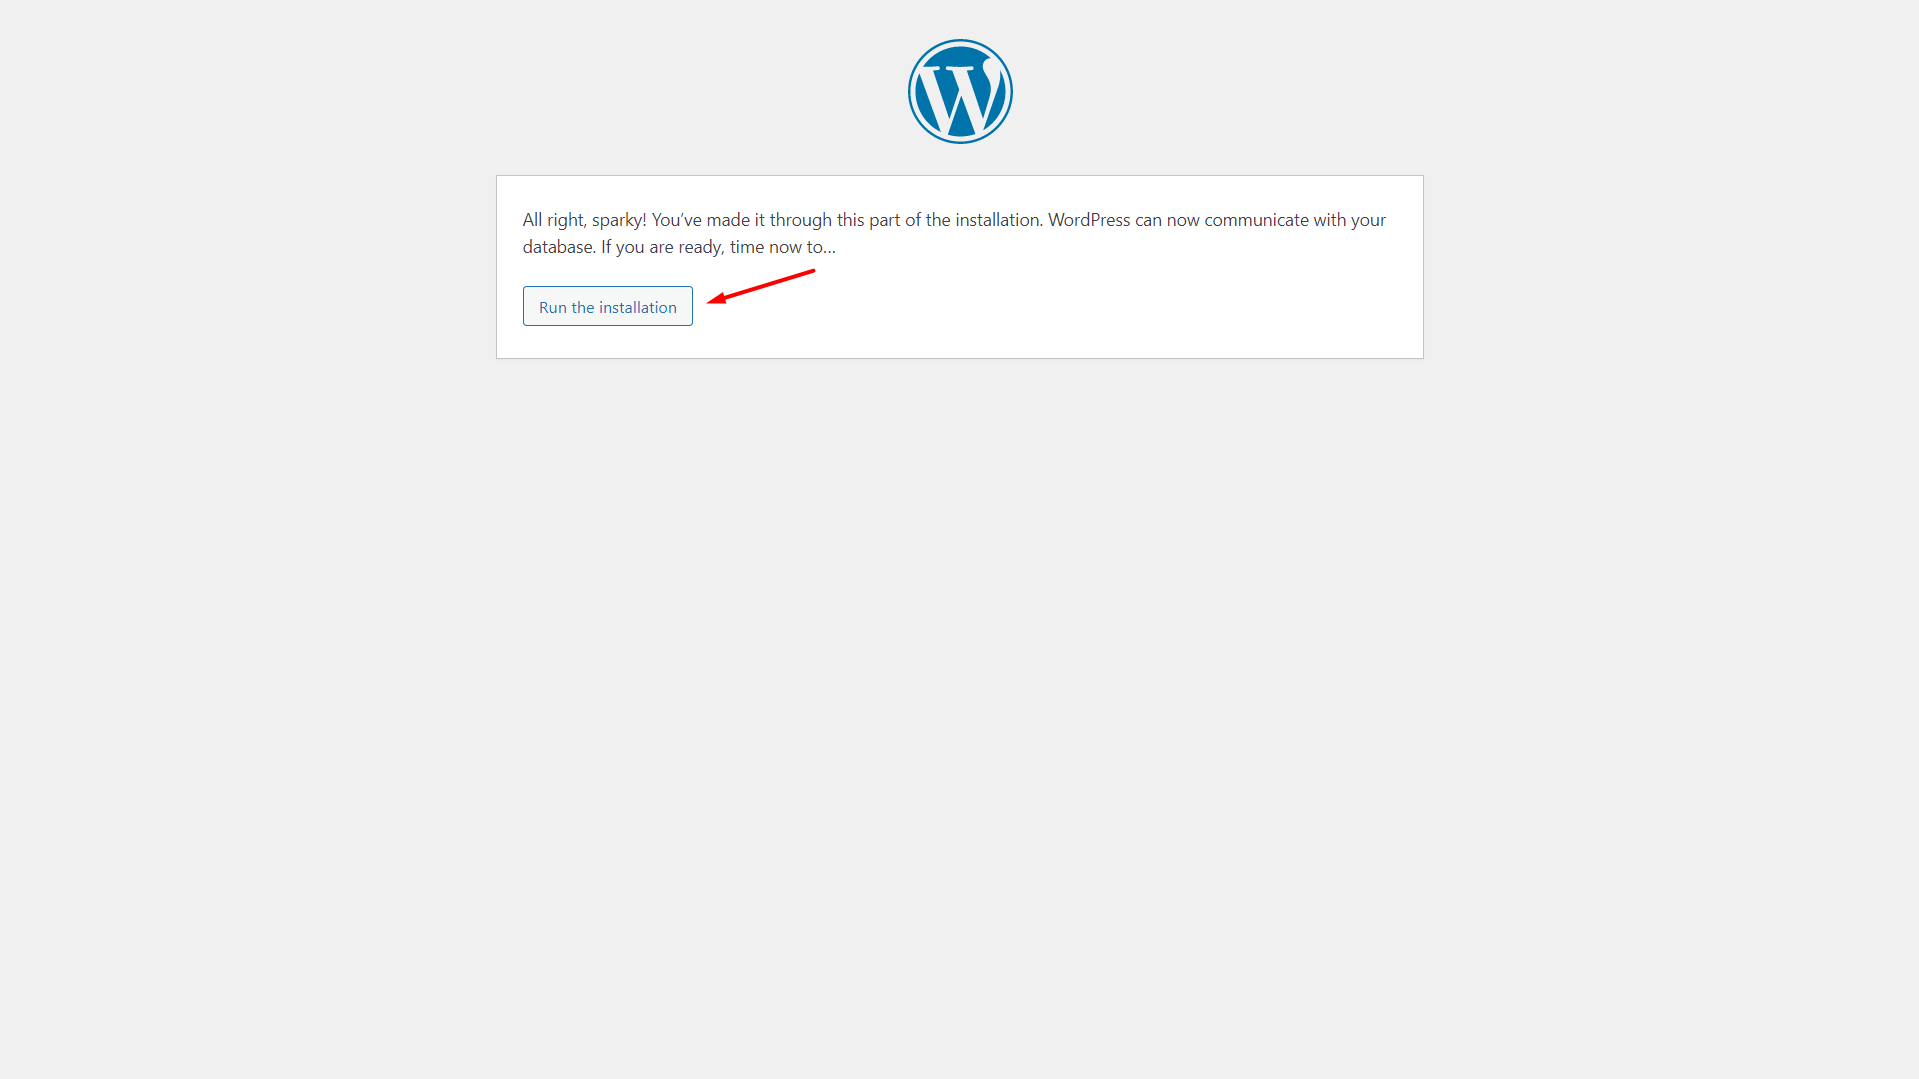
- The final install page will arrive. Now, you have to press Run the installation.
- You’ll see the success page now. Now you have to simply click log in.
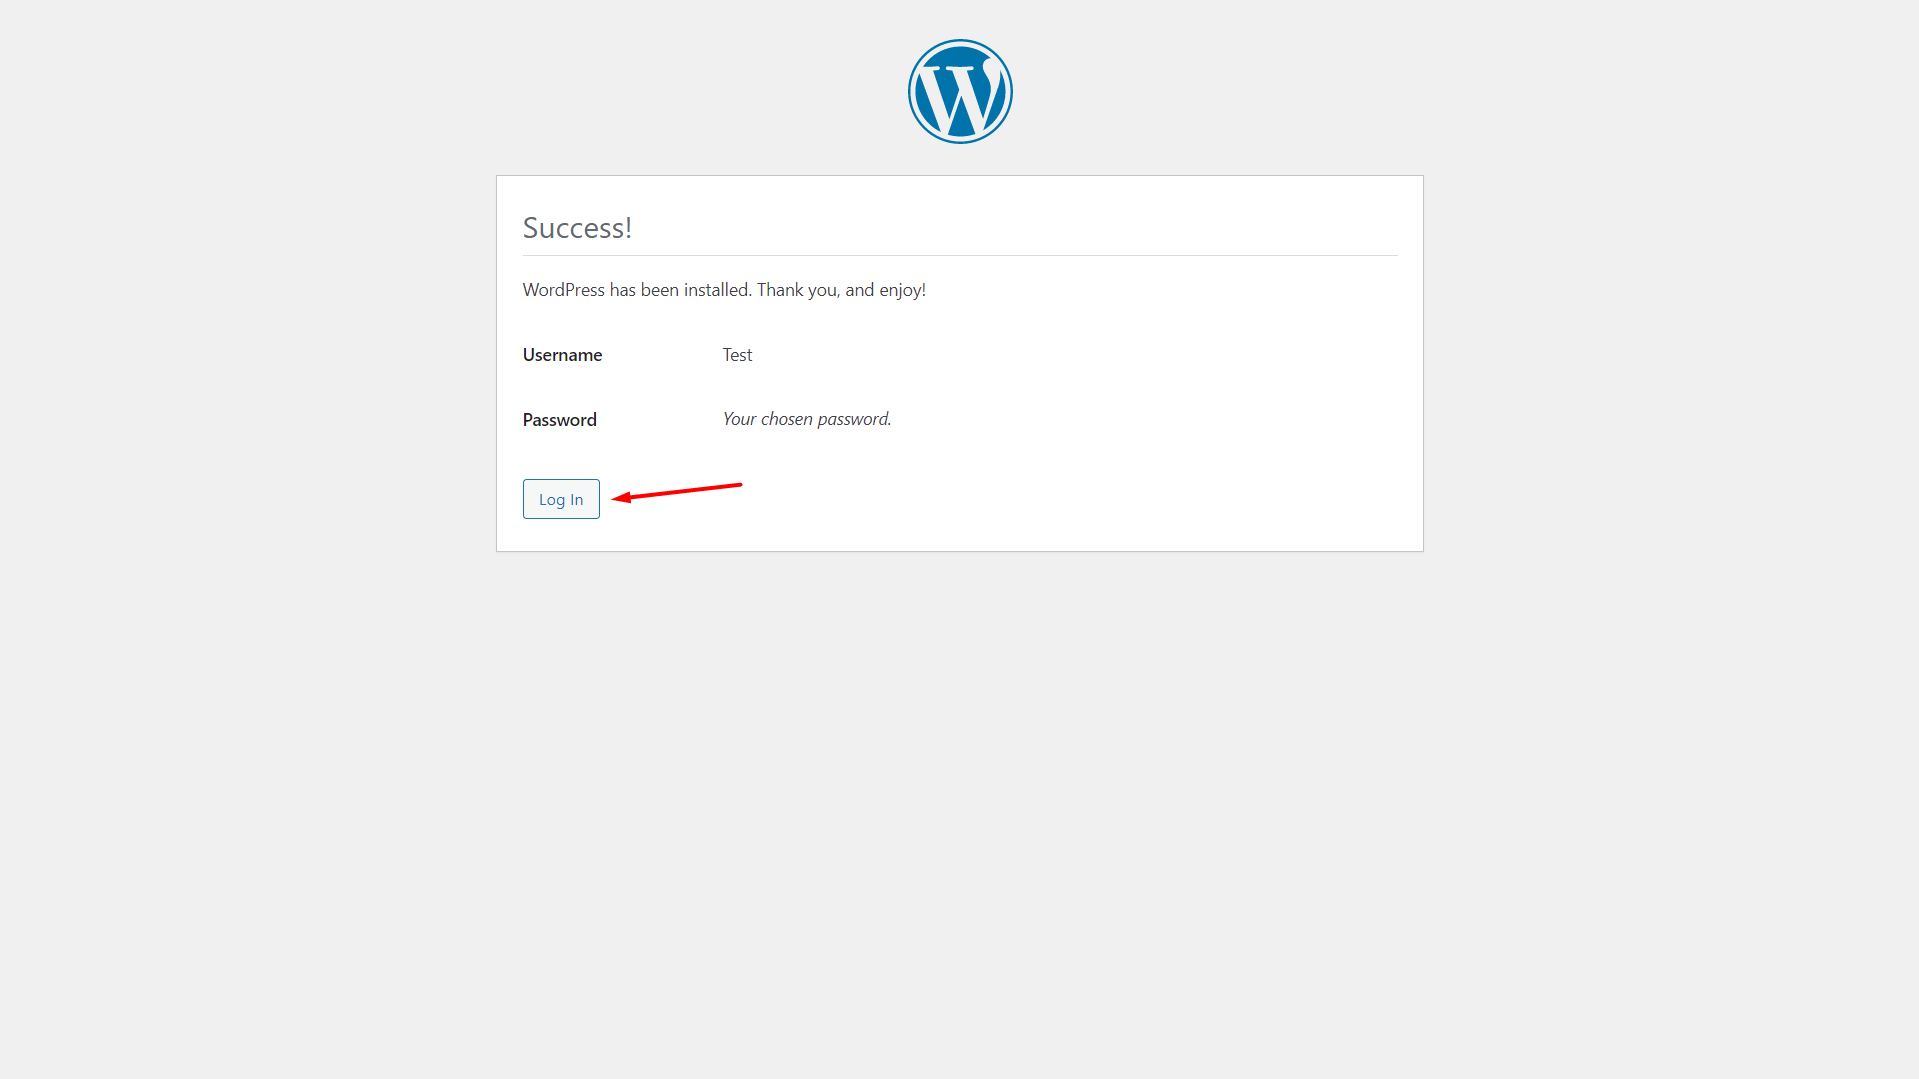
- Type your credentials and log in to get into the WordPress homepage.
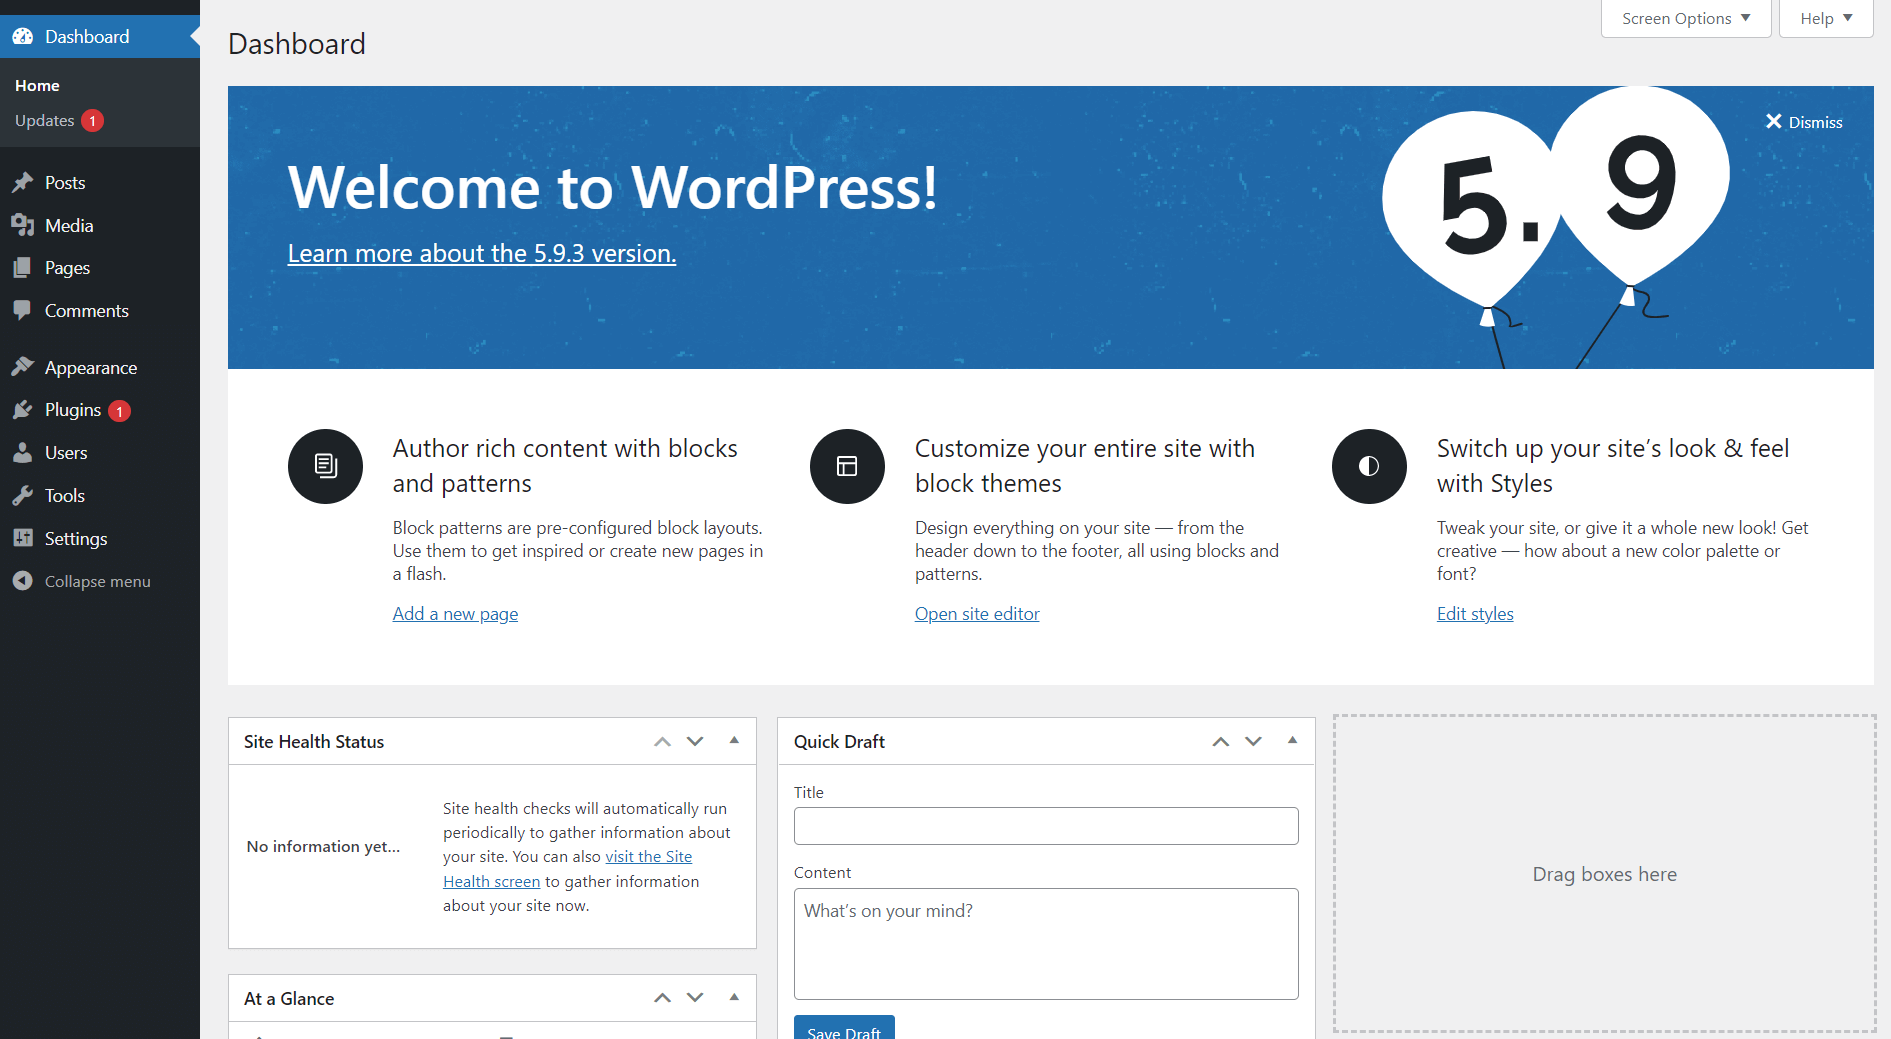
- And voila! You just installed WordPress on localhost. Congratulations!
Wrapping Up
So, in this post you have learned how to download and install AMPPS, along with downloading, preparing and installing WordPress on localhost. Hope you’ll find this easy installation guide very helpful. Best of luck with your website making endeavors!