
You might have noticed, there isn’t a dedicated space for Sidebar in WordPress Twenty Twenty-Three Theme.
In recent years, the importance of sidebars has diminished so much that many websites prefer to omit them completely. Websites want the content to be the primary focus of the visitor.
That being said, we must ensure that the elements previously used in the sidebar are not lost. They can be used elsewhere for better immersion and accessibility.
Since some of us are not good at letting things go and the thought of closure feels like impending doom, we can also create a pseudo sidebar to imitate its functionalities.
In this tutorial, we will show you How to Create Sidebar in WordPress Twenty Twenty-Three Theme.
Why Do We Need a Sidebar?
A sidebar is essentially an accessibility tool. Like a menu, it displays items we want the visitors to see or items we think they might be interested in.
The thing that makes it different from a menu is the use of widgets. A widget is a block of content that provides specific functionality.
Before the introduction of Fullsite Editor, widgets could only be inserted where our theme would allow us. Now, wherever we can insert a block, we can insert a widget.
The Fullsite Editor consists of multiple widgets like Calender, Latest Posts, Page List, Search, and so much more. But, we are not limited to these options. We can install plugins to our website to get additional widgets.
If you think menus are what you need instead, check out the blog post or the video on how to create a menu. Once you have created a menu, check out how to customize the menu to meet your needs.
How to Create Sidebar in WordPress Twenty Twenty-Three Theme
Before we start, we need to decide where we want the sidebar and do we want it to be stationary.
The Fullsite Editor made complex processes easy but in some cases, easy processes have become complex, like changing our site icon. With the updates to the Fullsite Editor, template parts can now be inserted as a block element. We will use the template parts as our sidebar.
This is the direction WordPress is heading towards, we might as well get used to it and learn how to adapt to these changes.
So let’s start creating.
Step 1: Go to the Full Site Editor
First things, first, we need to head into the Fullsite Editor.
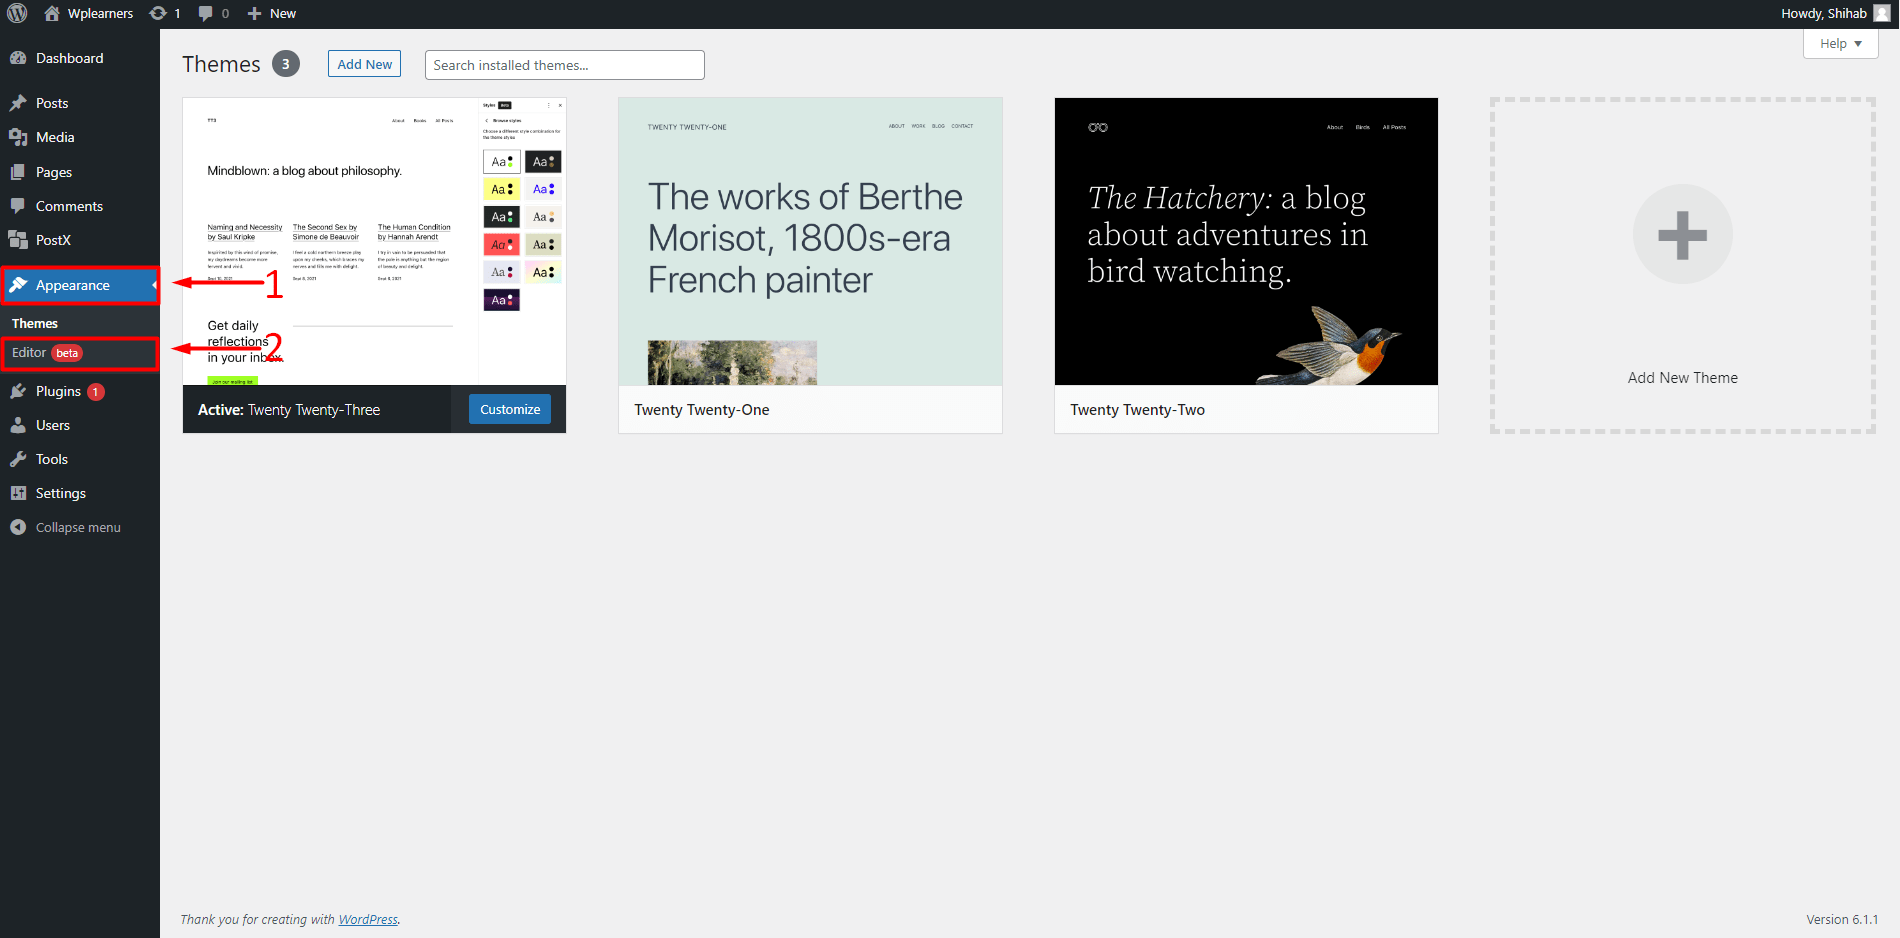
- Head to the Dashboard.
- Click on Appearance.
- Click on Editor.
Step 2: Add New Template Part
We need to add a new template part.

- Click on W/Site Logo at the top-left corner of the screen.
- Click on Template Parts.
- Click on Add New button.
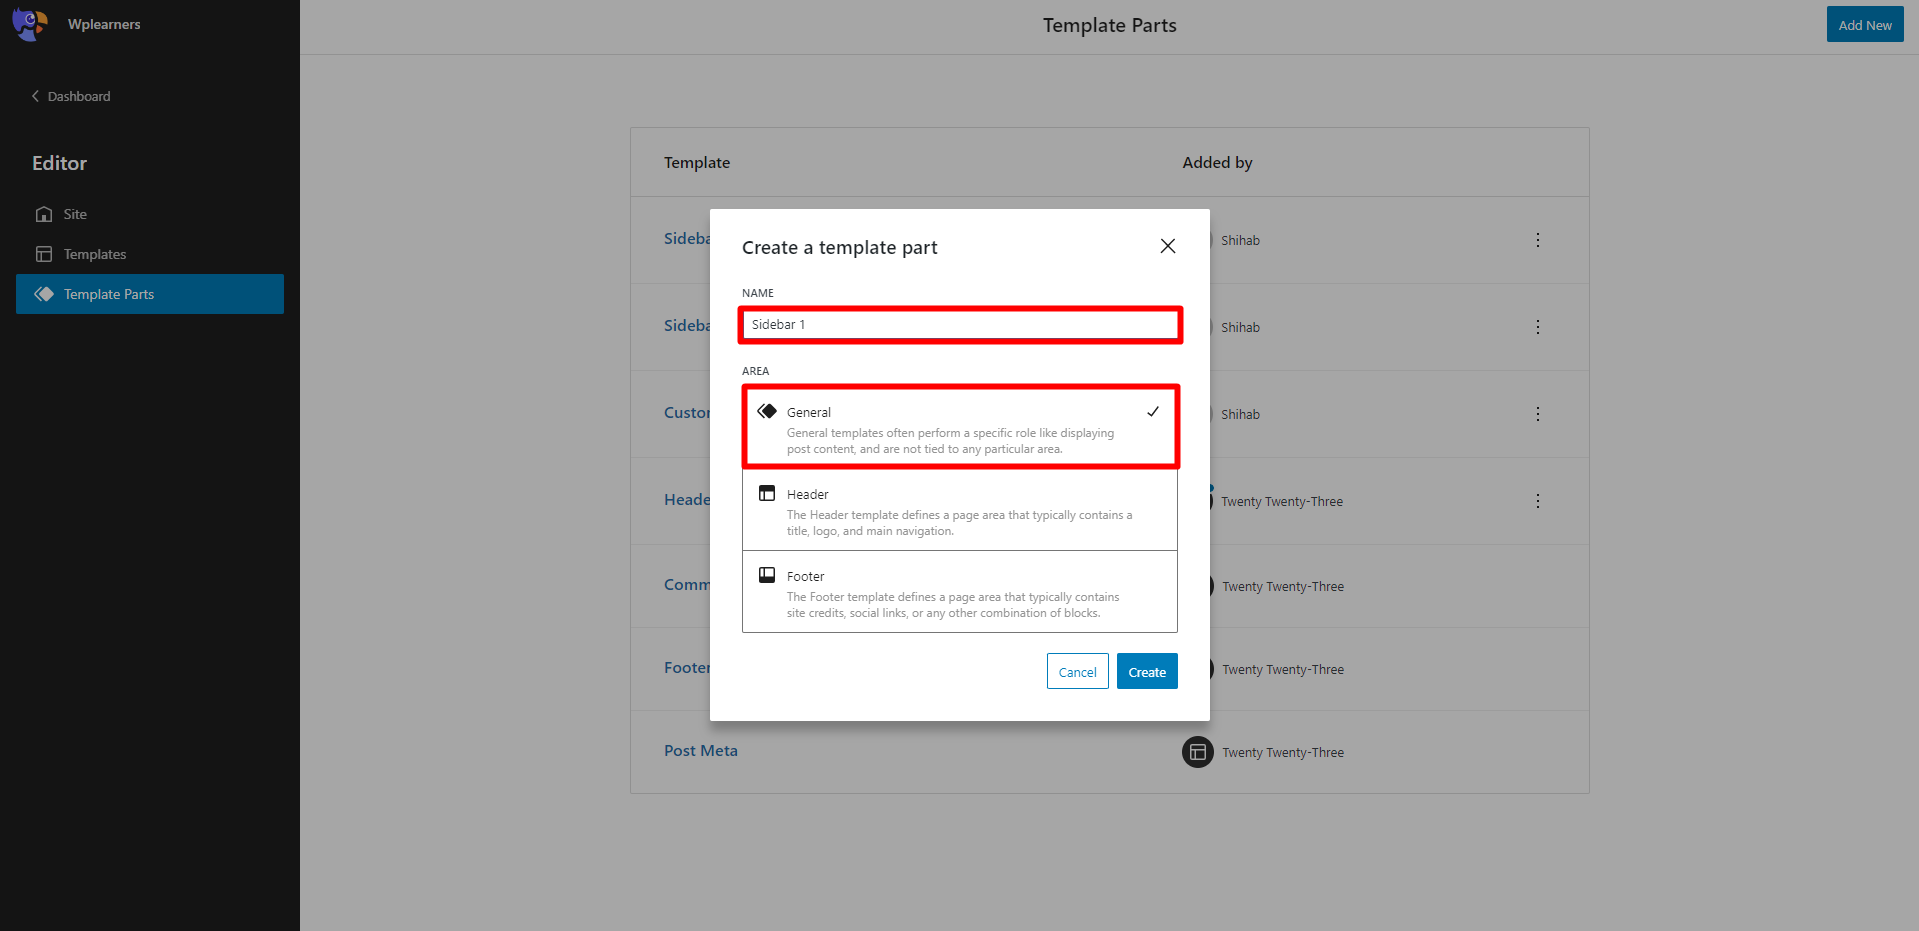
- Click on General
- Enter Name
Step 3: Add Widgets
Widgets are a block of content programmed to perform specific or multiple things. WordPress has various widgets that we can add to our website but we are not limited to them. Get additional widgets and features with the help of plugins.
- Click on either of the Plus symbols.
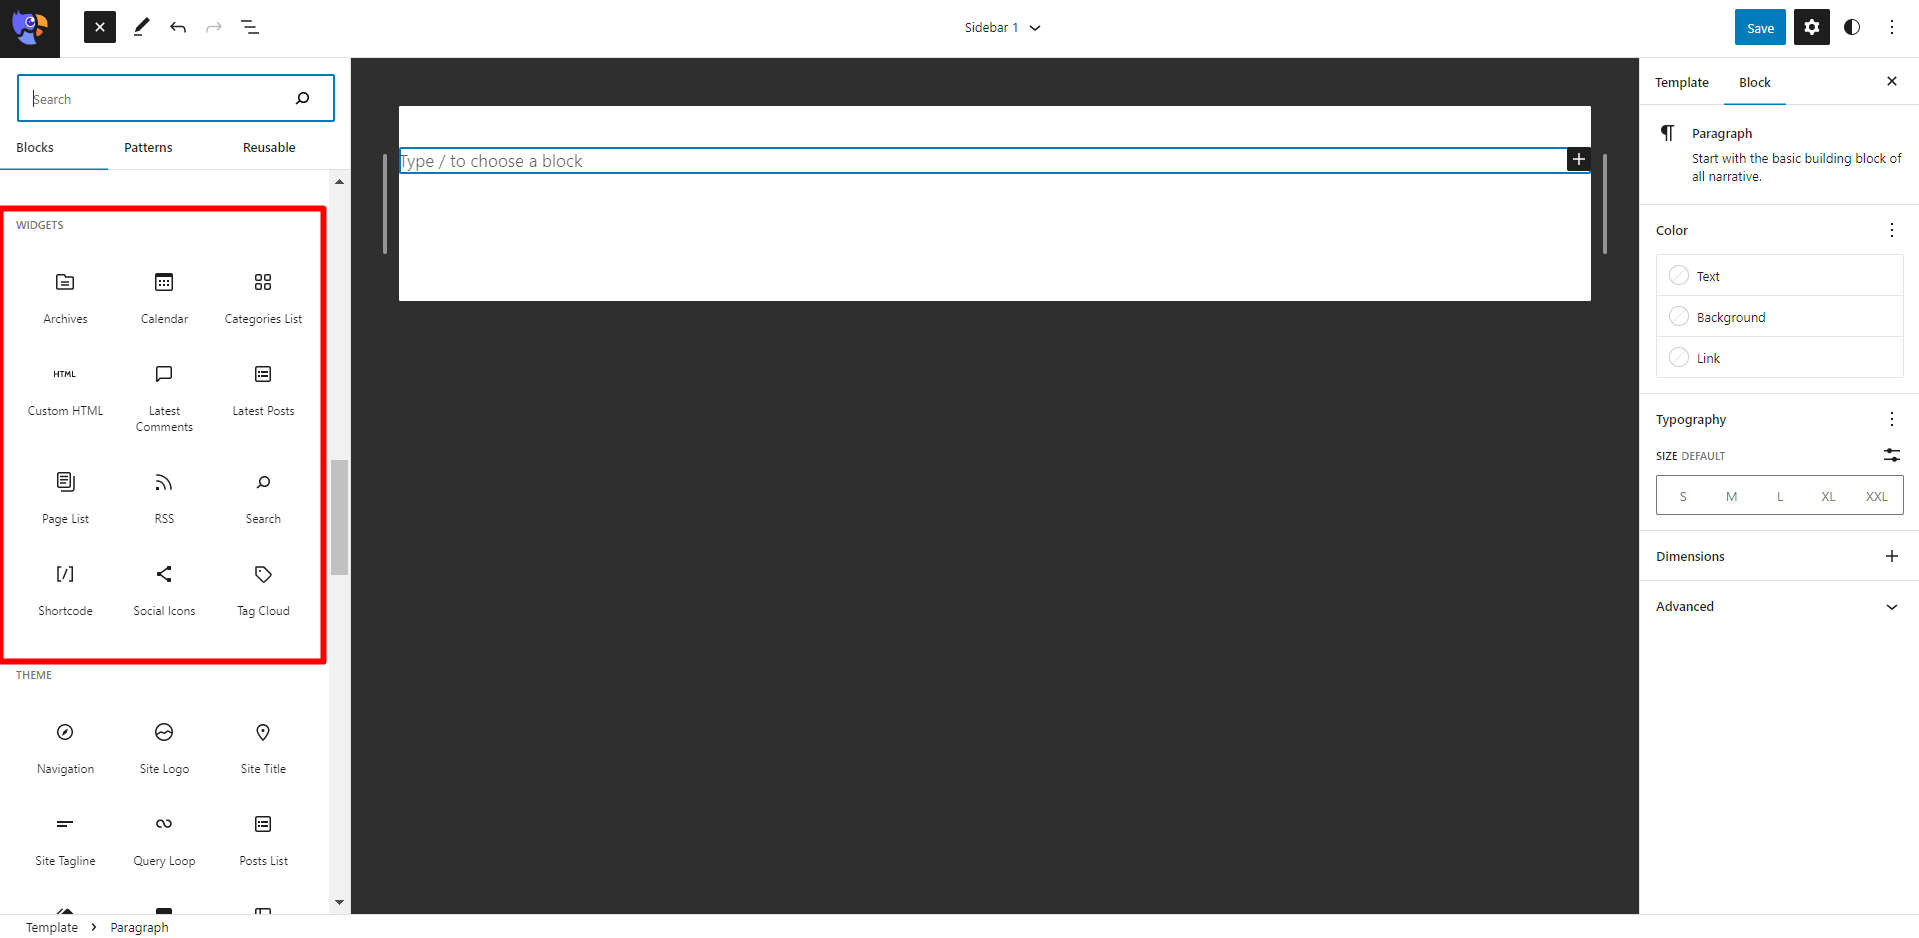
- Scroll/Search the desired widgets.
- Adjust widgets to your preference.
Here are a few widgets that might be useful to the visitors of the site. There isn’t a format that we need to follow. Widgets that we like can be selected and arranged in the order we prefer.
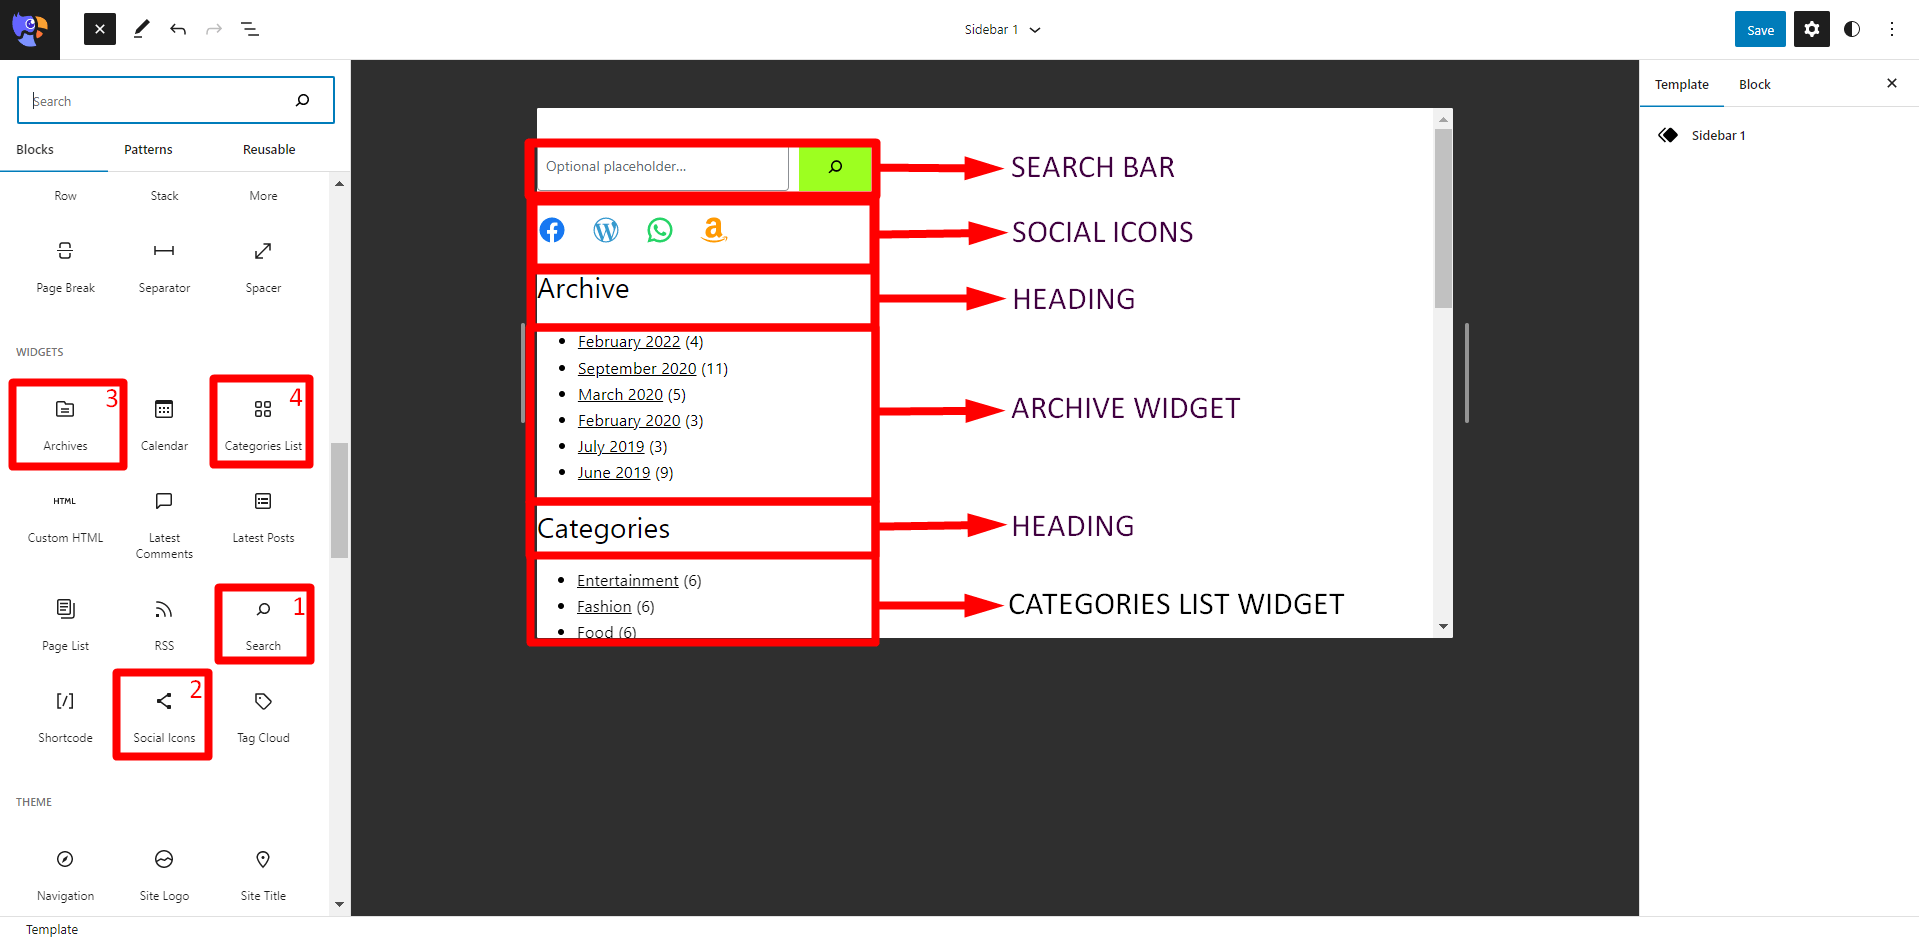
Since this isn’t an actual theme-allocated sidebar, the Fullsite Editor gives the freedom to add items that we couldn’t. We can add images, and videos and even embed links to our sidebar. Just by adding the type of block that we want.
Step 4: Embed Items
We will embed our Twitter timeline and youtube video in the sidebar. There are various other items we can add to our website.

- Click on Add Block.
- Select your desired items.
- Fill in the required fields
Step 5: Save the Changes
We must make sure that we save the changes before leaving the editor. Any changes that are not saved, will be lost.
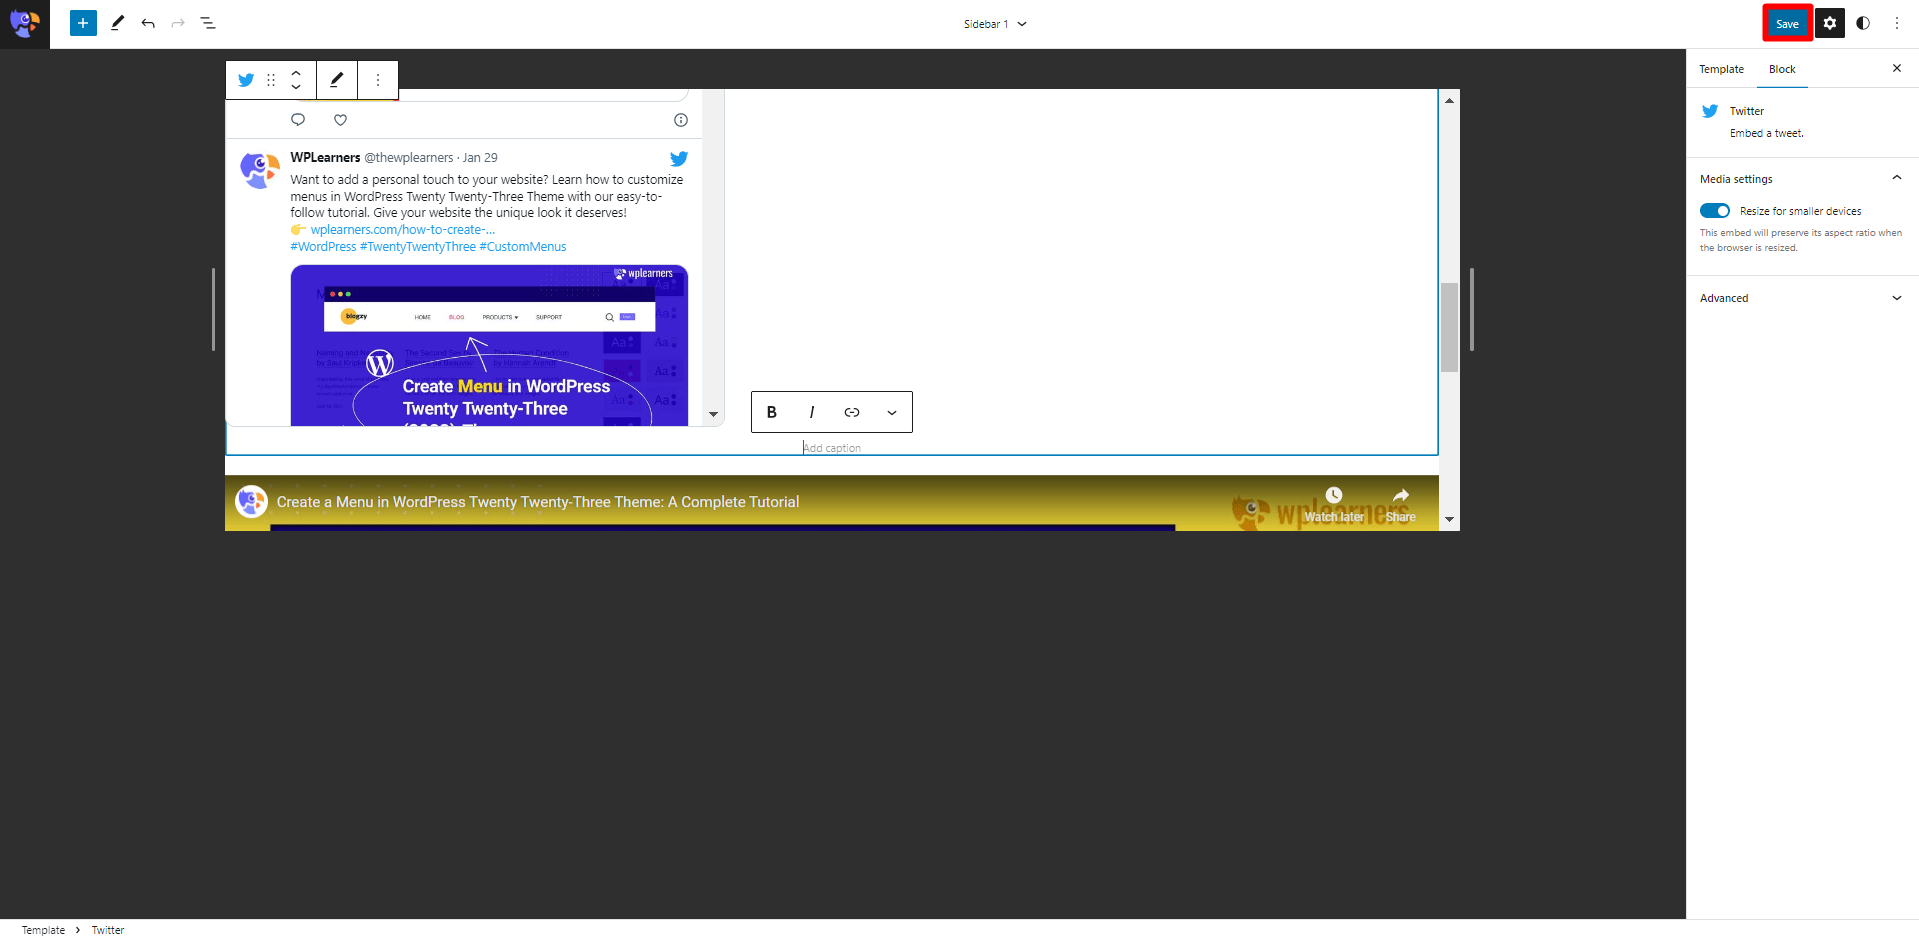
- Click on the Save button.
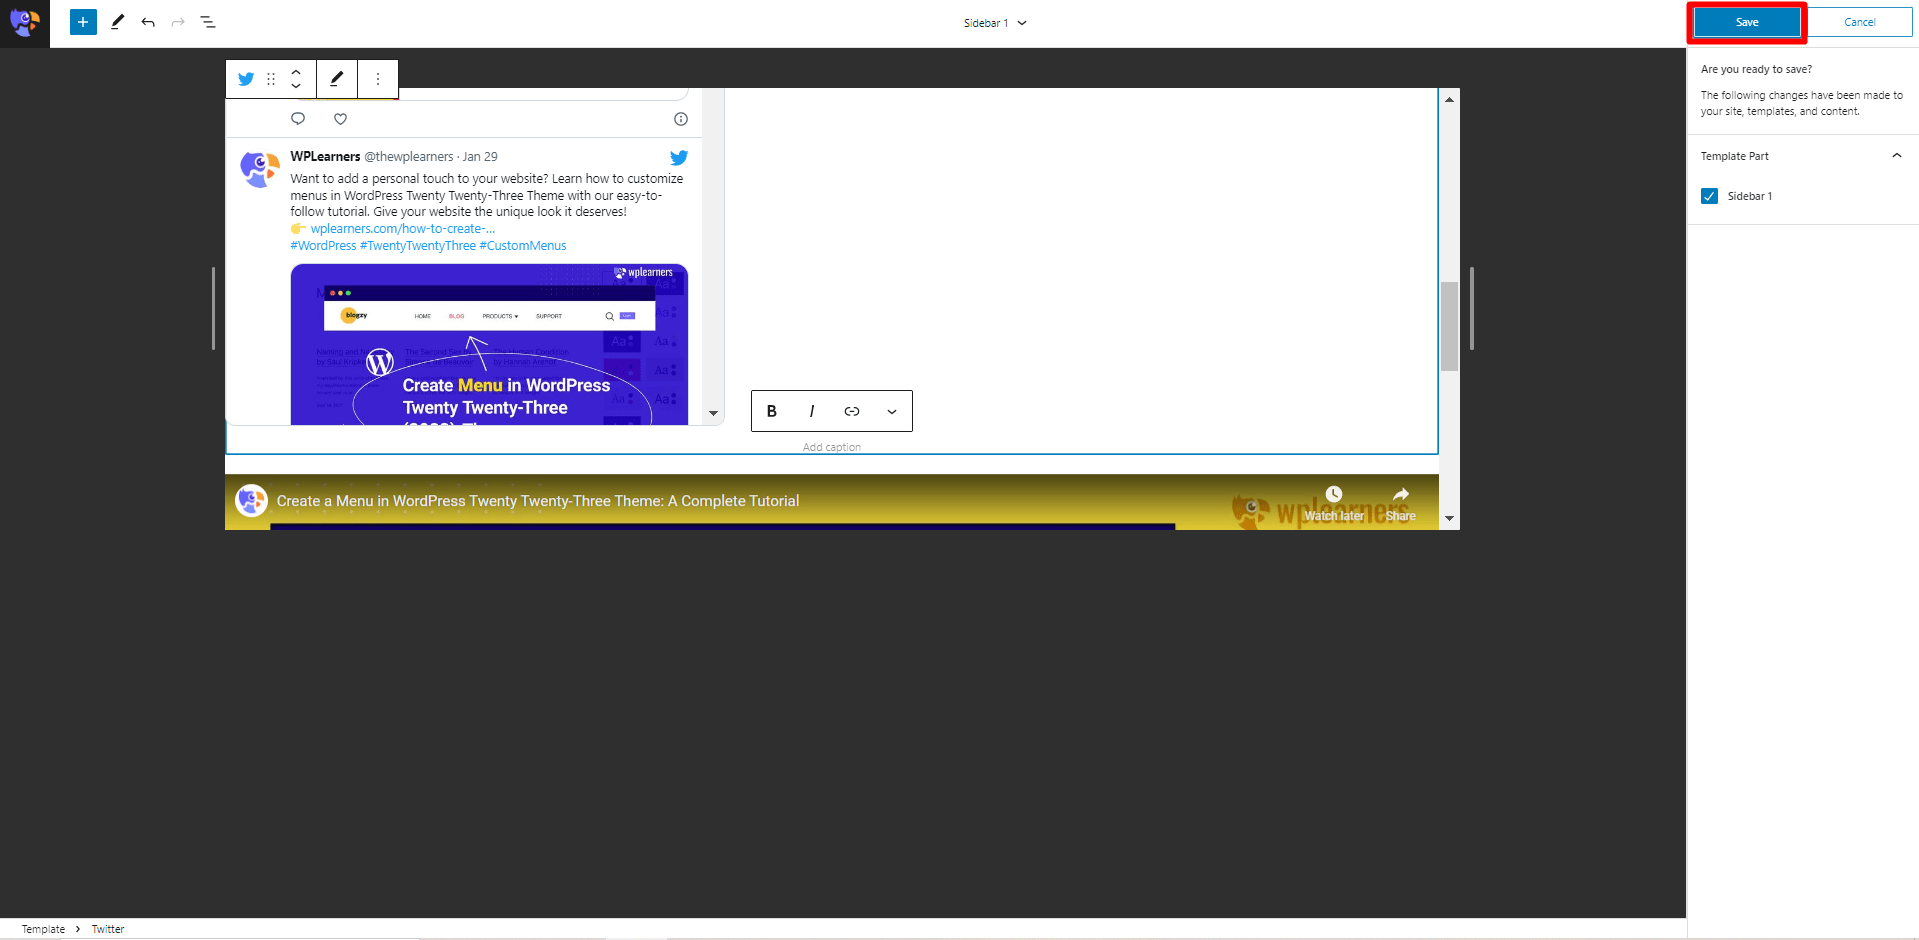
- Confirm Changes.
- Click on the Save button.
With that, we have successfully created a sidebar. Now we must decide where we want to place it.
This pseudo sidebar is a template part, theoretically, we can insert it in any block or column.
Insert Sidebar to Single Posts
To insert the sidebar on all single posts/blog posts, we must plan and leave the necessary column where we want to insert it.
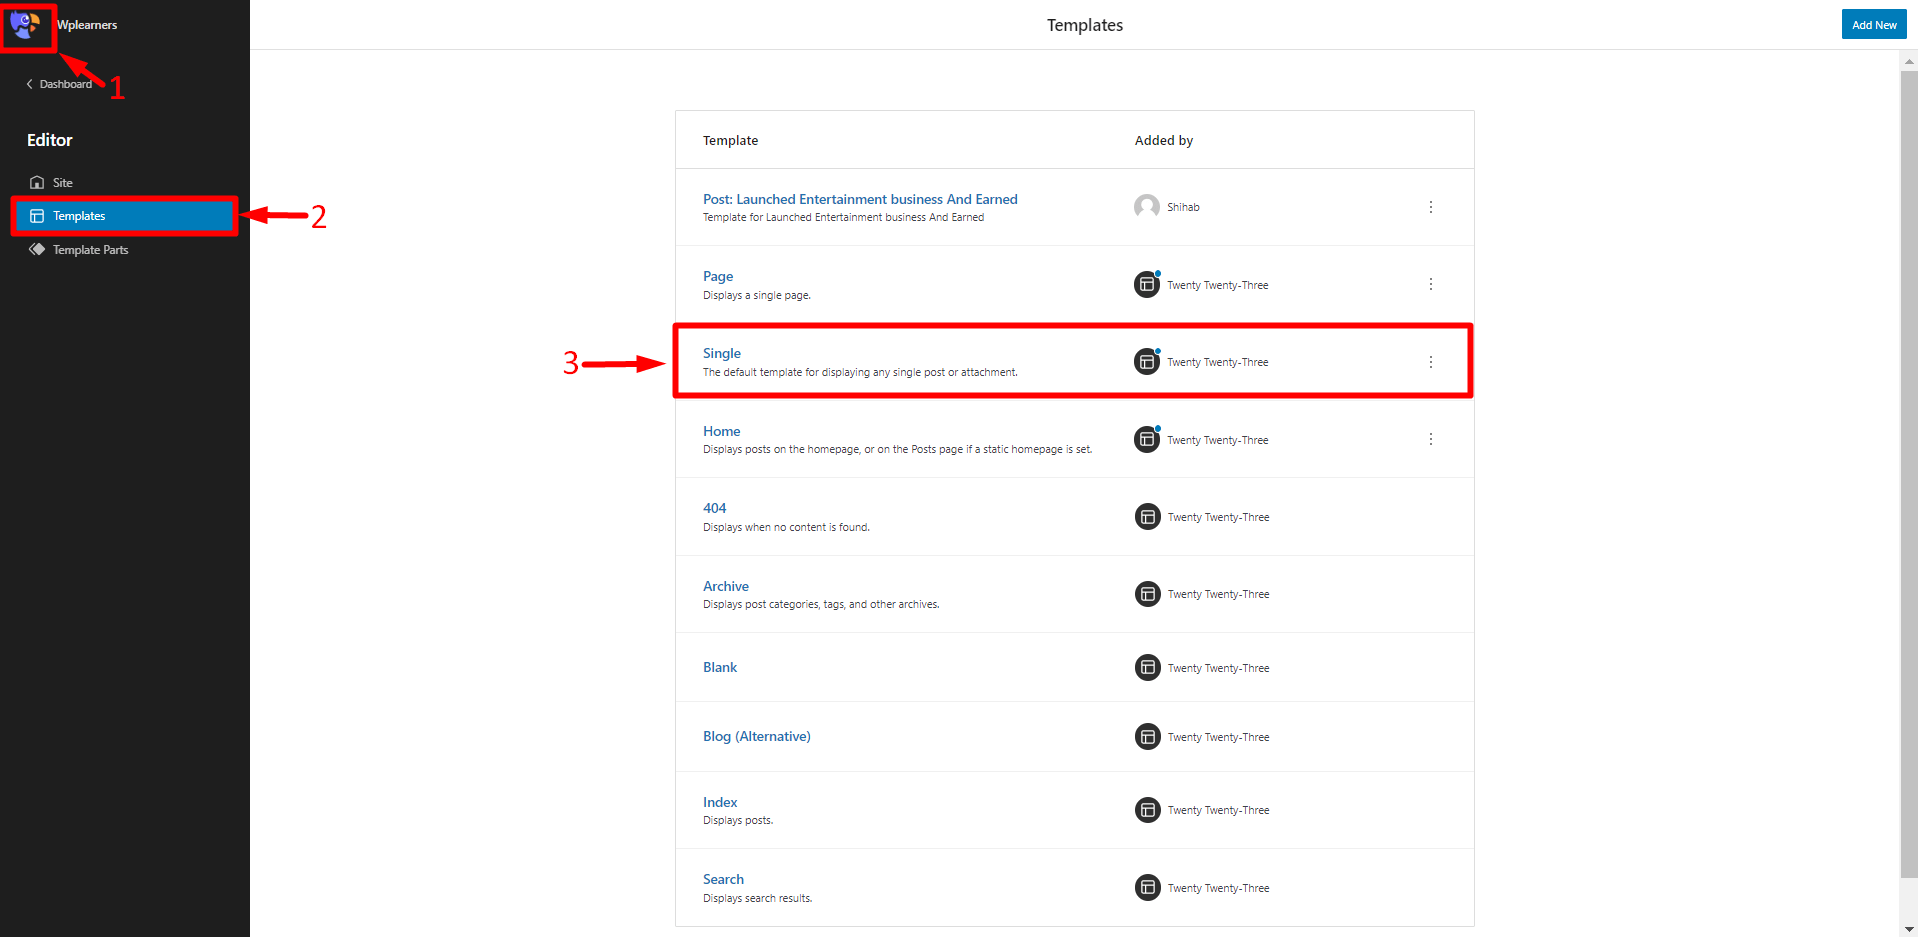
- Click on W/Site Logo.
- Click on Templates.
- Click on Single.
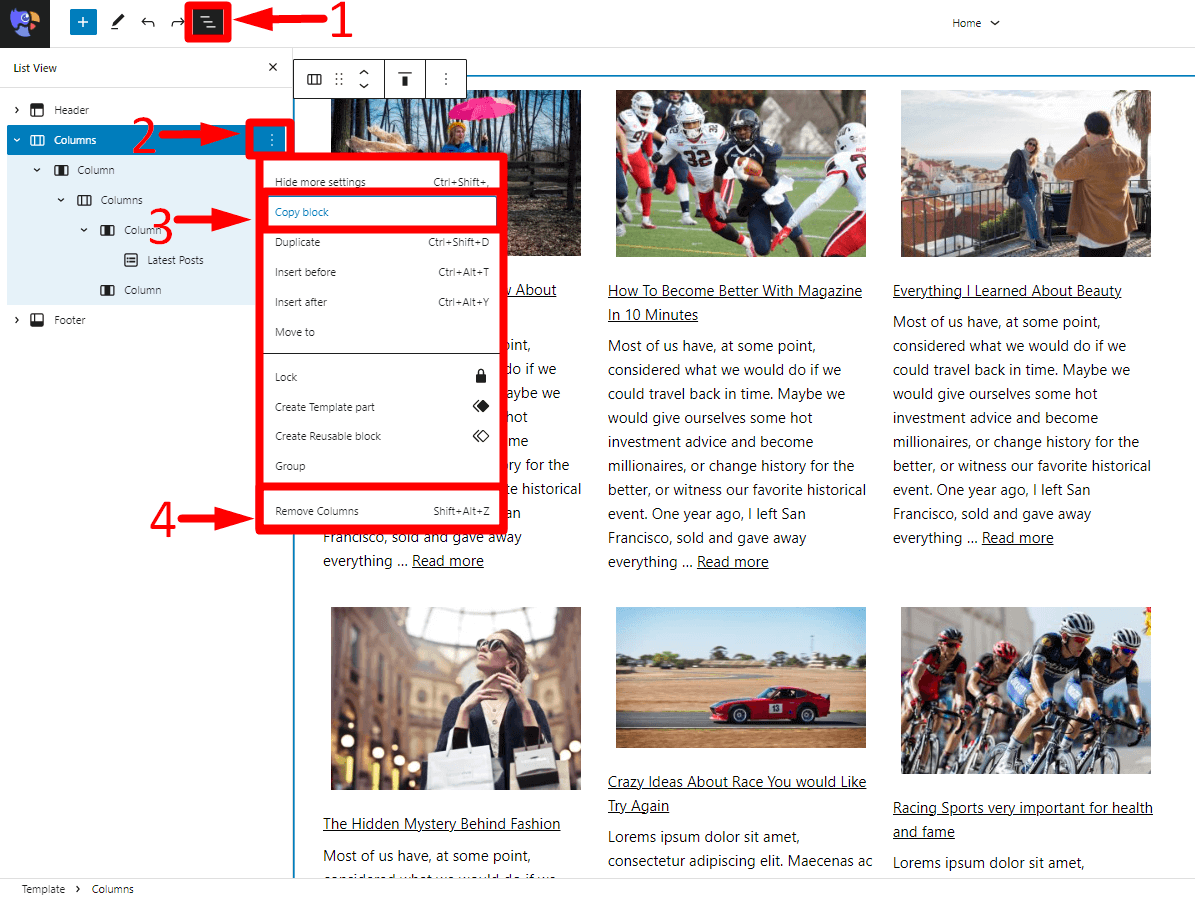
Now we need to group all the post items like Featured Image, Post title, etc., and copy the block. Then we need to remove the entire group to make space for the columns.
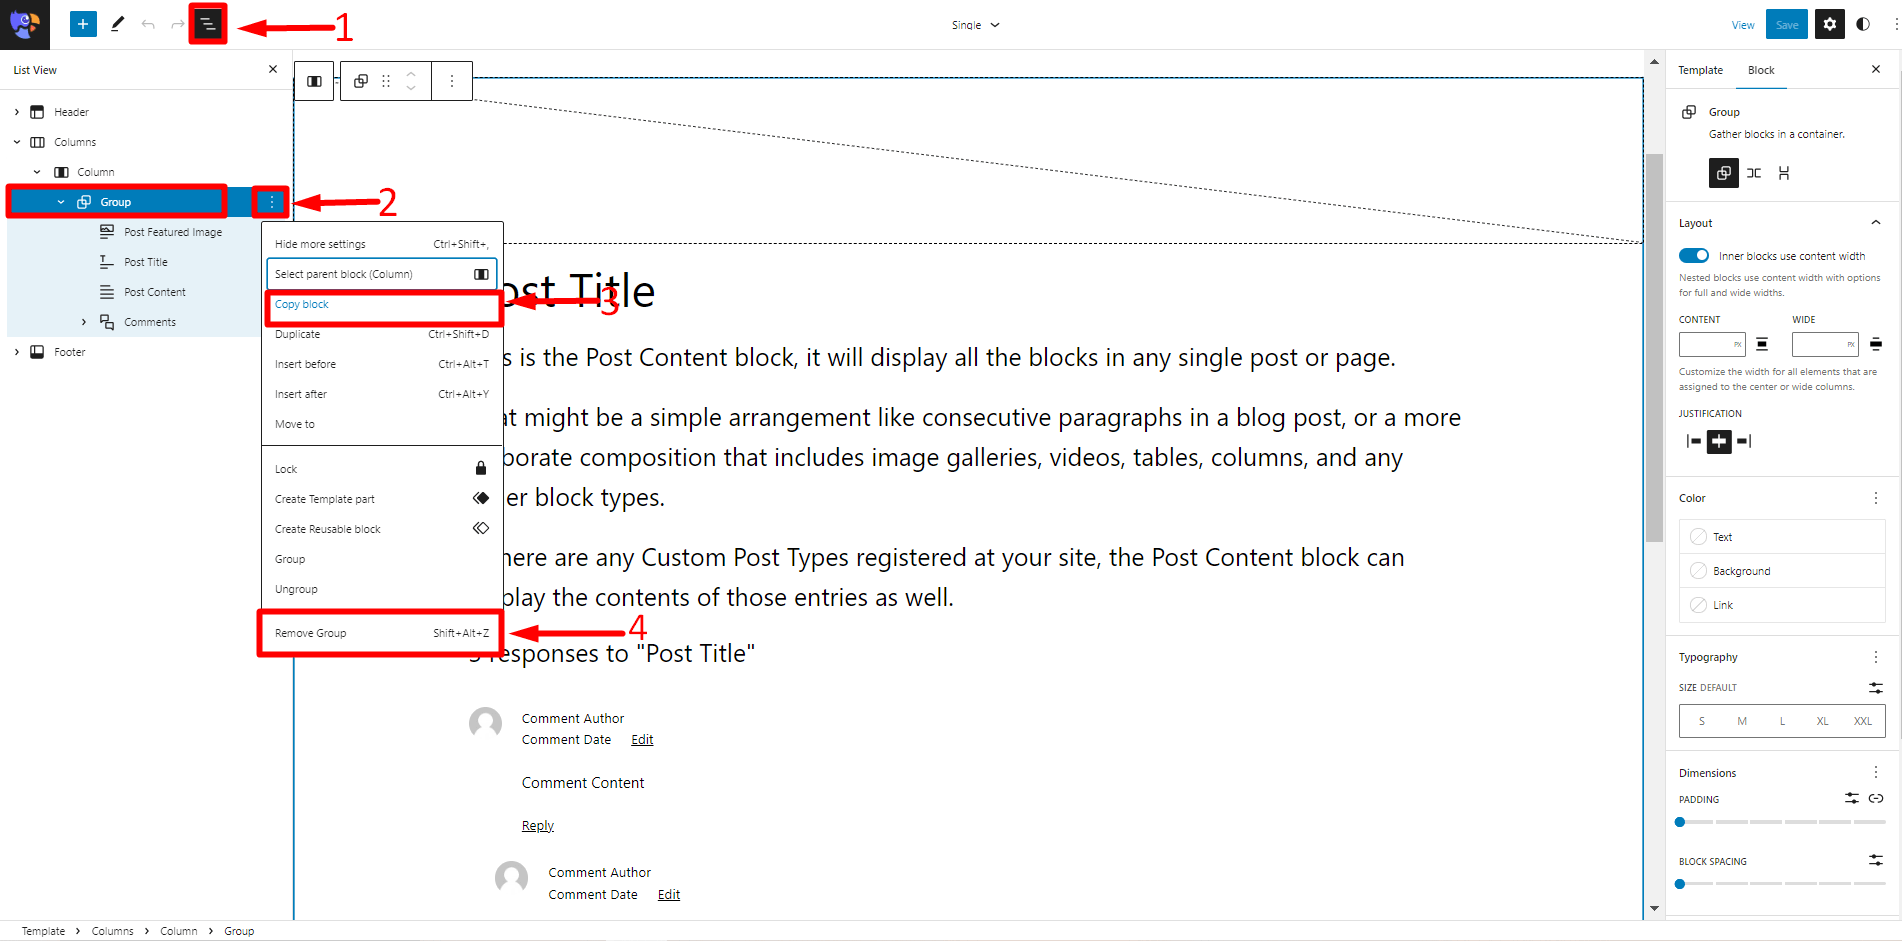
- Click on List View.
- Click on the Three Dots next to the group.
- Click on Copy Block.
- Click on Remove Group.
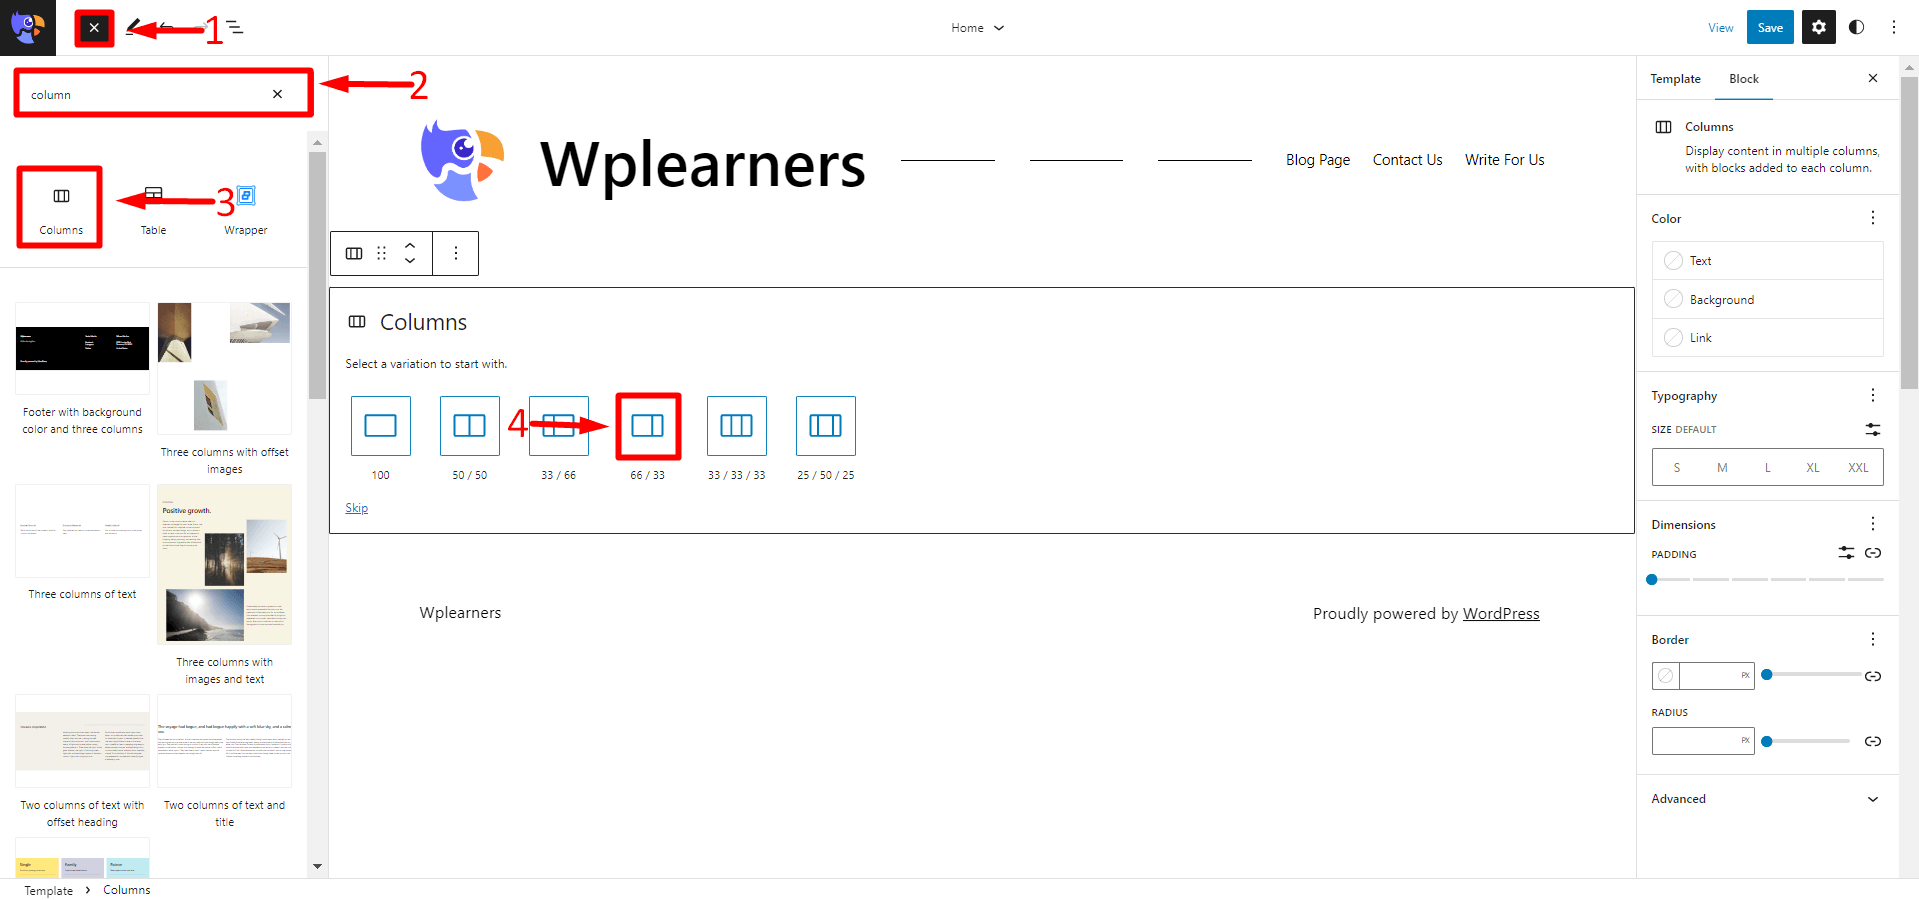
Only the header and the footer will be left on the screen. Here, we will insert a 66/33 column. We can further adjust the width of the columns manually from the block settings.
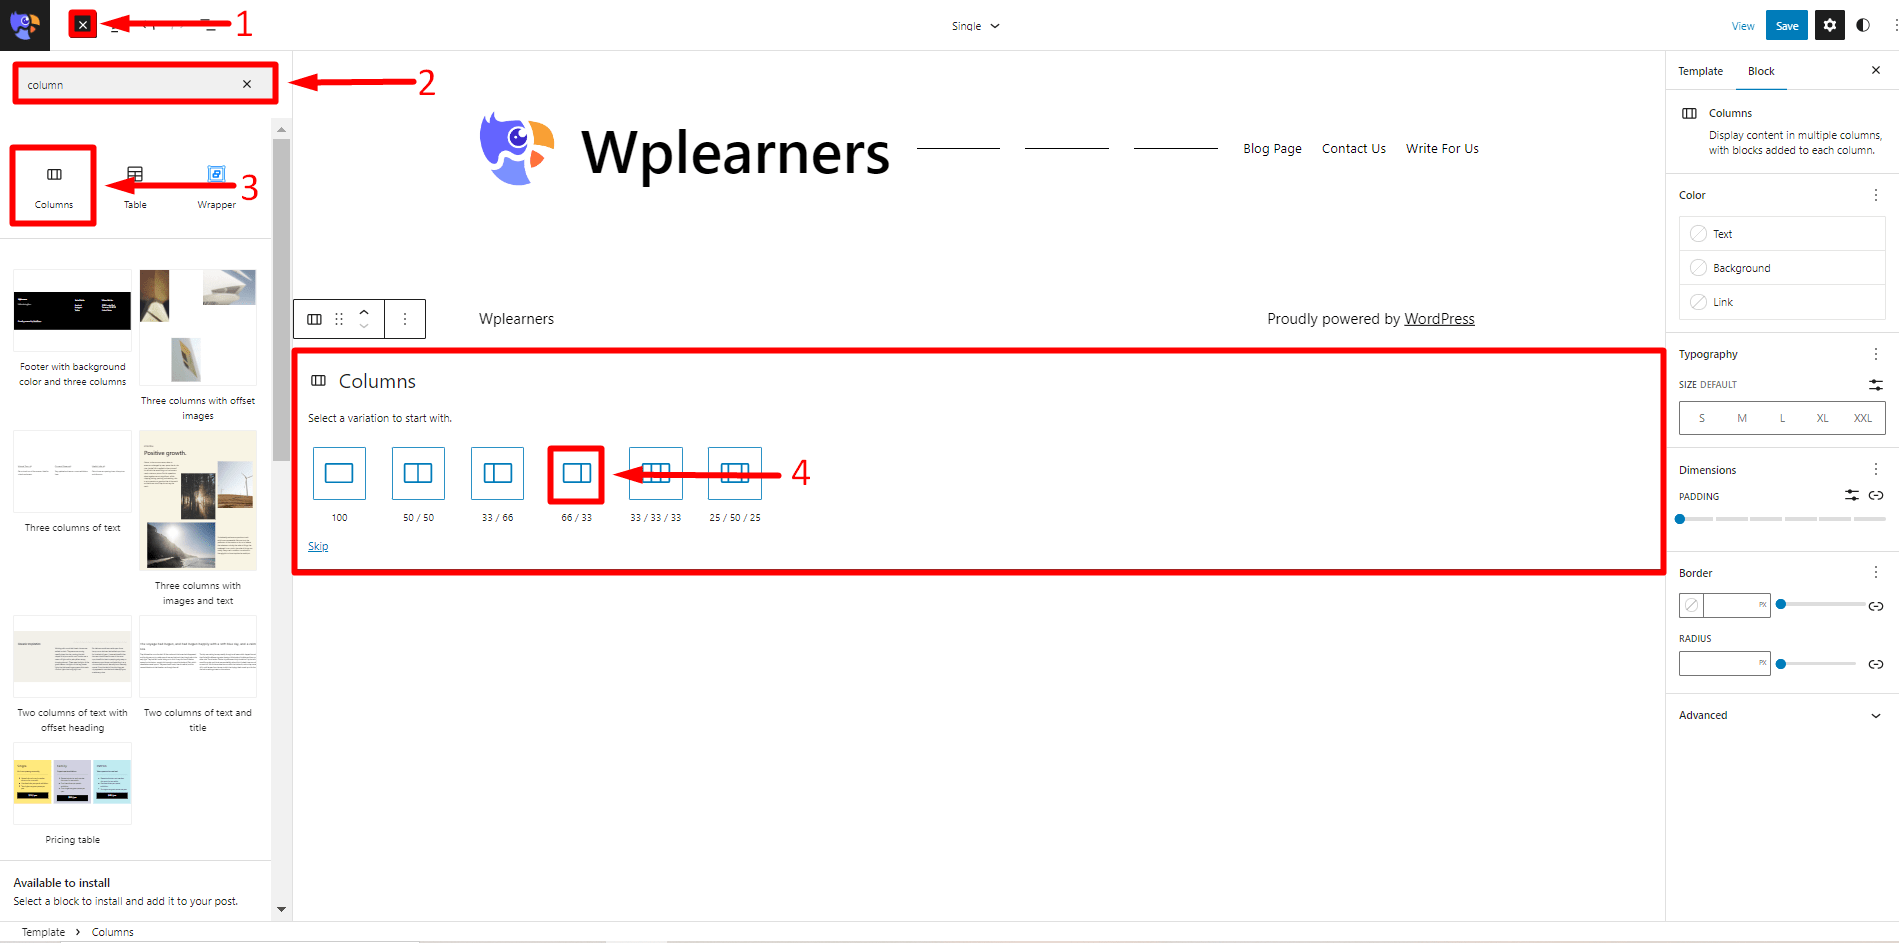
- Click on Toggle Block Inserter.
- Search and select Columns.
- Select the 66/33 Column.
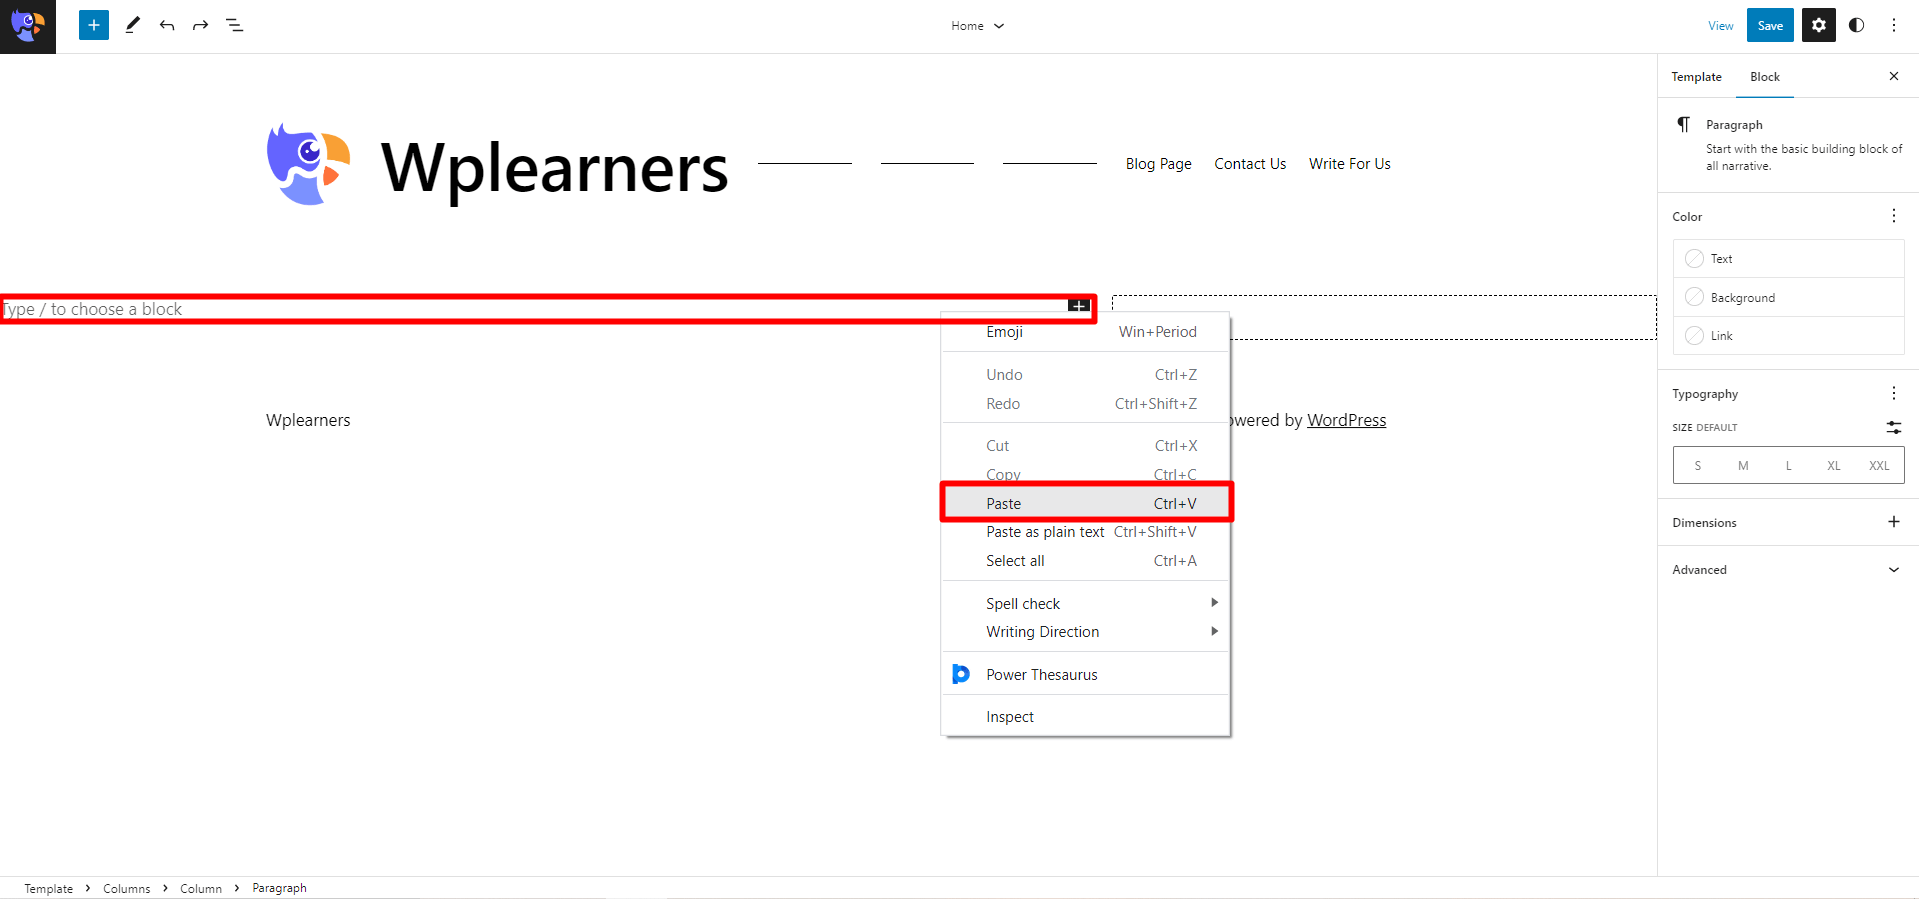
Now that the columns are created, we can insert the group block that we recently copied into our clipboard on the left side. The sidebar that we created as a template part will go on the right column.
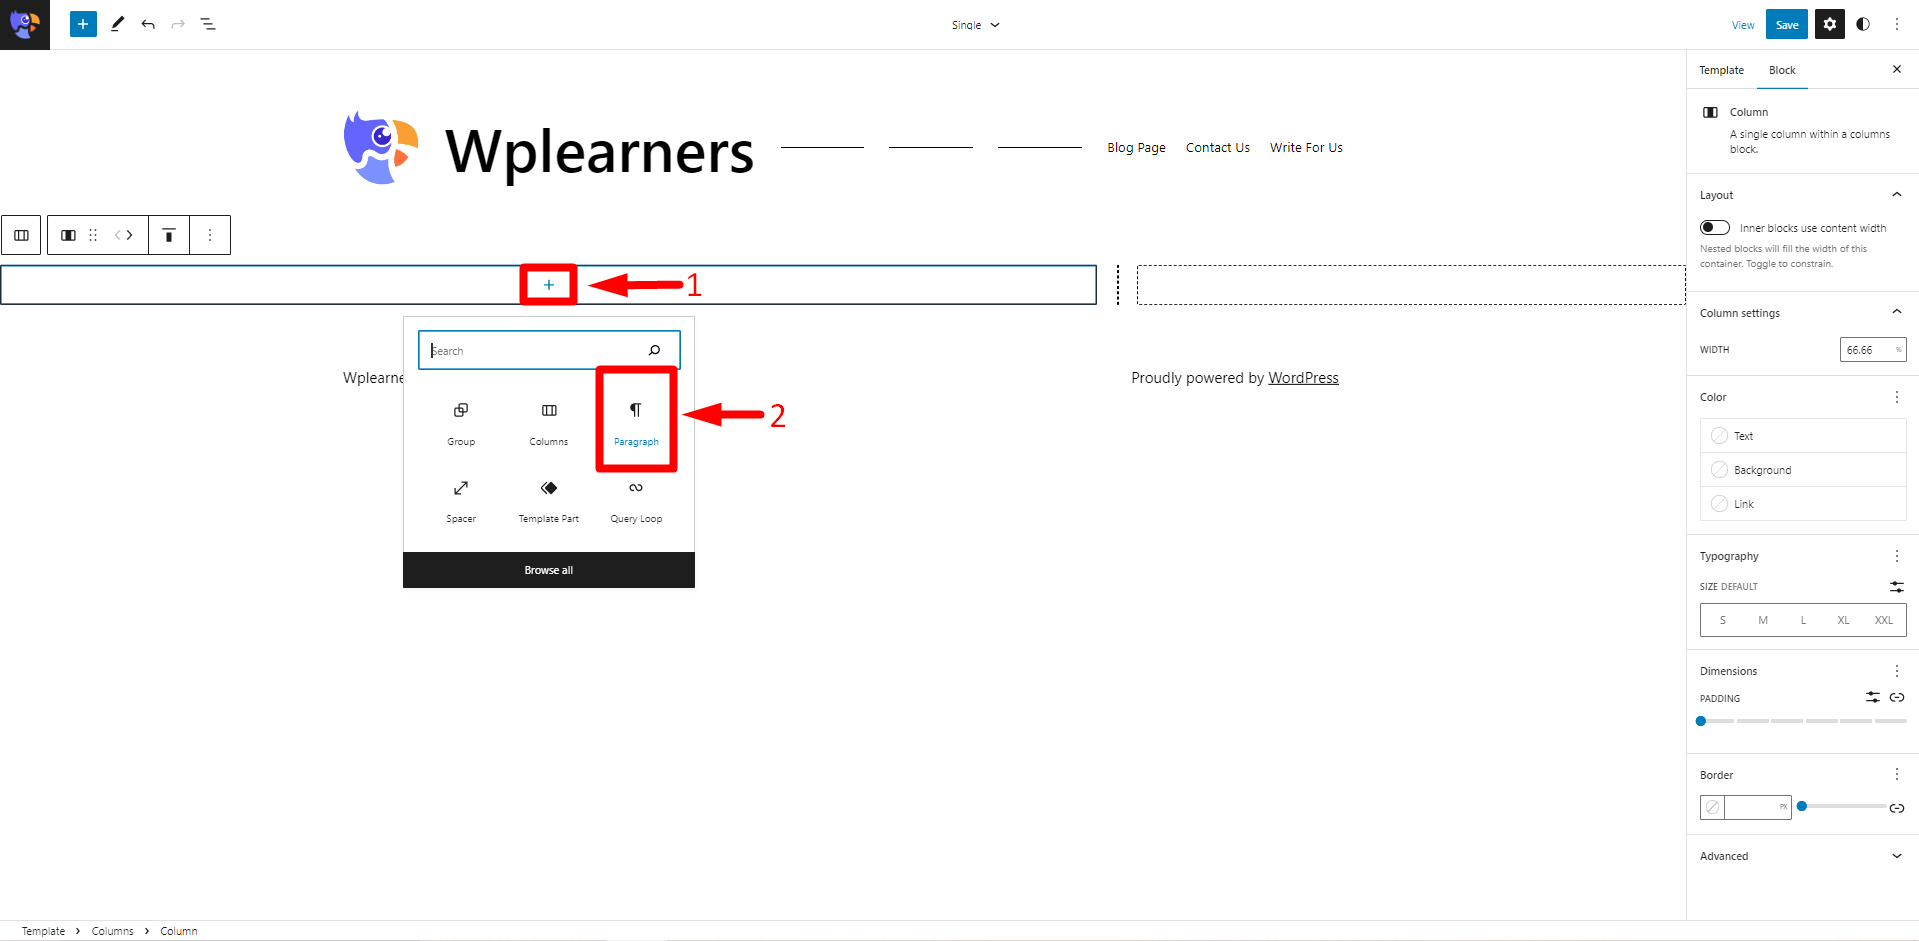
- Click on the Plus symbol in the left column.
- Search and Select paragraph
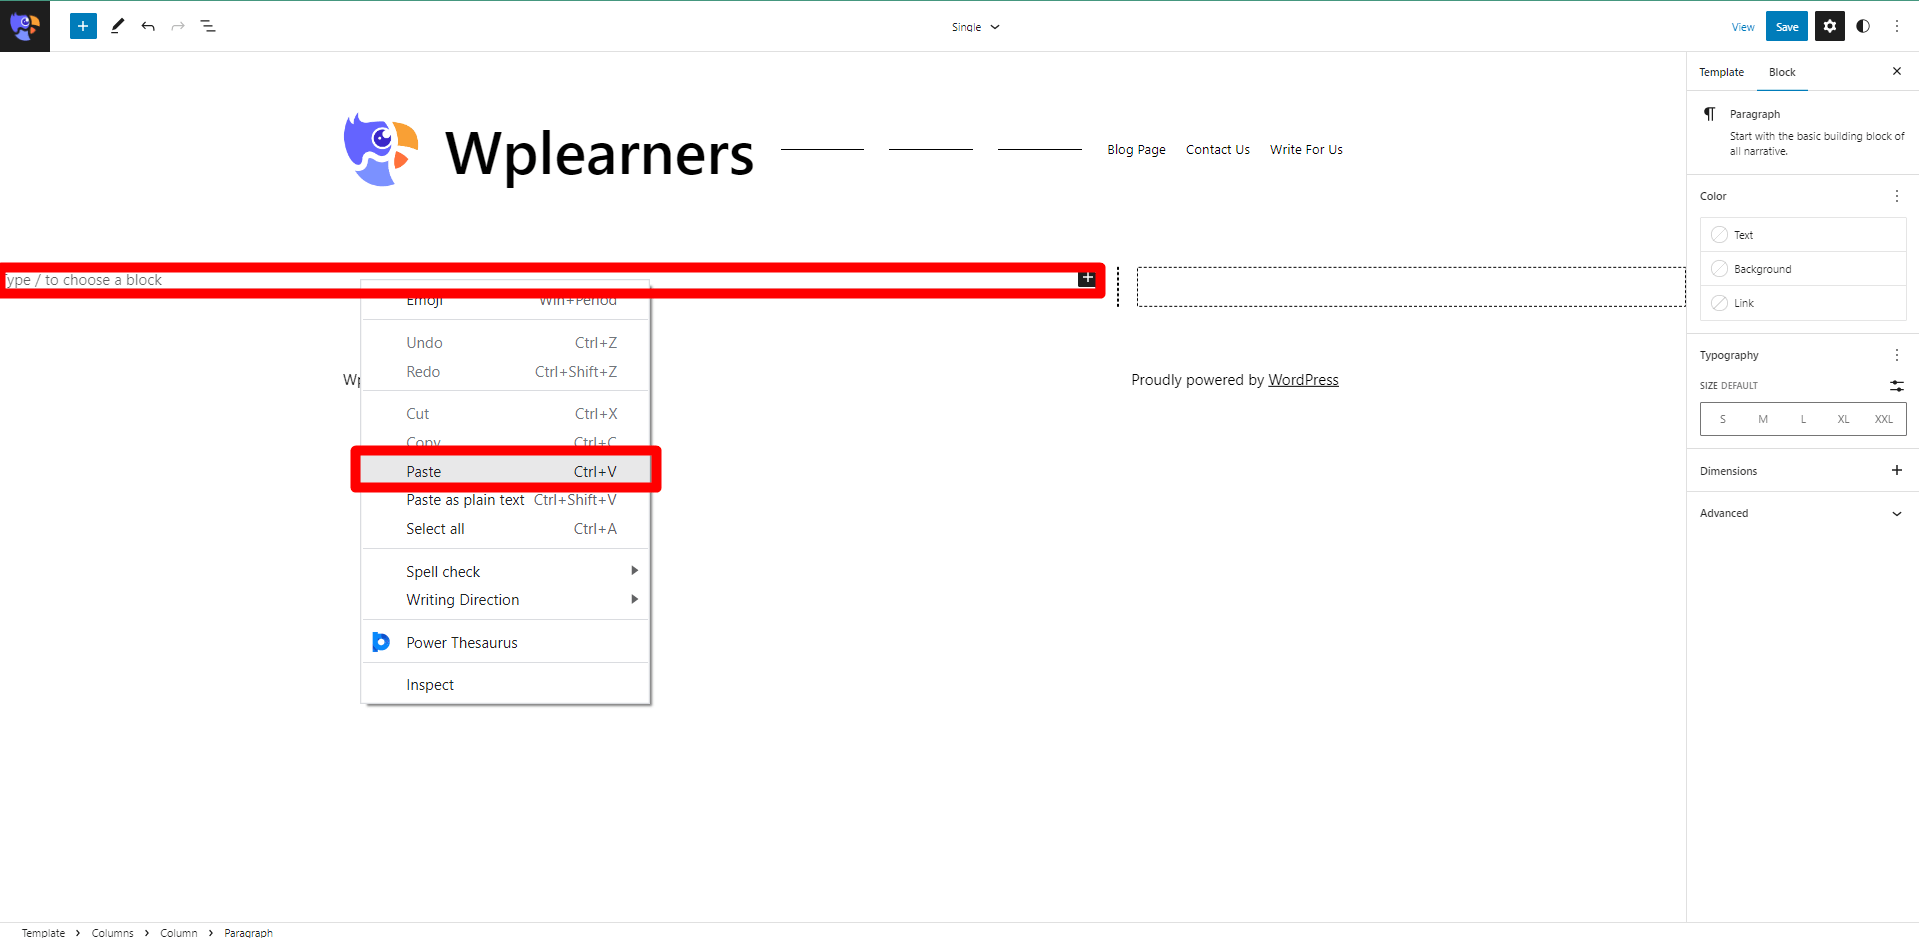
- Right-click on the paragraph block.
- Paste the group block from the clipboard.
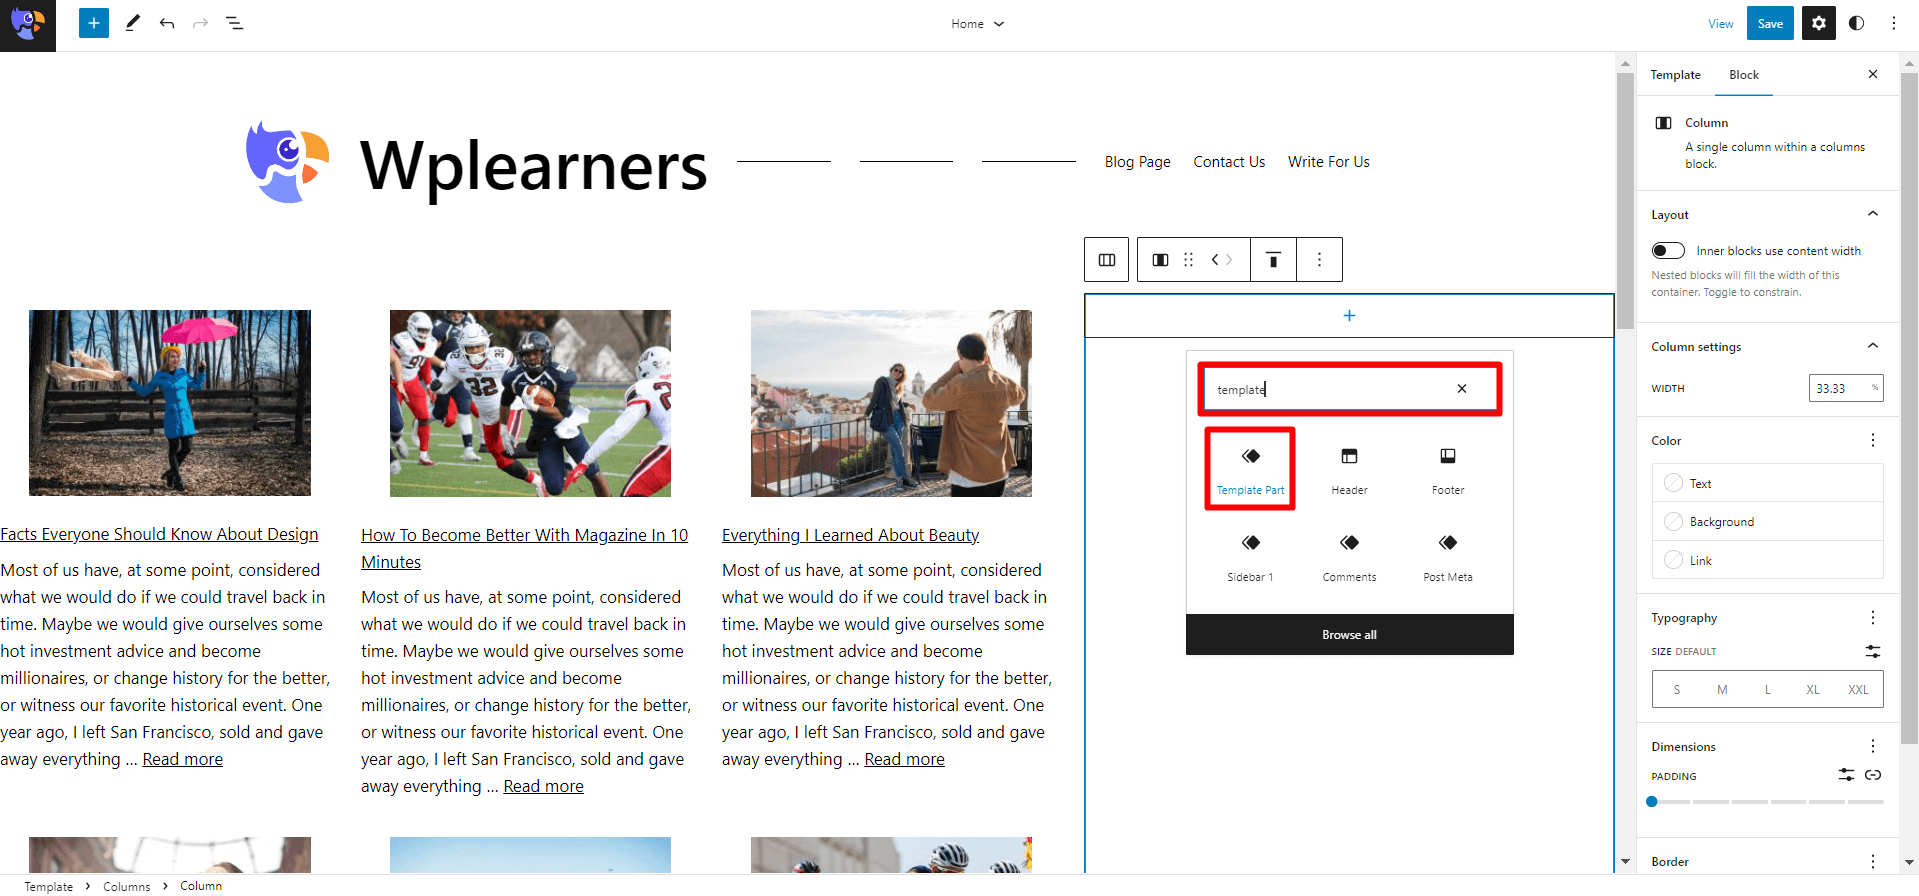
Finally, we will insert the template part.
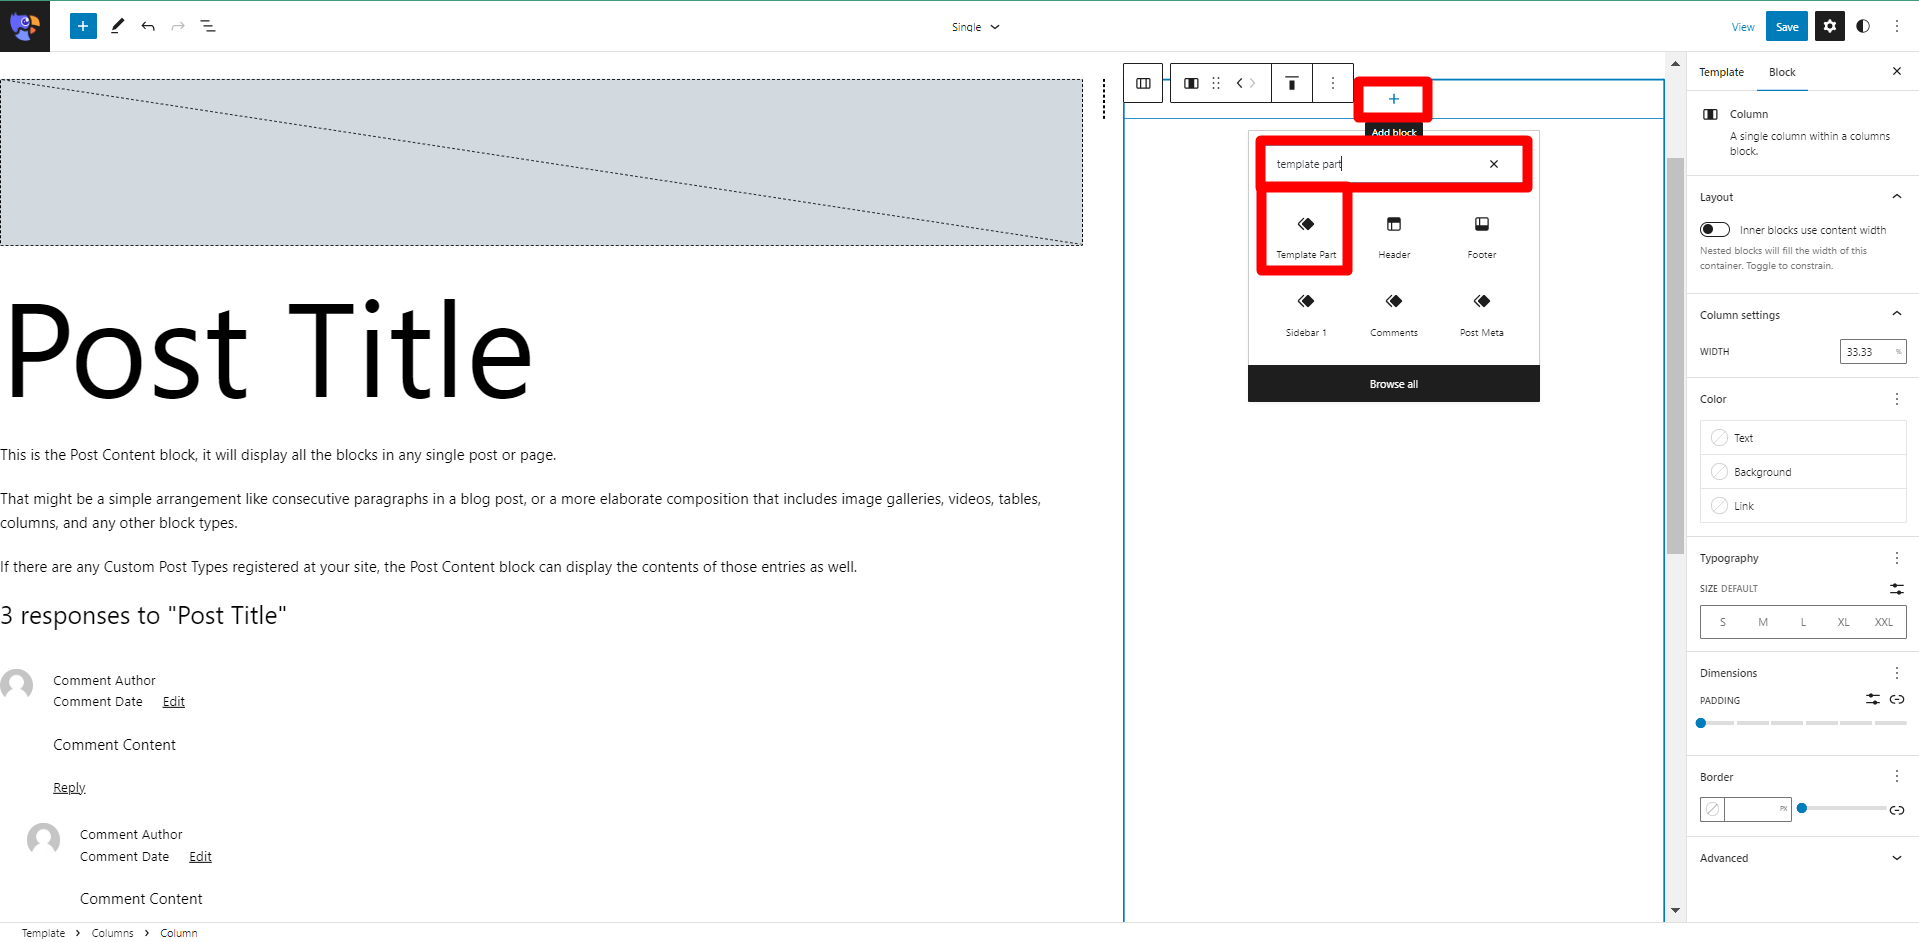
- Click on the Plus Symbol in the right column.
- Search and select Template Parts.
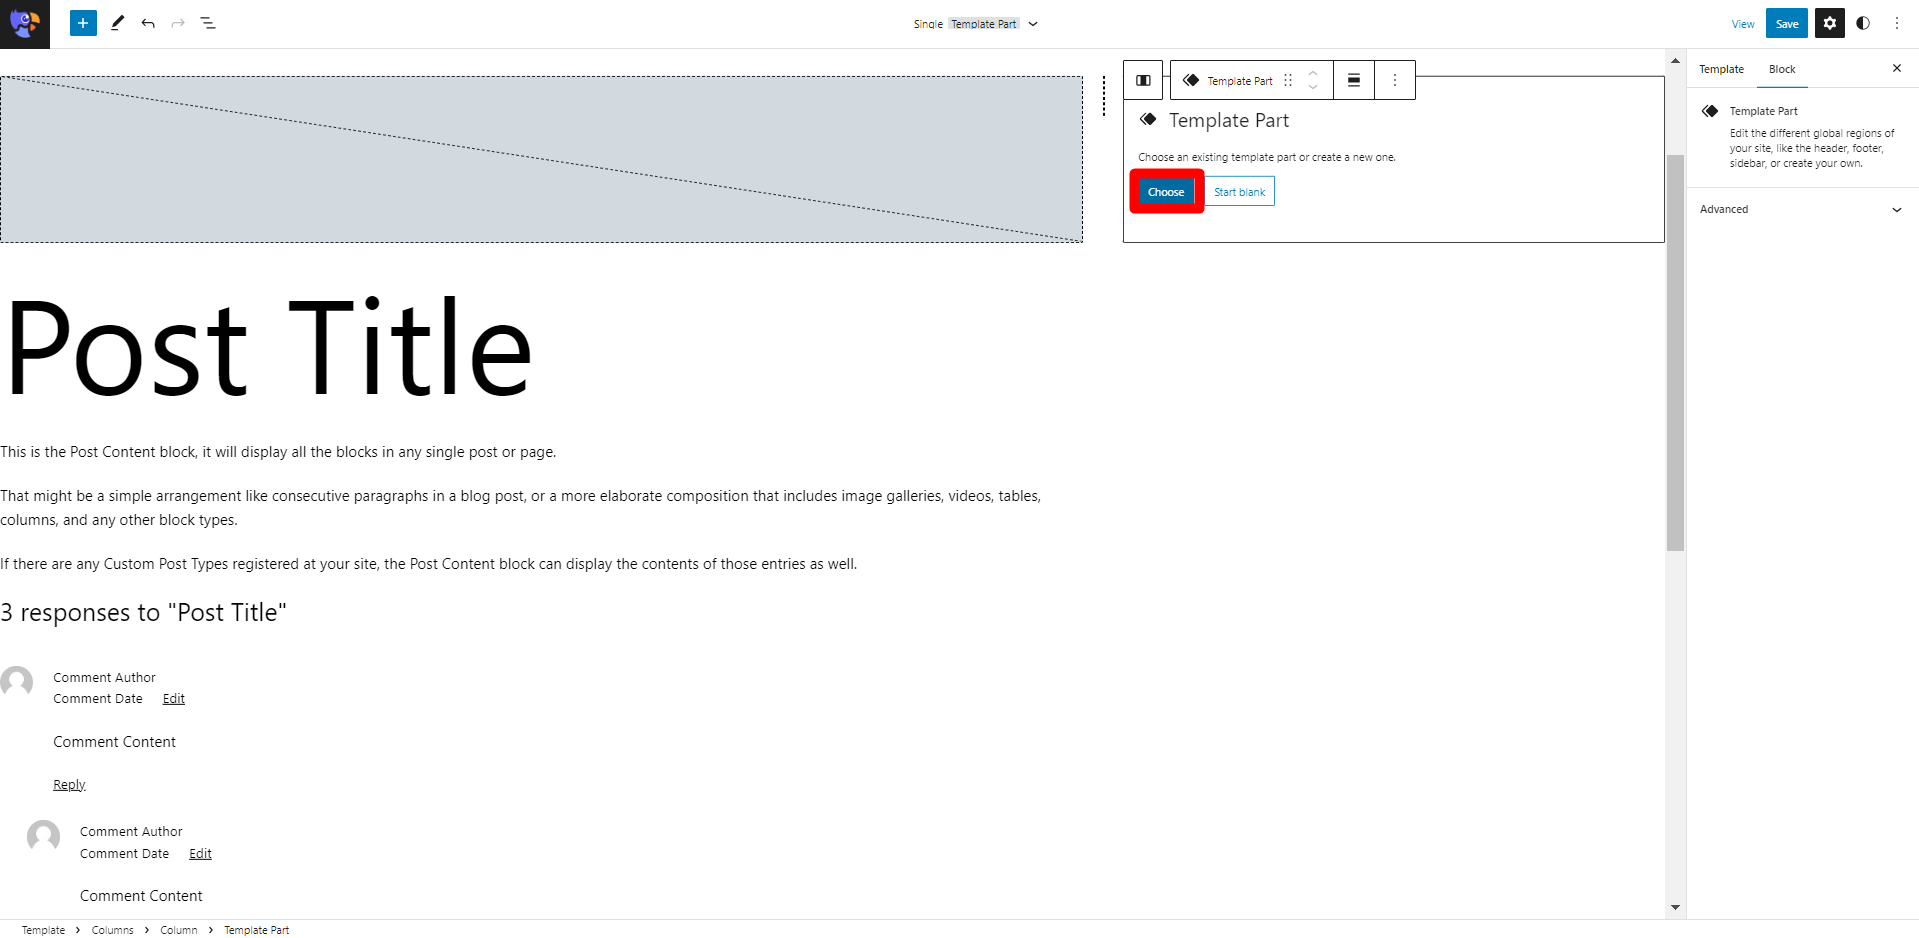
- Click on the Choose Button.
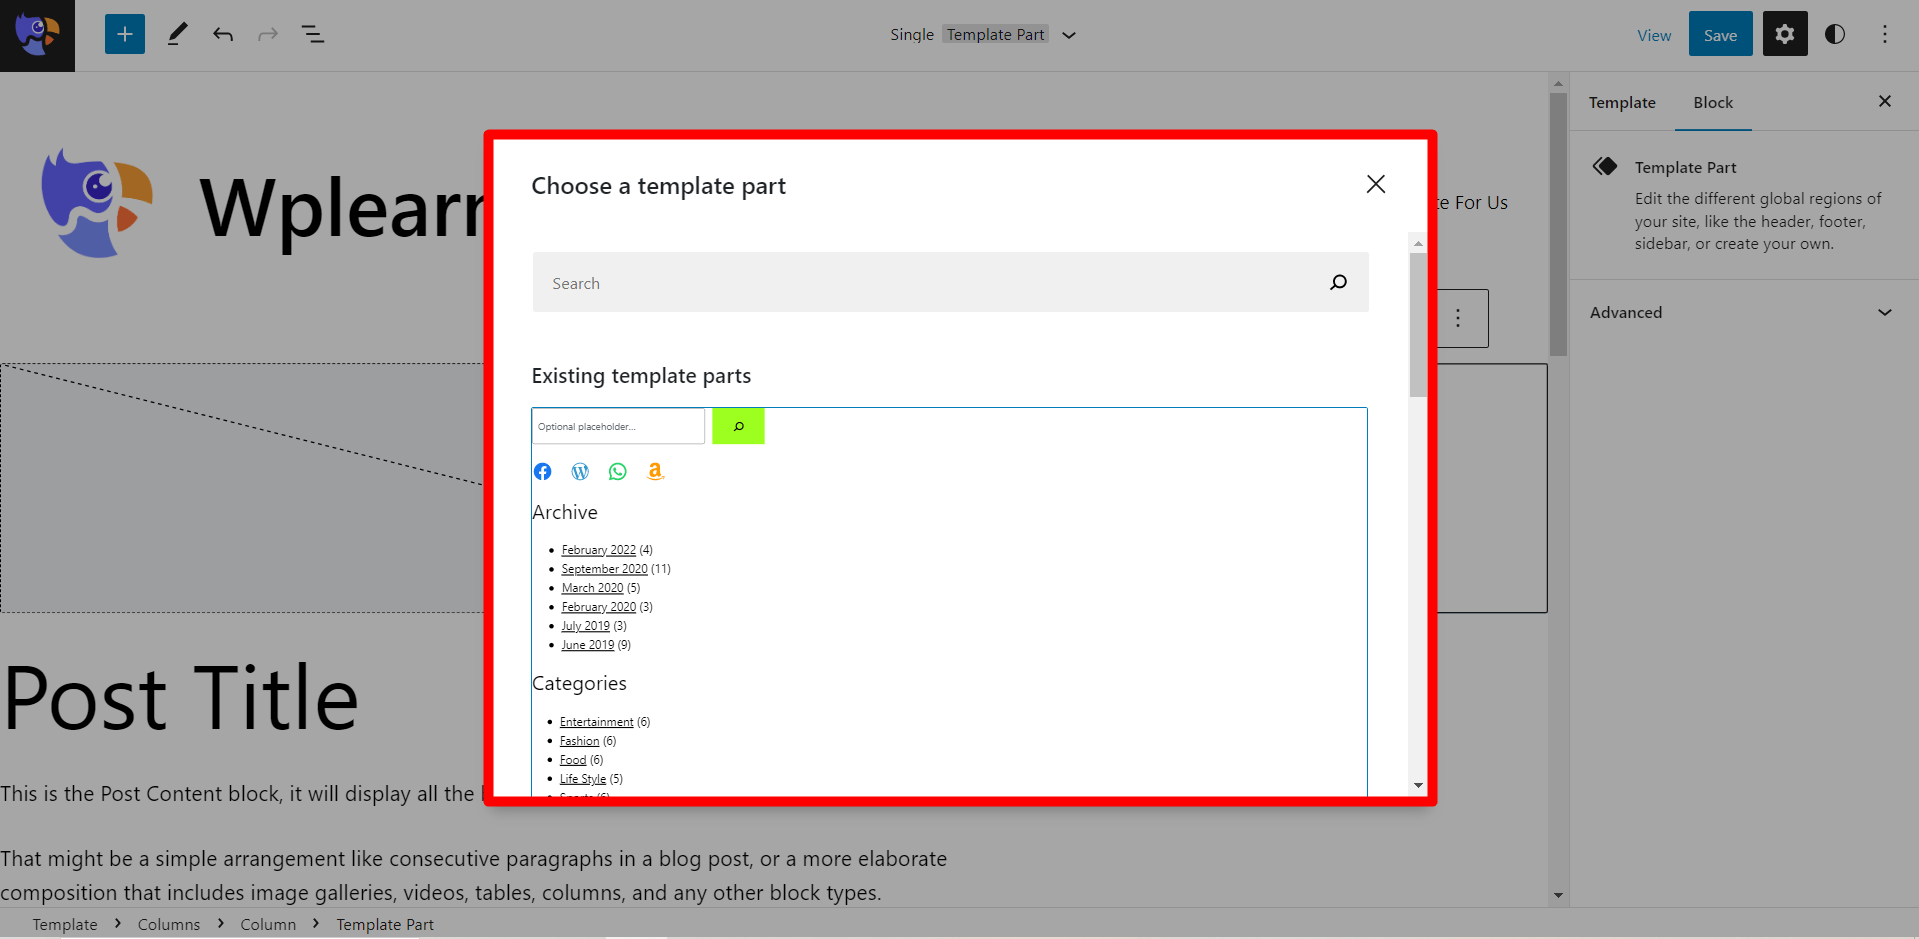
- Select the Sidebar.
We must save the changes for them to take effect, and not lose progress.
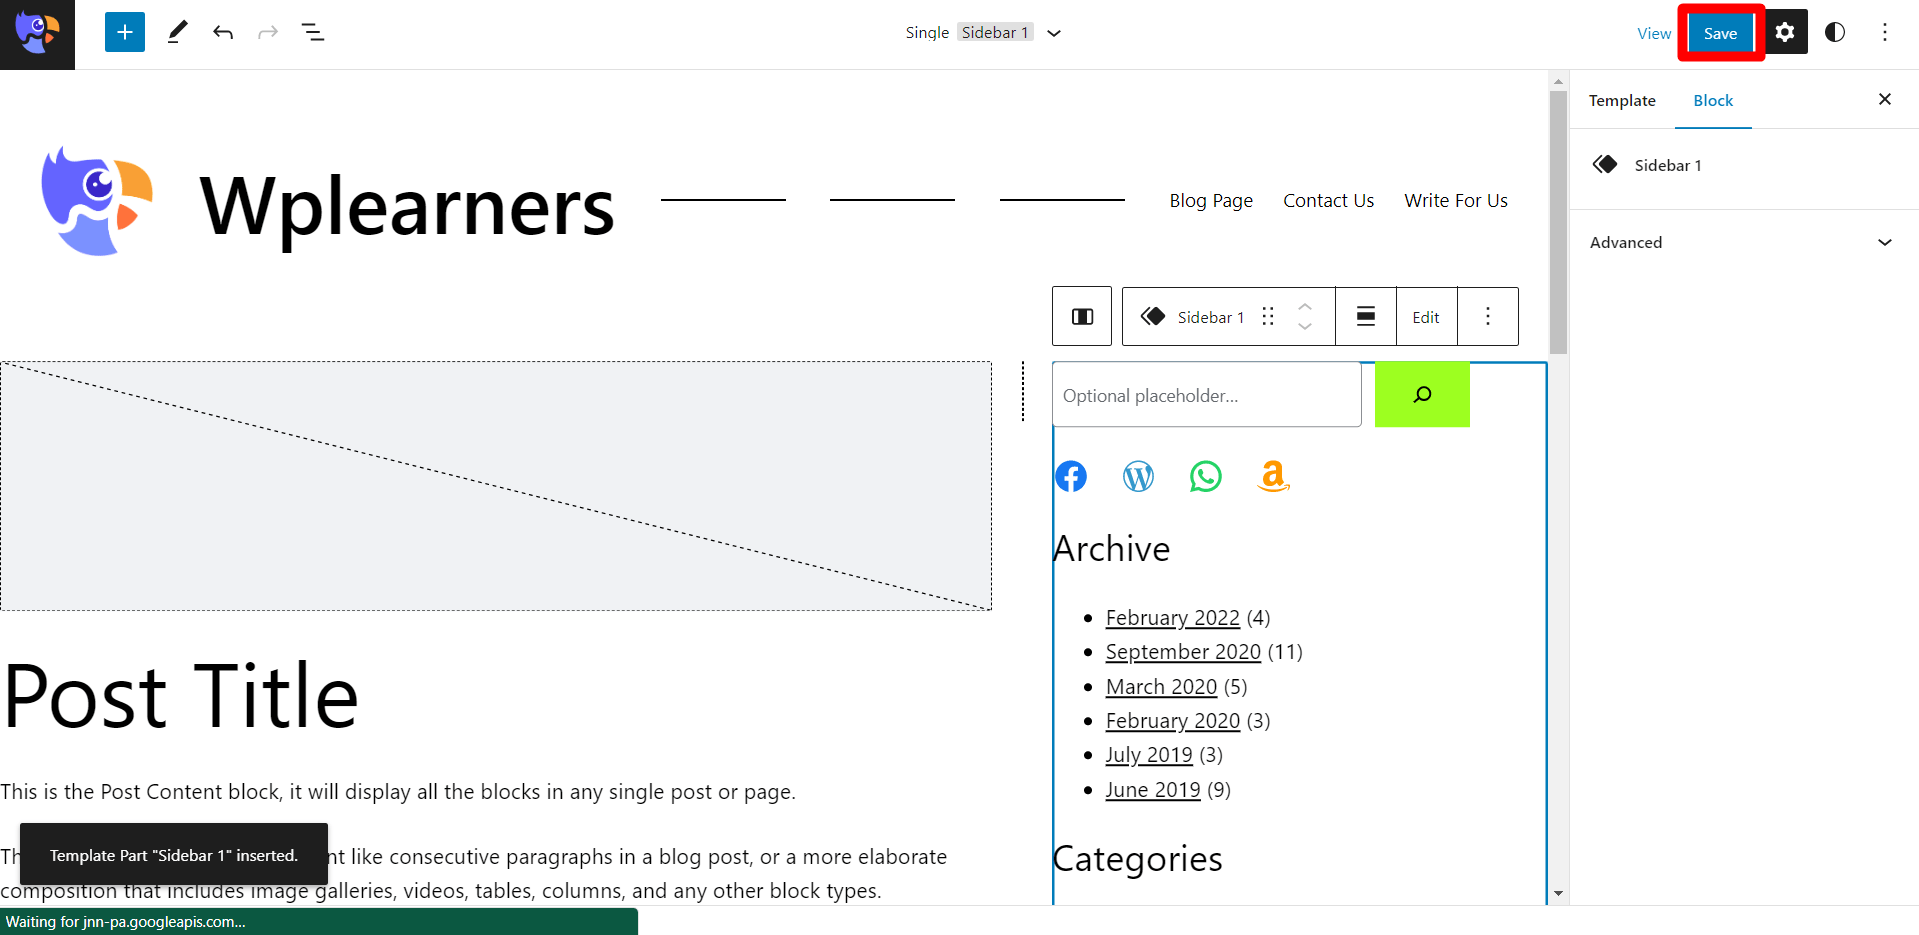
- Click on the Save button.
- Confirm changes and click on the Save button.
After saving the changes, we can now check how our sidebar looks in the Front-End.

Insert Sidebar to the Home Page
The process of inserting sidebars on the home page is fairly similar. We need to plan and leave sufficient space for our sidebar. We can create a home page from scratch or when we can copy the content of the home page and paste them on the left column.
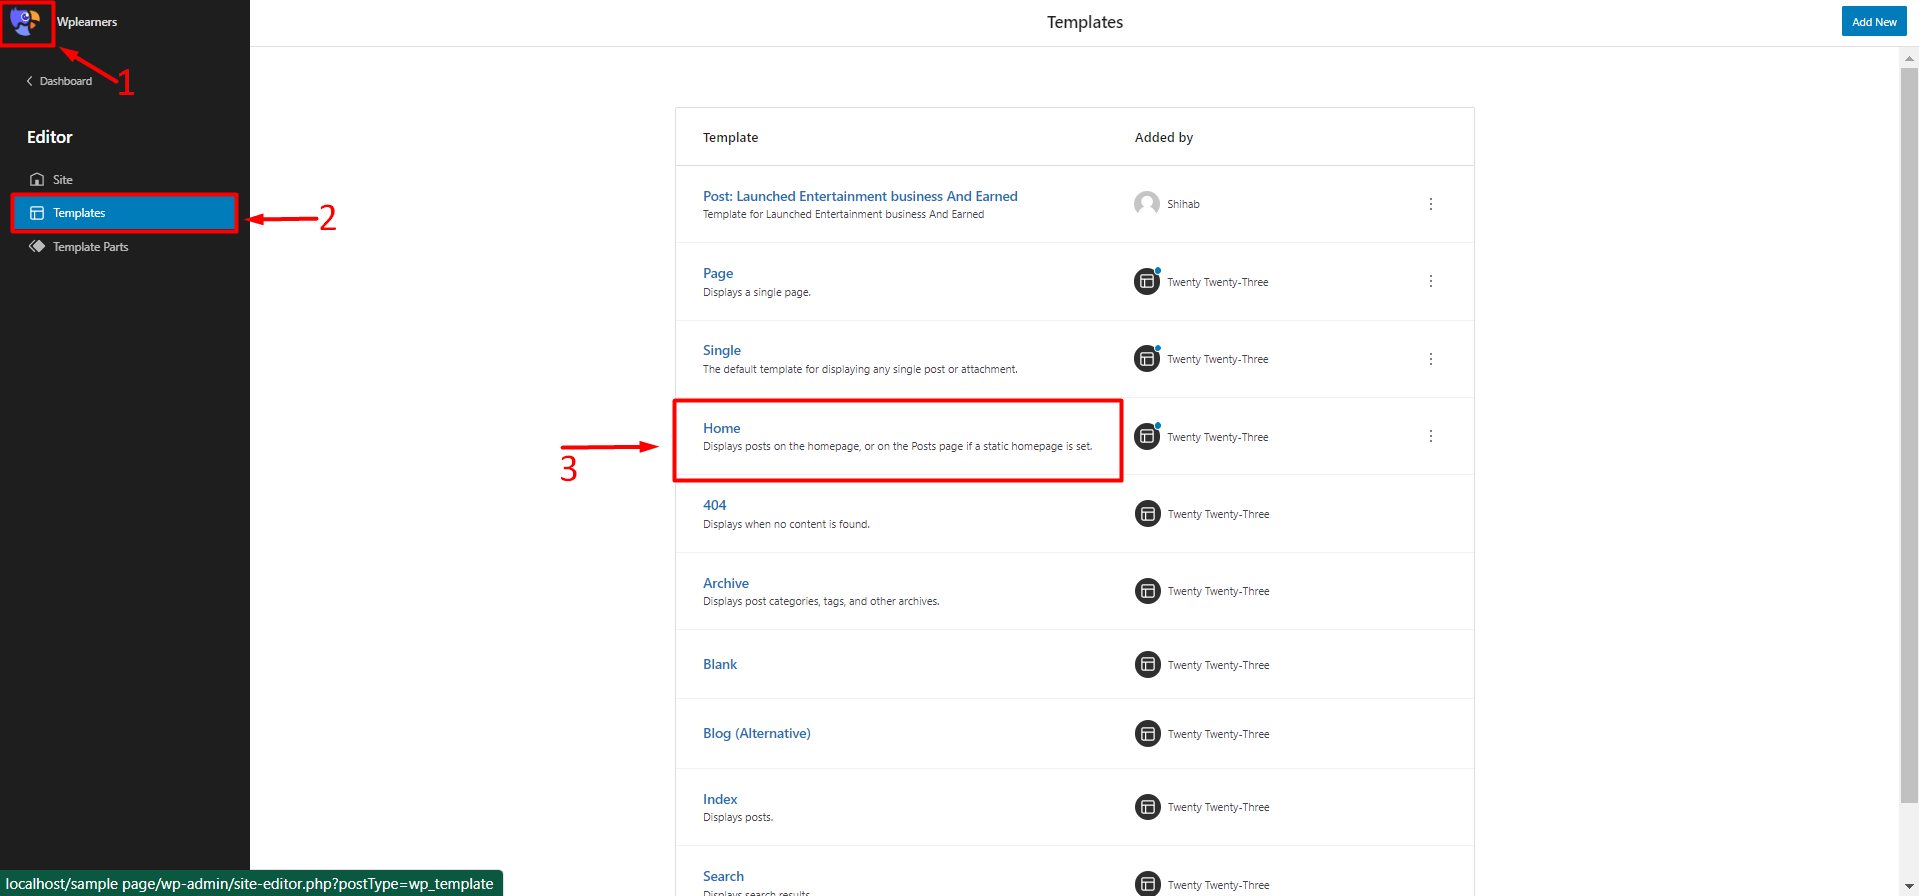
- Click on W/Site Logo.
- Click on Template.
- Click on Home.
- Click on Toggle Block Inserter.
- Click on the Three Dots.
- Copy the Contents of the home page.
- Remove the block.
- Click on Toggle Block Inserter
- Search and Select Column.
- Select 66/33 Column.

- Insert the Paragraph block on the left column.
- Right-Click and Paste the home’s content on the paragraph block.
- Insert Template Part
- Select the Sidebar Template part.
Now let’s see how our home page looks on the Front-End.
Conclusion
That’s it for this blog post, we have covered all the basics that we need to know about sidebars in the Twenty Twenty-Three Theme. You can further experiment and play around with widgets and various Gutenberg block items.
If you’re new to the Twenty Twenty-Three theme, and the Fullsite Editor, we would recommend you visit our website for basic tips, tricks, and tutorials on everything related to WordPress. You can also check our youtube channel for more in-depth tutorials.