Do you want to add a dropdown menu to your website but don’t know how to create one by yourself?
Today I will show you how to easily create dropdowns and their sub-items by following this simple 5-Step guide.
Smooth navigation is a very important aspect of your website. Users may find it annoying if they can’t find the content they are looking for easily.
Moreover, if you want to display certain content over others, you can do it with the help of a dropdown menu.
Creating the menu may seem like a confusing task, but with the help of the WordPress menu editor, it is much simpler than you think.
What is a Dropdown Menu?
WordPress dropdown menus are links that take you to a specific page, post, or custom link when you click on them.
WordPress has a built-in function that lets you create, edit, or remove menus.
Your posts can be categorized and displayed as a menu for easy access.
It makes your website navigation smoother and aesthetically pleasing by saving visual space.
You can even categorize your posts and link them in your menu so that users can easily navigate through your website.
How to Create a Dropdown Menu in WordPress?
As you continue to develop your website, it will gradually get filled with content.
With the increase in the volume of content, tracking down a single post or a page in chronological order can be a bit of trouble.
However, you can reduce this issue by adding a dropdown menu to your website.
Step 1: Create a New Menu
WordPress has streamlined the process of creating a new menu or editing your pre-existing menus.
You can either use the built-in WordPress menu editor or theme customizer to manage your menus.
Since we are focusing on the basics of menu creation, we will use the built-in menu editor in the WordPress Admin Dashboard.
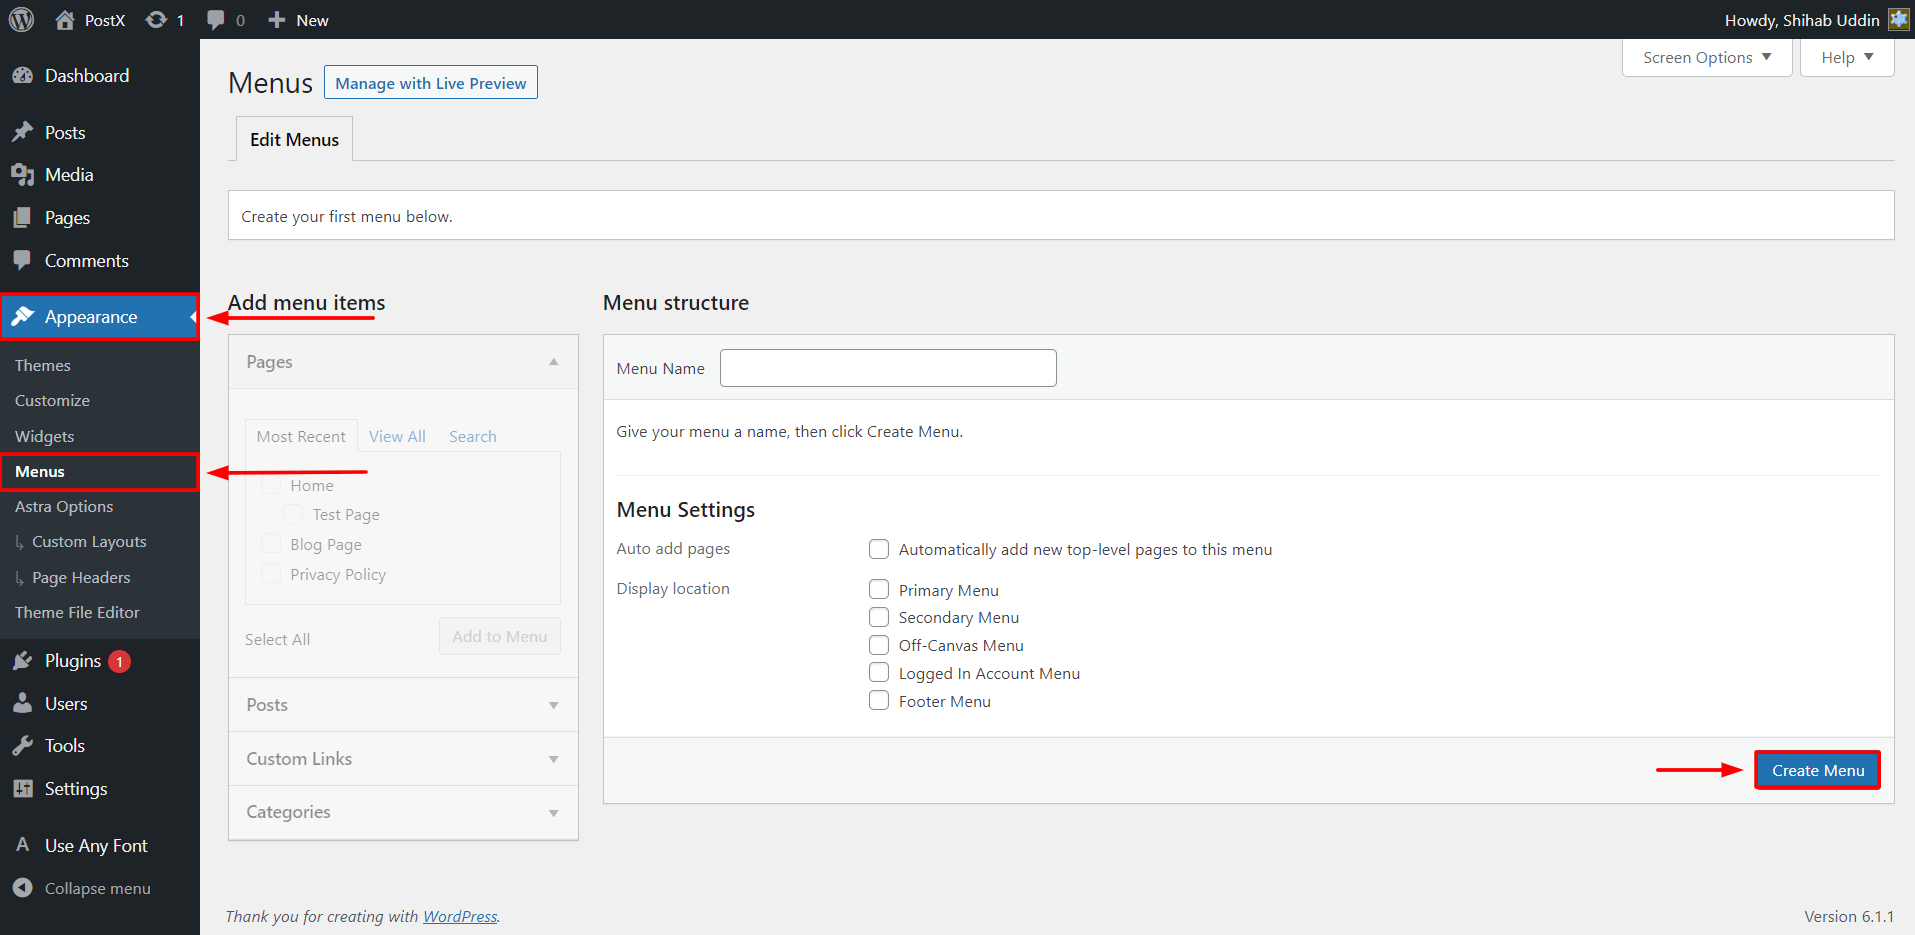
- Head over to the WordPress Dashboard and click on Appearance, which can be located on the left side of your screen.
- Then under appearance, click “Menus.” You should now be on the menu editing page. Here you can find various options like Edit Menu, Manage Location, Add Menu Items, etc.
- To build a menu from scratch, input the name of your menu in the space provided and click the “Create Menu” button on the bottom-left side of your screen.
Step 2: Add Items to Your Menu
After creating the menu, you can now add pages, posts, categories, or even custom links to your menu.
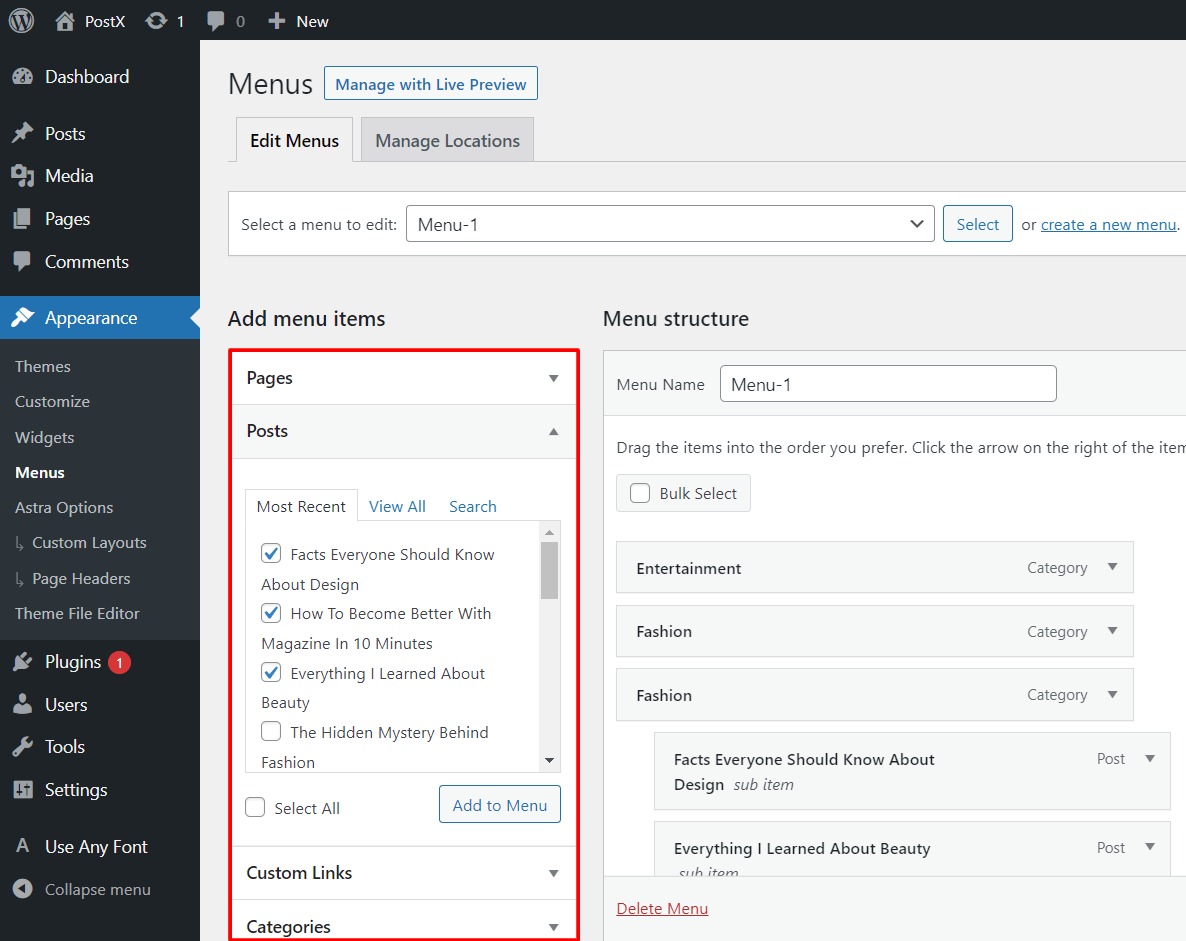
- Select the items you would like to be displayed in your menu in the “Add menu items” section.
- After you’re done selecting your items, click the “Add to Menu” item.
The items that you have selected will now appear under “Menu structure” on the right.
Step 3: Sorting Your Menu
Once you have selected the desired items on the menu, you can now arrange them in your preferred order.
WordPress makes it very easy for its users to customize the menu with a few clicks or by the simple drag-and-drop feature.
To change the navigational labels that will be displayed on the menu section of your website,
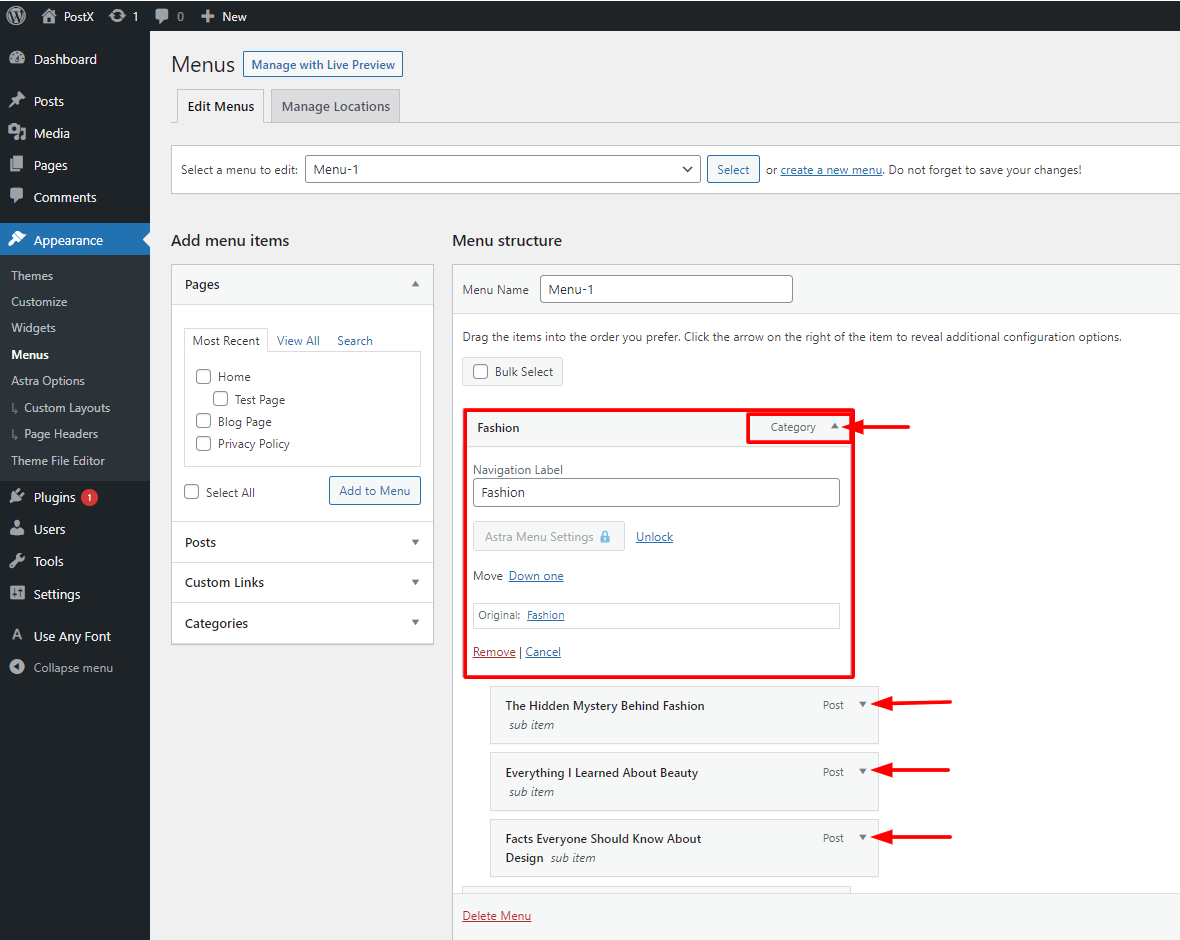
- Click the arrow on the right of the items. This will reveal additional configuration options. Here you can change the label of the items.
You can also remove items that you feel are unnecessary individually by selecting the item and clicking on the remove option that appears in the bottom-left corner.
You can also use the “Bulk Select” option to remove multiple items at once.
Also, if you feel like the menu is not going in the direction that you would have liked, you can
- Click on the “Delete Menu” option to delete the selected menu and start over again.
Now, you might want to add some sub-items in your dropdown menu. So, from the menu structure, you can drag the items into your preferred order.
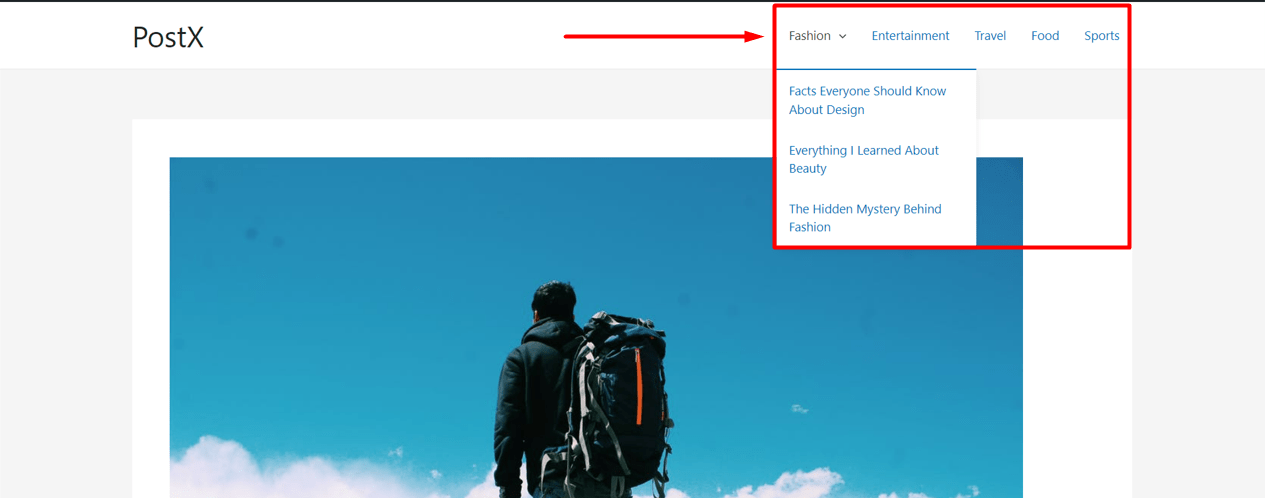
Items that you drop under other items are displayed as “sub-items.” These sub-items will appear in the form of a dropdown menu in the front end when visitors hover over the menu.
Step 4: Select Menu Location
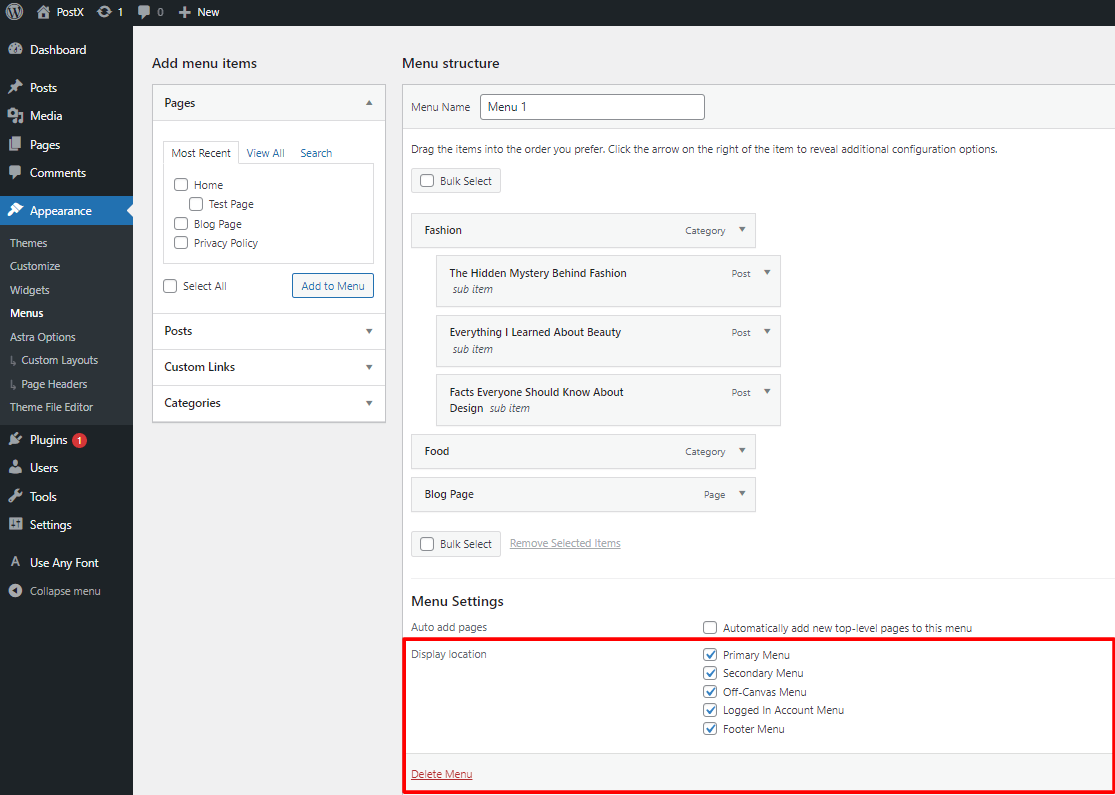
The location where your menu will be displayed relies heavily on the theme you’re using.
Since I’m using Astra during this tutorial, you might see some location options that may or may not be available to you if you use other themes.
Step 5: Save the Changes
After all the edits and customizations to your menu, you must save the changes that you have made.
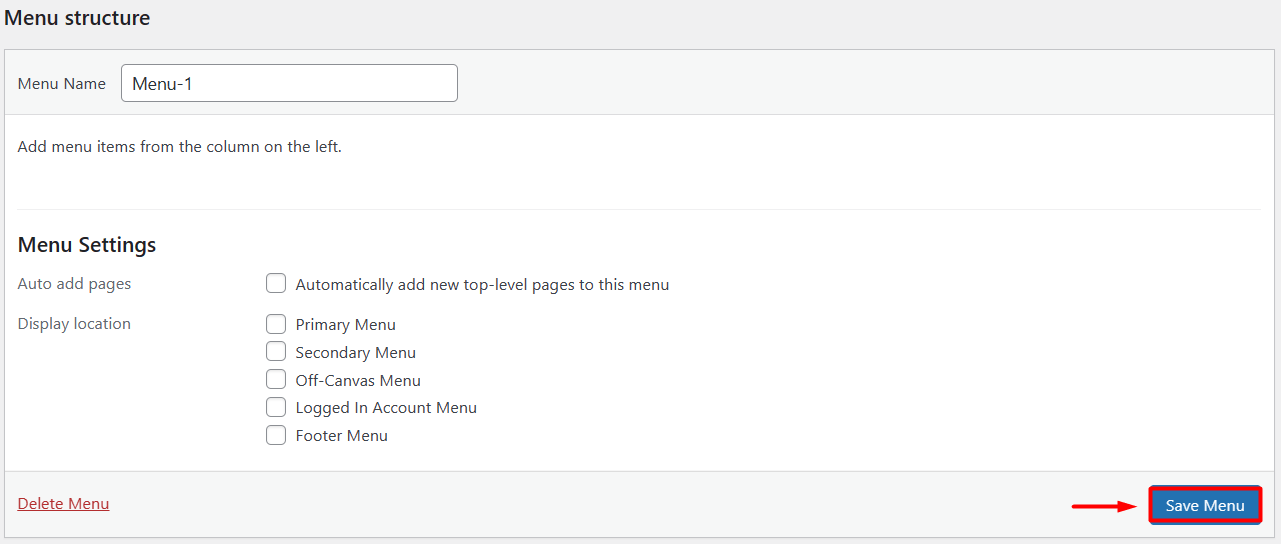
- Simply, click the “Save Menu” button on the bottom-left side of your screen.
Conclusion
So, we are now at the end of this interesting tutorial on creating a dropdown menu. We hope our tutorial has cleared the confusion and saved you time while creating the menus. WordPress has amazing customization possibilities, and it’s fun to tweak here and there to create the perfect-looking website according to your needs.
That’s all for today’s tutorial. Stay with us, as we will be giving more tutorials regularly. For more helpful WordPress-related posts, head over to the WPLearner tutorial page.