Do you want to build a website on your own but need help figuring out where to start?
Do the techy terms like localhost, cPanel, MAMP, AMPPS, etc., not make sense to you?
We have the perfect guide for you! This step-by-step guide will show you how to install WordPress locally on Mac with MAMP for free and with ease.
Building and testing a website locally on your computer is the best practice for a beginner. It gives you a better learning curve and lots of room for improvement before publishing your first website.
If you want to know how to install WordPress on your Windows PC, we have a guide for that too.
What is WordPress?
Before we start, you might wonder, “What is WordPress?”.
It is a content management system (CMS) that is user-friendly and feature-rich. The majority of website developers use it to build their websites.
You can create a website for your online store, podcast, personal blogs, or all of them together with WordPress!
You can find more in-depth information here.
What is a localhost?
As we build our website, we add items like posts, pages, pictures, and various other things.
These items need to be stored somewhere to be displayed on our website.
They can be stored on the web with services like Bluehost, Hostgator, and so on, but we might have to pay a fee to use these online services.
Instead, we could store our content locally for free on our computers while testing and experimenting with our website. When our website is ready to be published, we could switch to an online hosting service.
After our website is published, we can edit it locally and make numerous changes without interfering with our real-time website. Once all the changes are finalized, we can update our website in real-time.
To do so, we will need to create a hosting environment on our computer with the help of a local hosting application like:
- MAMP – My Apache, MySQL, and PHP.
- AMPPS – Apache, Mysql, MongoDB, PHP, Perl, Python, and Softaculous.
- LAMP – Linux, Apache, MySQL, and PHP.
- WAMP – Windows, Apache, MySQL, and PHP.
- XAMPP – Cross-platform, Apache, MySQL, PHP, and Perl.
In this guide, we will use MAMP as it is relatively easy to set up, so you can start building your dream website as soon as possible.
How to Install WordPress Locally on Mac with MAMP
The installation process of WordPress can be divided into two parts. We will need first install MAMP to create a local hosting environment in our system.
After creating a local host in our system, we will continue installing WordPress locally.
How to Download and Install MAMP
MAMP has two different variants; depending on our processor, we must select the right one. To check which version is meant for you, click on the Apple icon and then “About This Mac.” The opened popup will have all the information we need to make our decision.
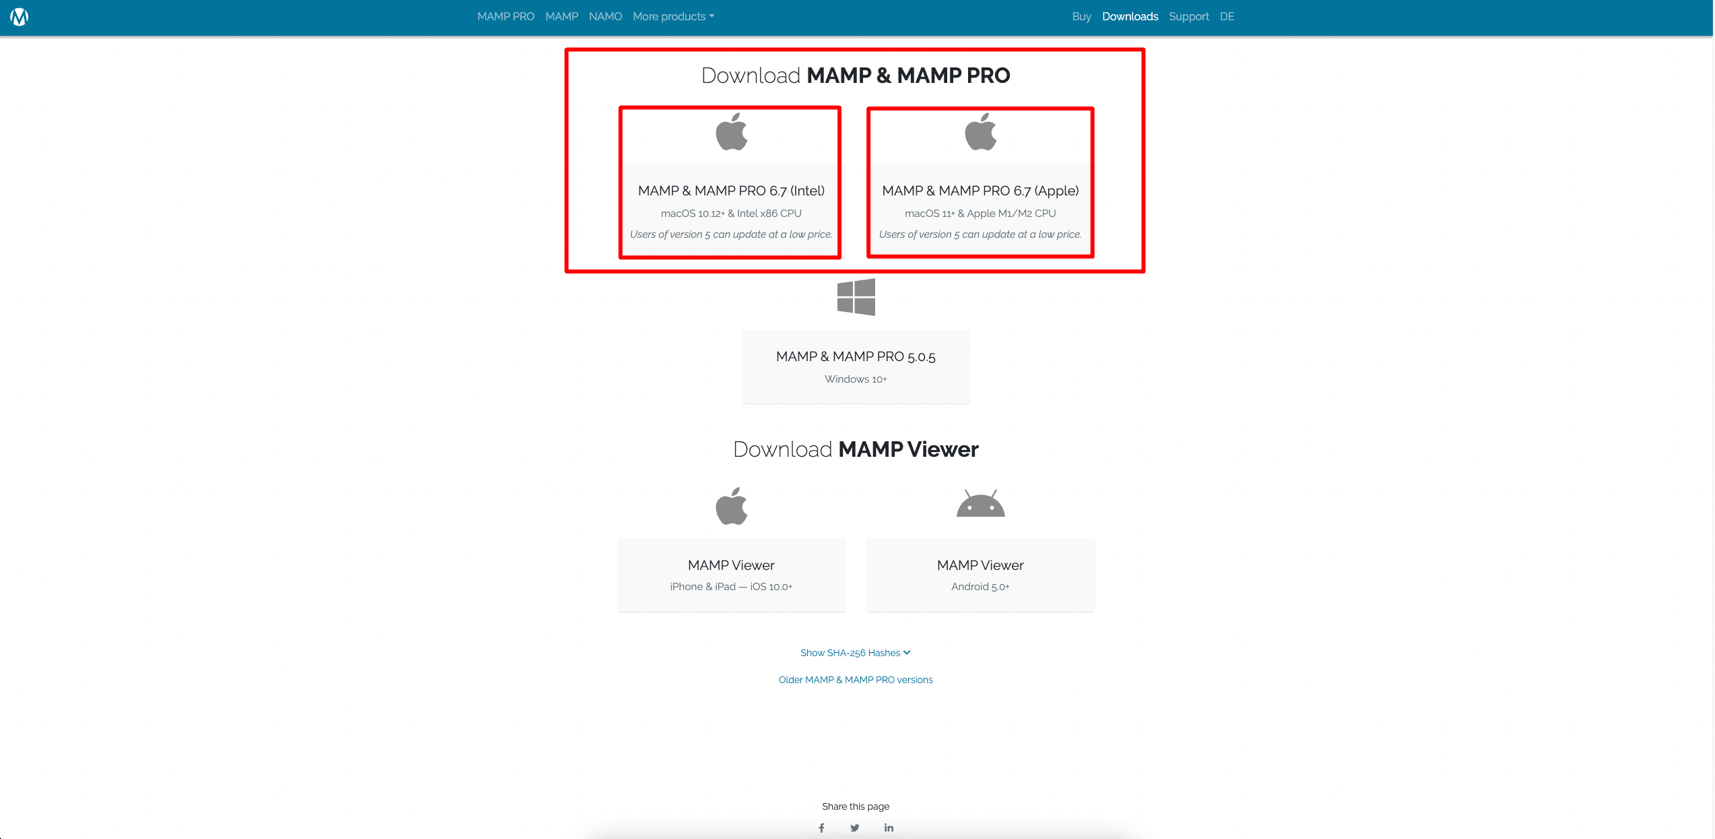
- Go to Finder →Download → MAMP installation file.
- Download MAMP from their official website.
Once the download is completed, we will now install it into our device.

- Install MAMP
- Continue with the simple installation process till you get to the “The installation was successful” screen.
- Click on “Close”.
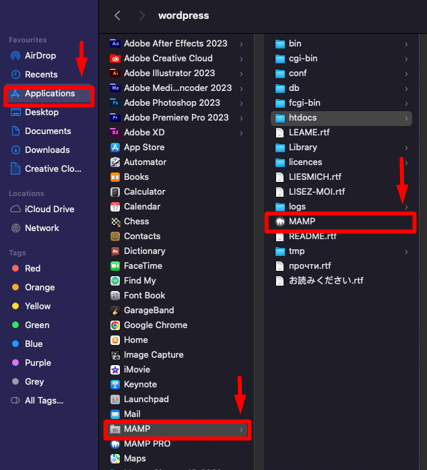
Once the installation is completed, we must now head over to the MAMP’s directory to create a folder for our website.
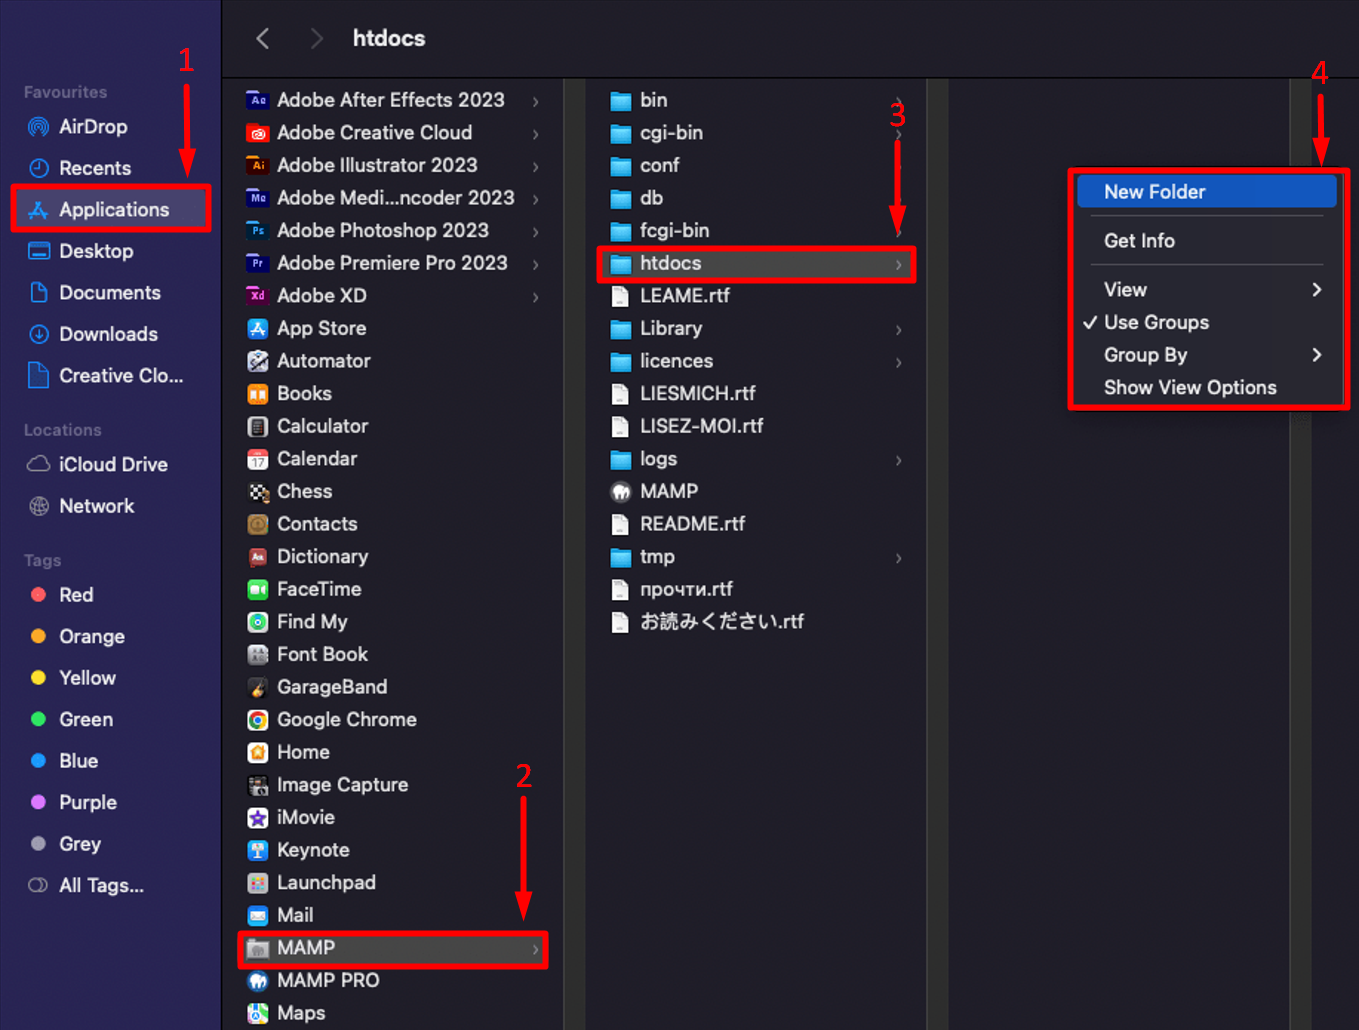
- Go to Finder → Applications → MAMP → htdocs
- Right-click and create a New Folder.
We should name this folder as we would name our website. In this guide, we will be using “testwordpress” as the name of our website so we named the folder the same.

- Type your website’s name as the folder name.
How to Download and Install WordPress
Now that we are done setting up the localhost, we must now download WordPress from its official website.
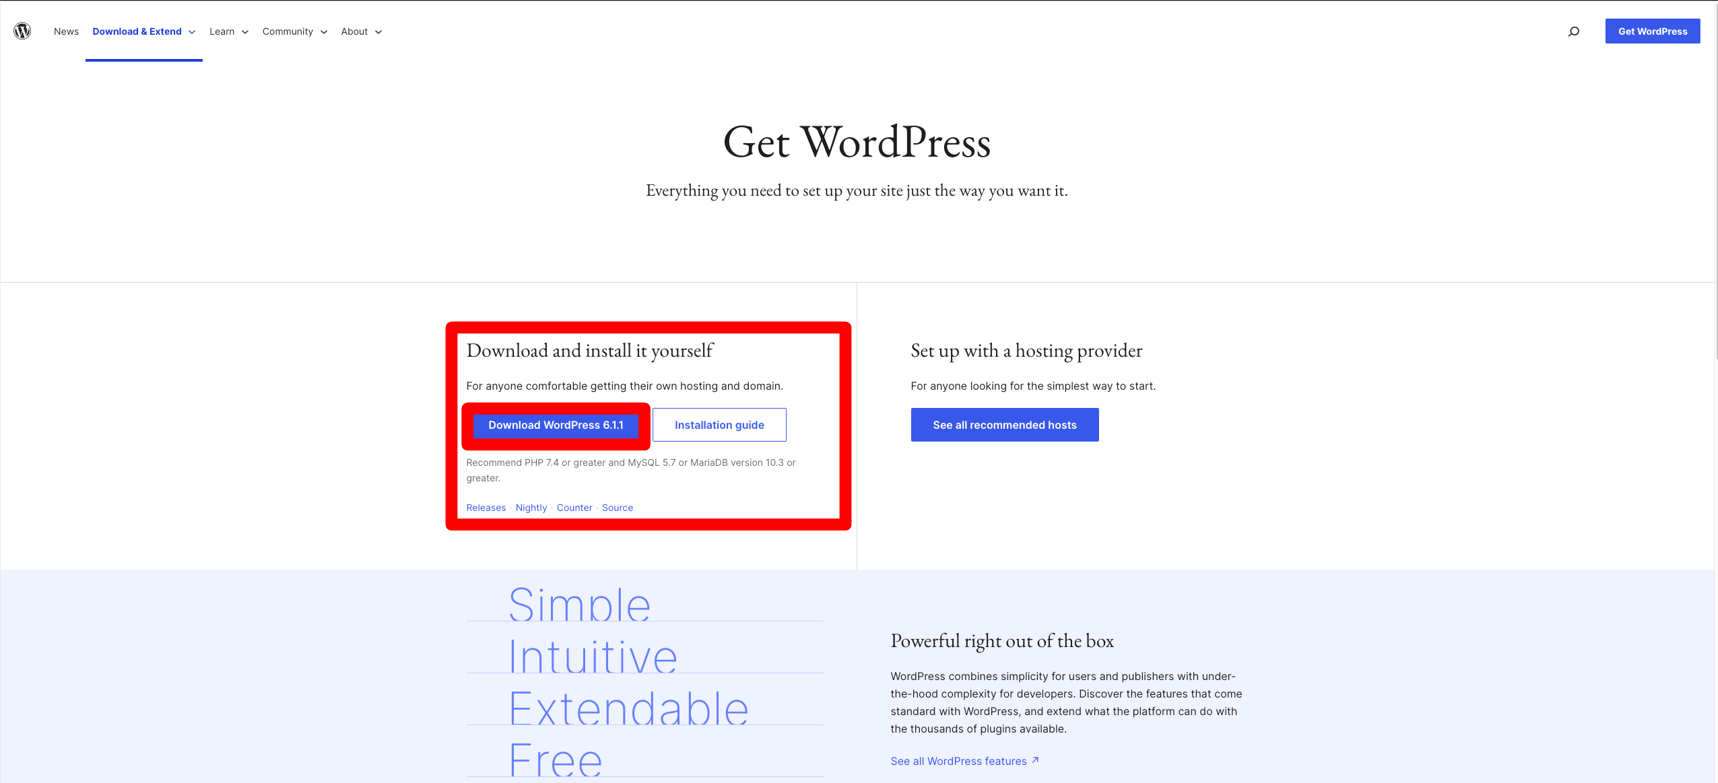
- Click Download.
After the download is completed, just unzip the file and access the folder created
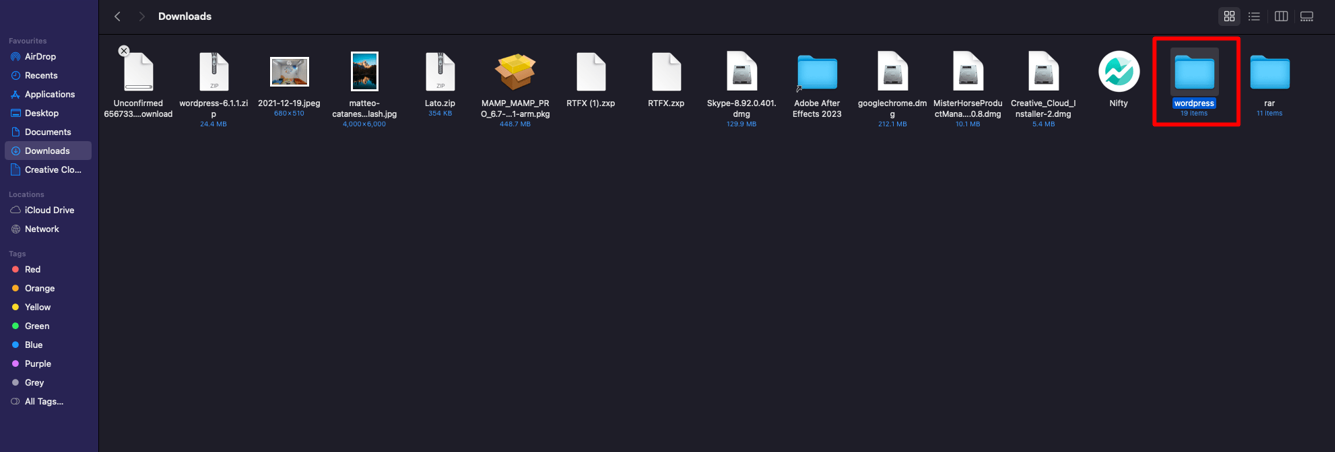
- Unzip the downloaded file.
- Open the folder.
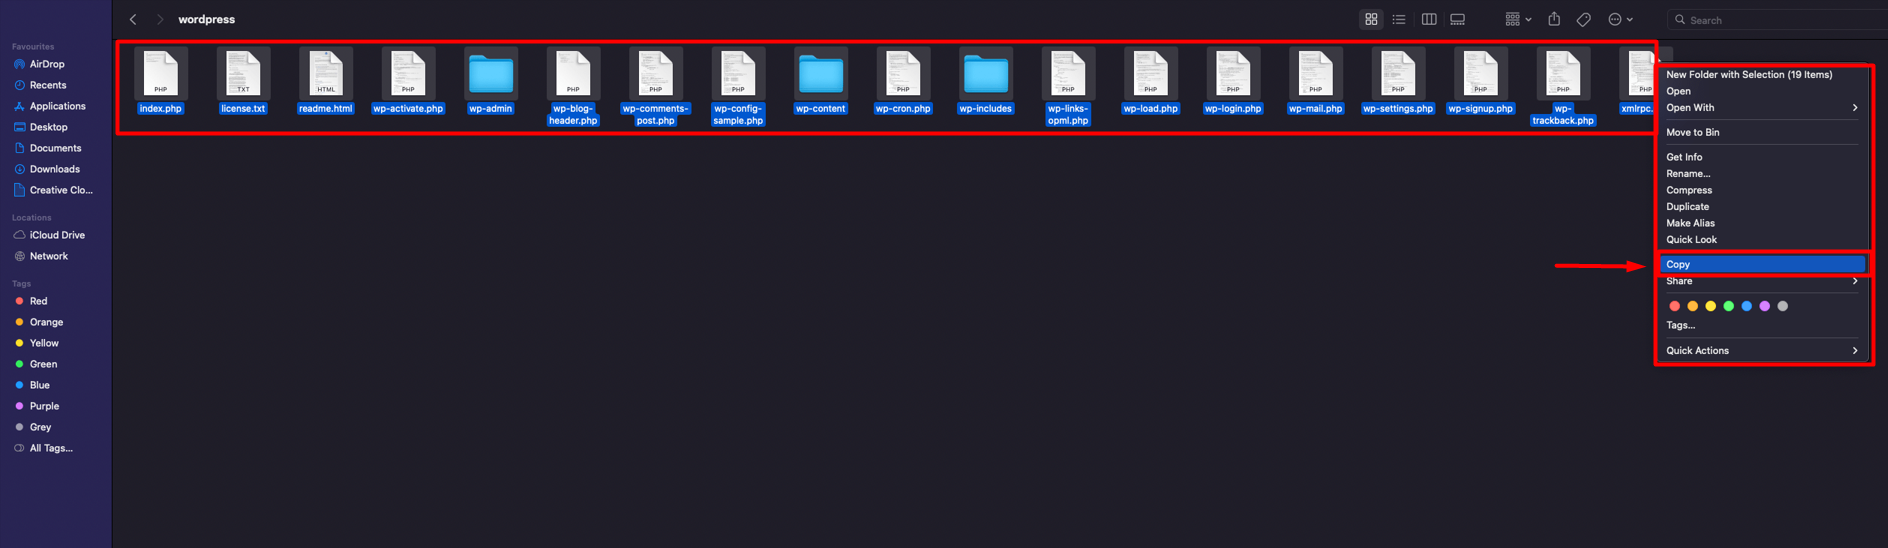
- Copy all the content inside the folder.
The contents of the folder need to be copied to the folder which we created earlier in MAMP’s directory.
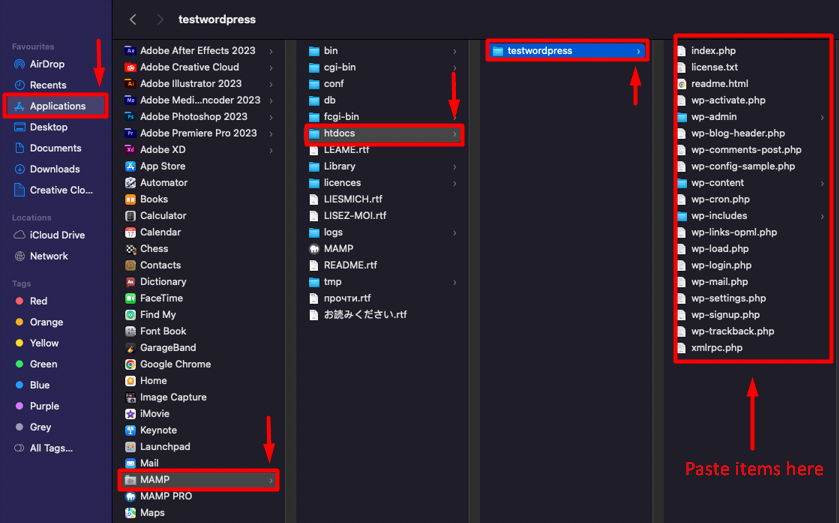
- Go to Finder → Applications → MAMP → htdocs → testwordpress (your website’s name)
- Paste the items here
With that, the comparatively difficult part is done. Everything from this point onwards is fairly simple. We will begin by starting MAMP.
- Go to Finder → Applications → MAMP → MAMP
The MAMP app should pop up on our screen now, along with a promotion that we can ignore. At this point, we don’t need to worry about any of the configurations. All we need to do is press “Start”
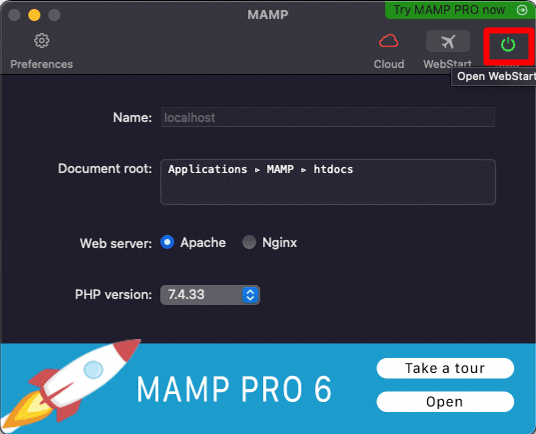
- Click on “Start”
- Wait till MAMP loads up the server, this may take some time.
Once the loading process is complete. Our browser will automatically take us to the MAMP’s welcome page. When the welcome screen appears, we can take it as a confirmation that the installation was successful.
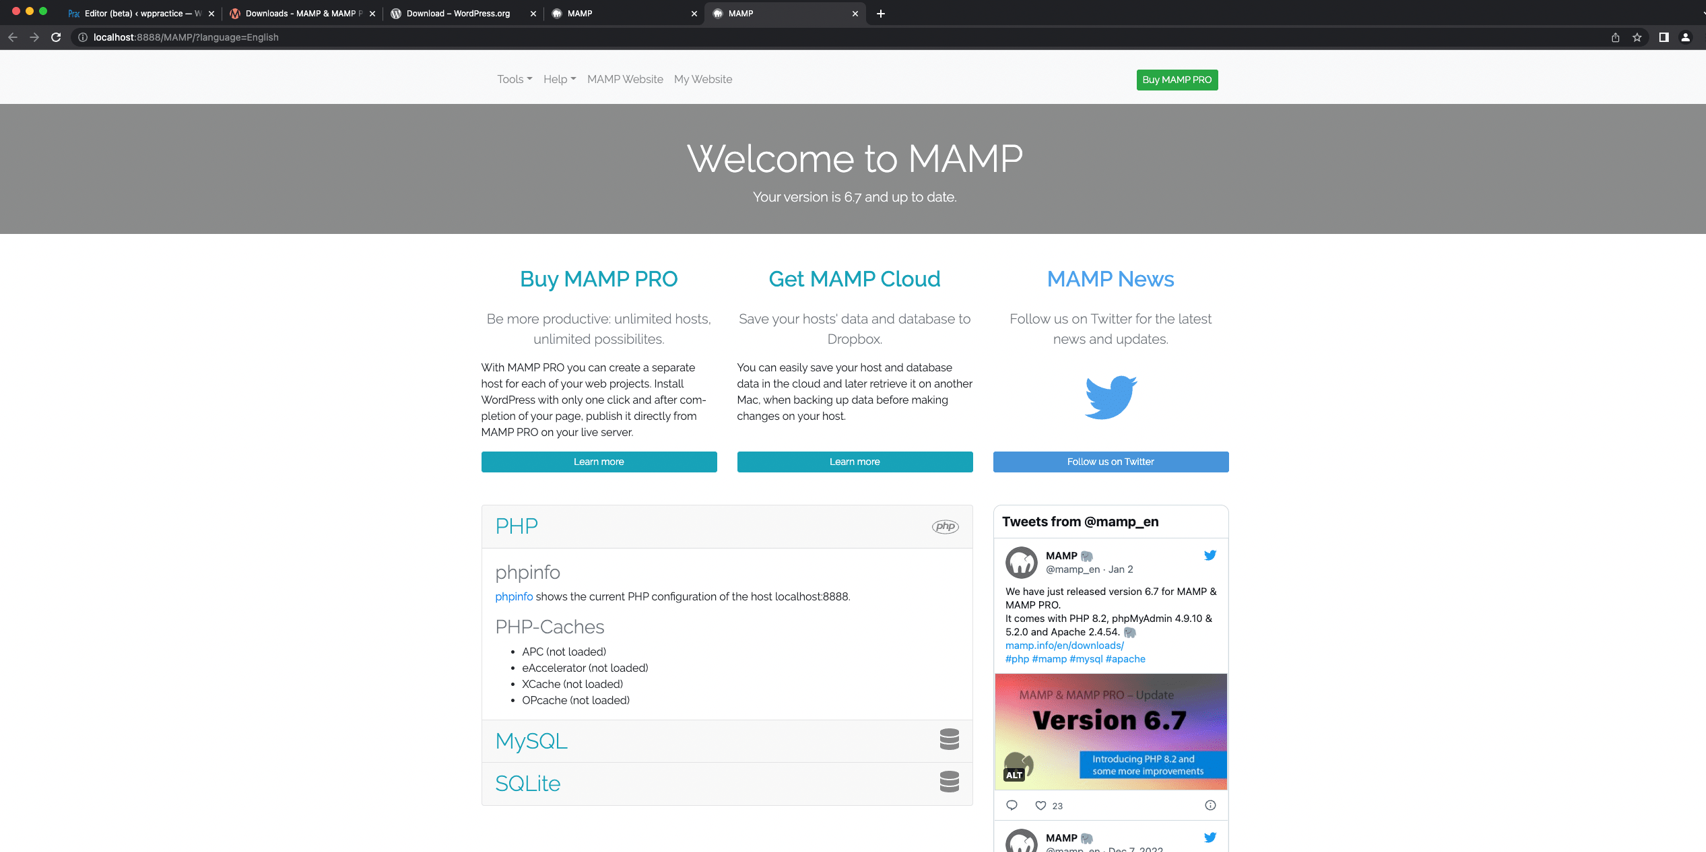
Once the server is up and running, we need to visit the admin panel to create our database. We can access the admin page by clicking on MySQL on the welcome page, which will display some of MySQL’s settings. All we need to do is click on “phpMyAdmin”
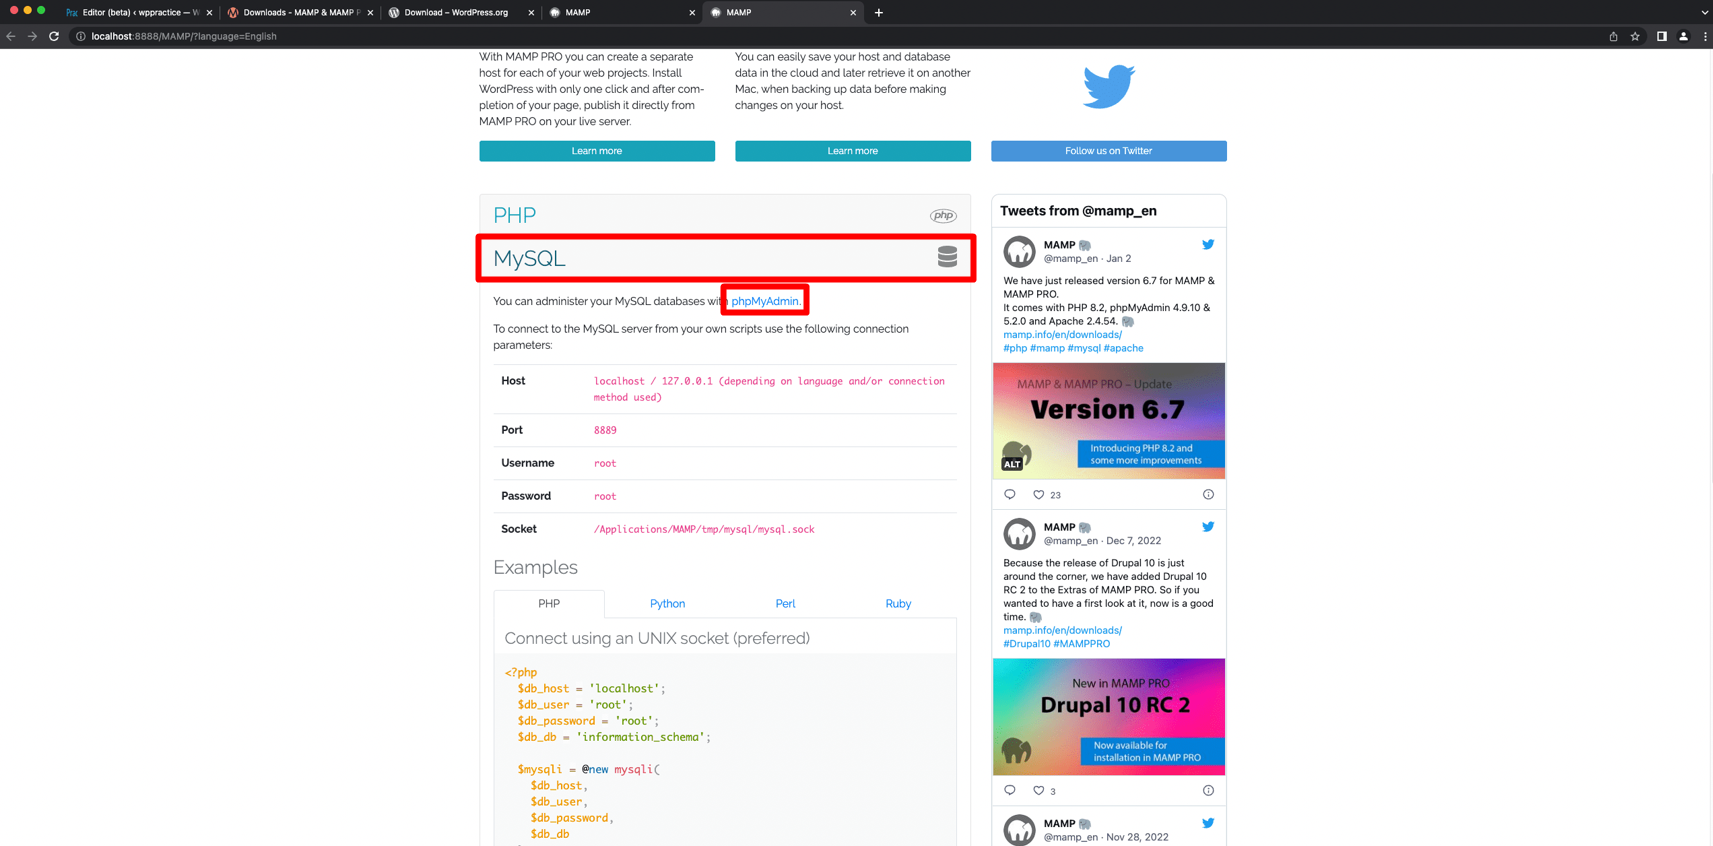
- Click on MySQL to open its configurations.
- Click on “phpMyAdmin” to access the Admin Page
We are now on the “phpMyAdmin” page. What we want to do on this page is to create a database for our website. It is advisable to keep the name of the database closely related to our website.
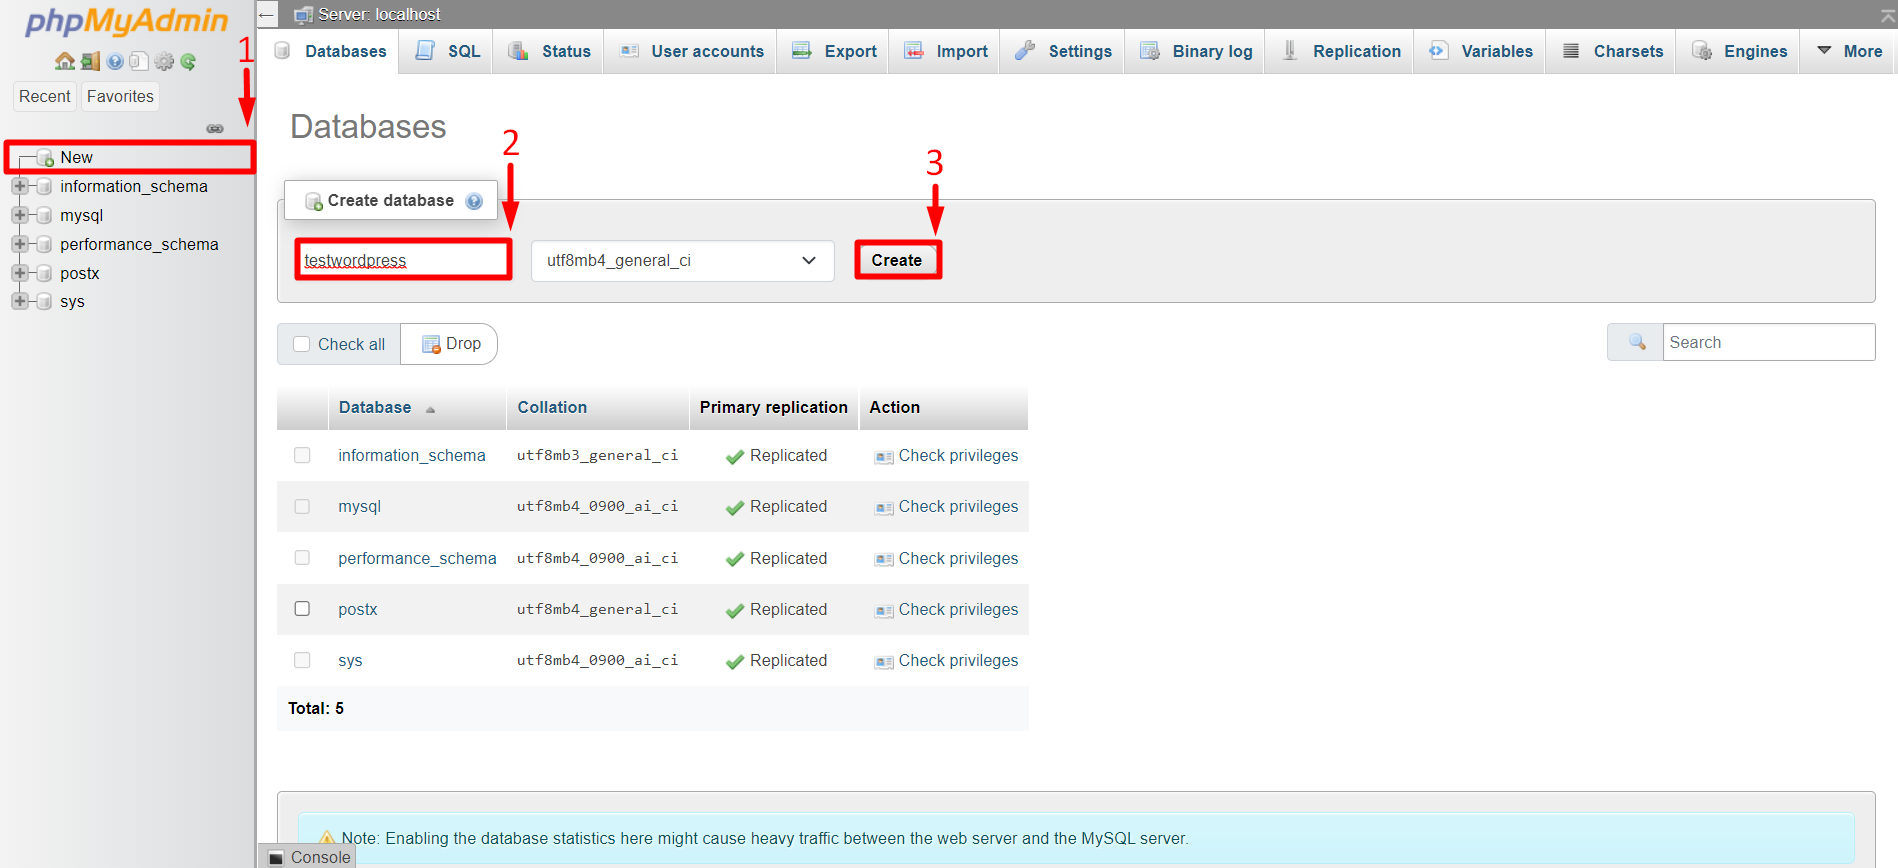
- Click “New” to create a new database
- Enter the name of your database.
- Click Create.
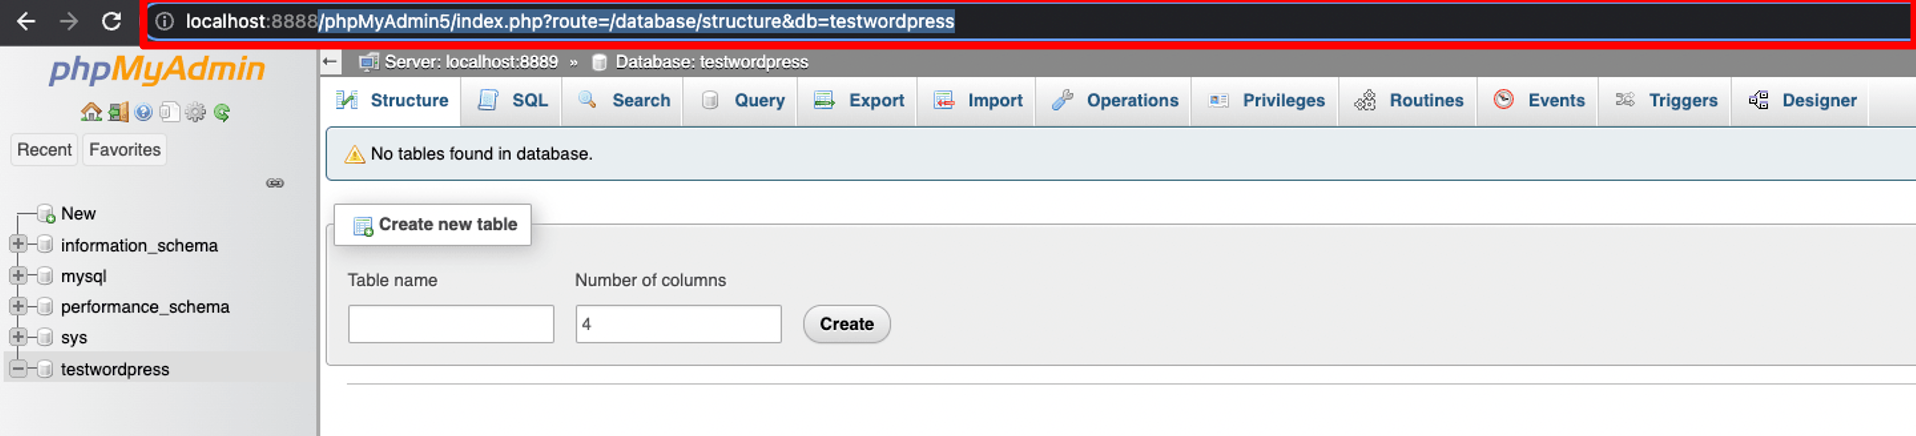
The database has been created for our website. We will type localhost:8888 in the address bar of the browser to access our database. You could also access the “phpMyAdmin” page by removing everything besides “localhost:8888” from the address bar.
- Type localhost:8888 in your browser’s address bar and press Return.
We are now on the database page. Clicking on the link with our website’s name should start the final process of WordPress installation.

- Click on the name of your website.
We are now in the final stretch of the marathon. The remaining steps require us to fill out details related to our website. This is the WordPress website setup page.
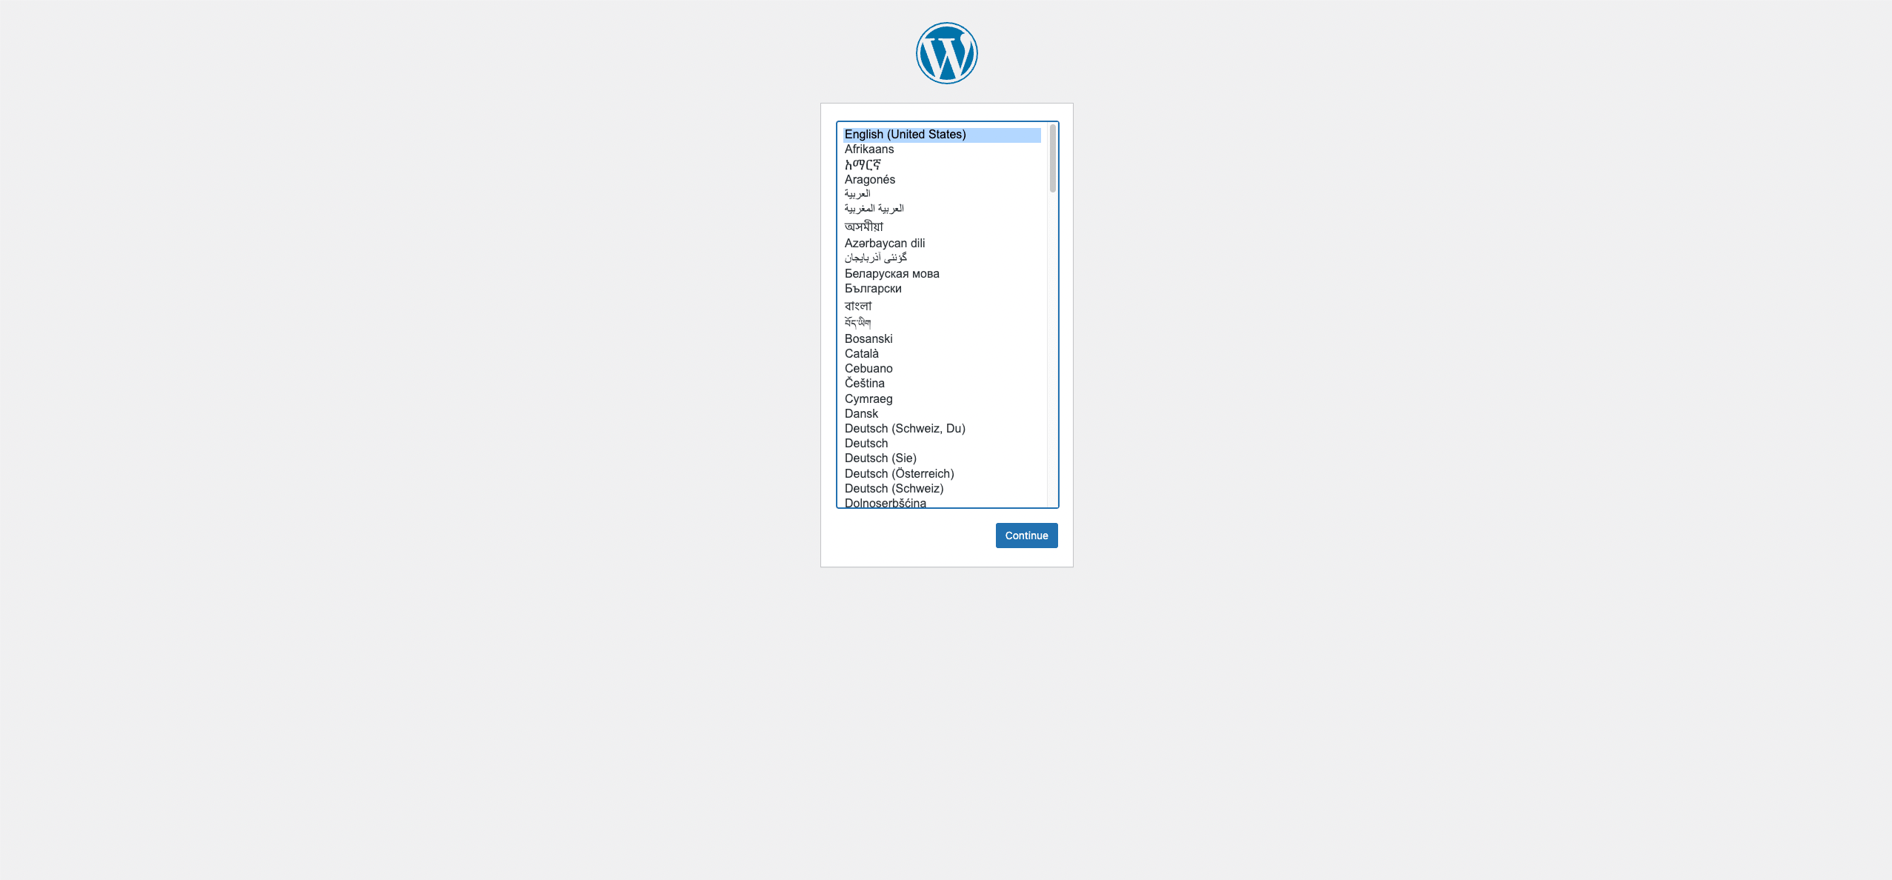
- Select your preferred language.
- Click on “Let’s Go”.
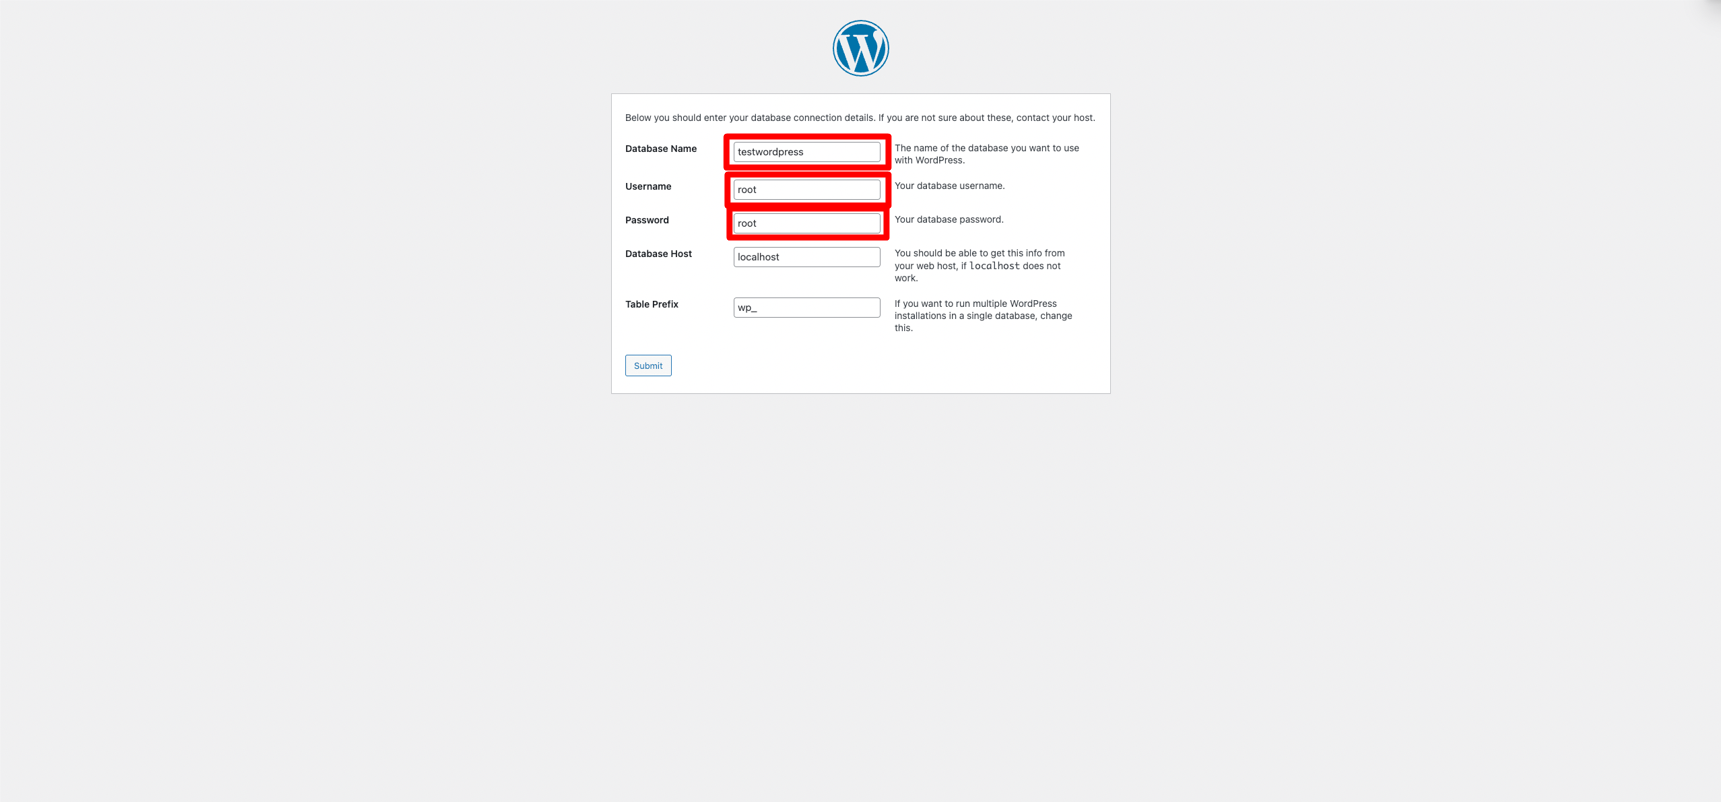
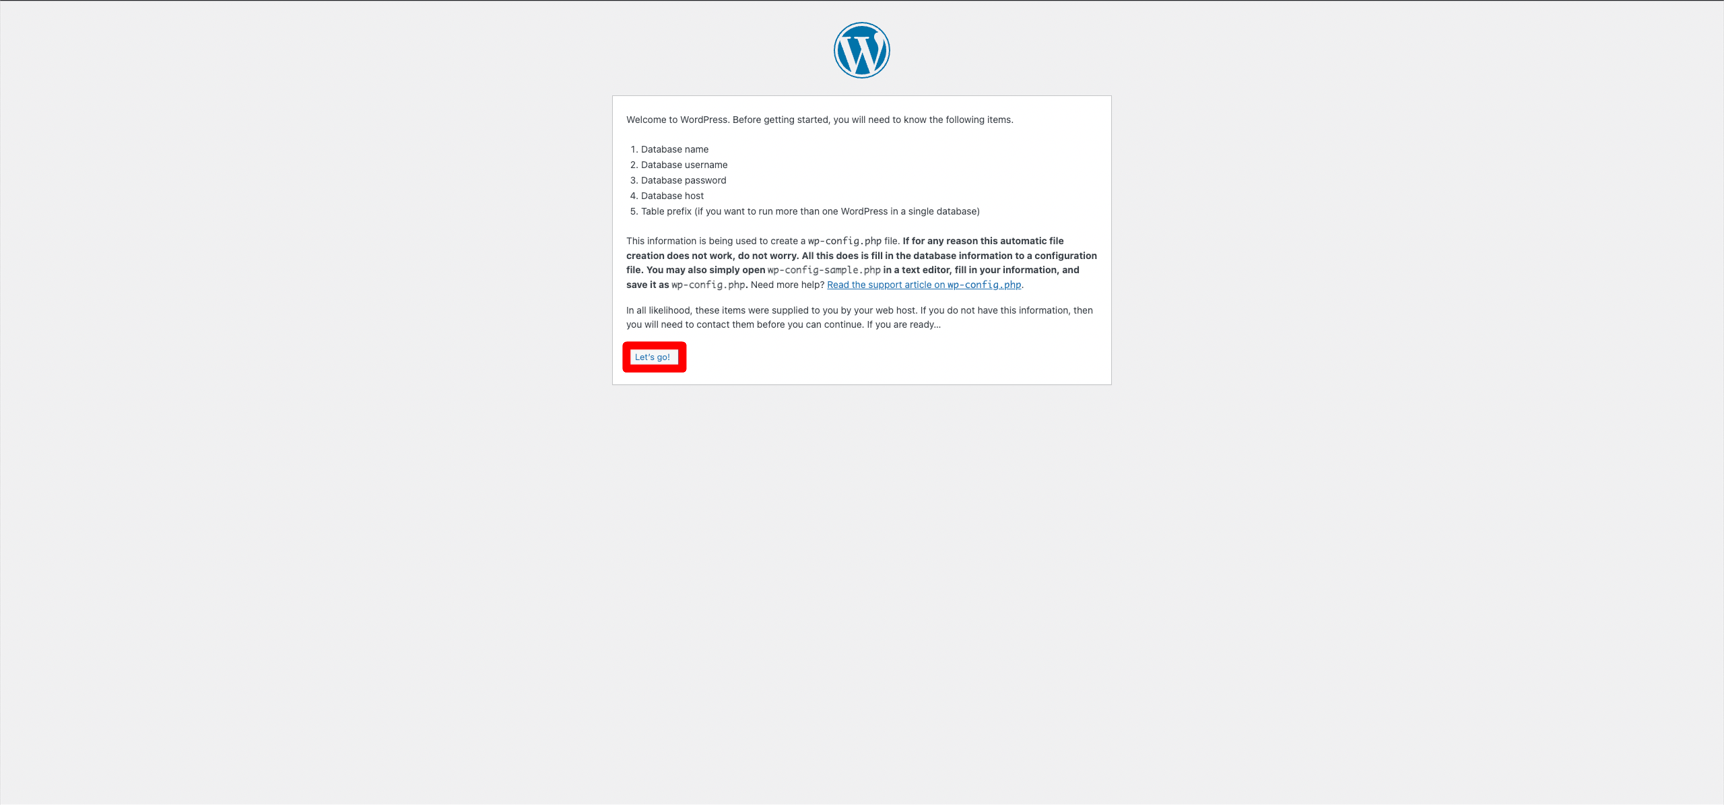
- Enter the name of your database
- Enter the Username & Password, which are root by default
- Leave the rest two columns as they are.
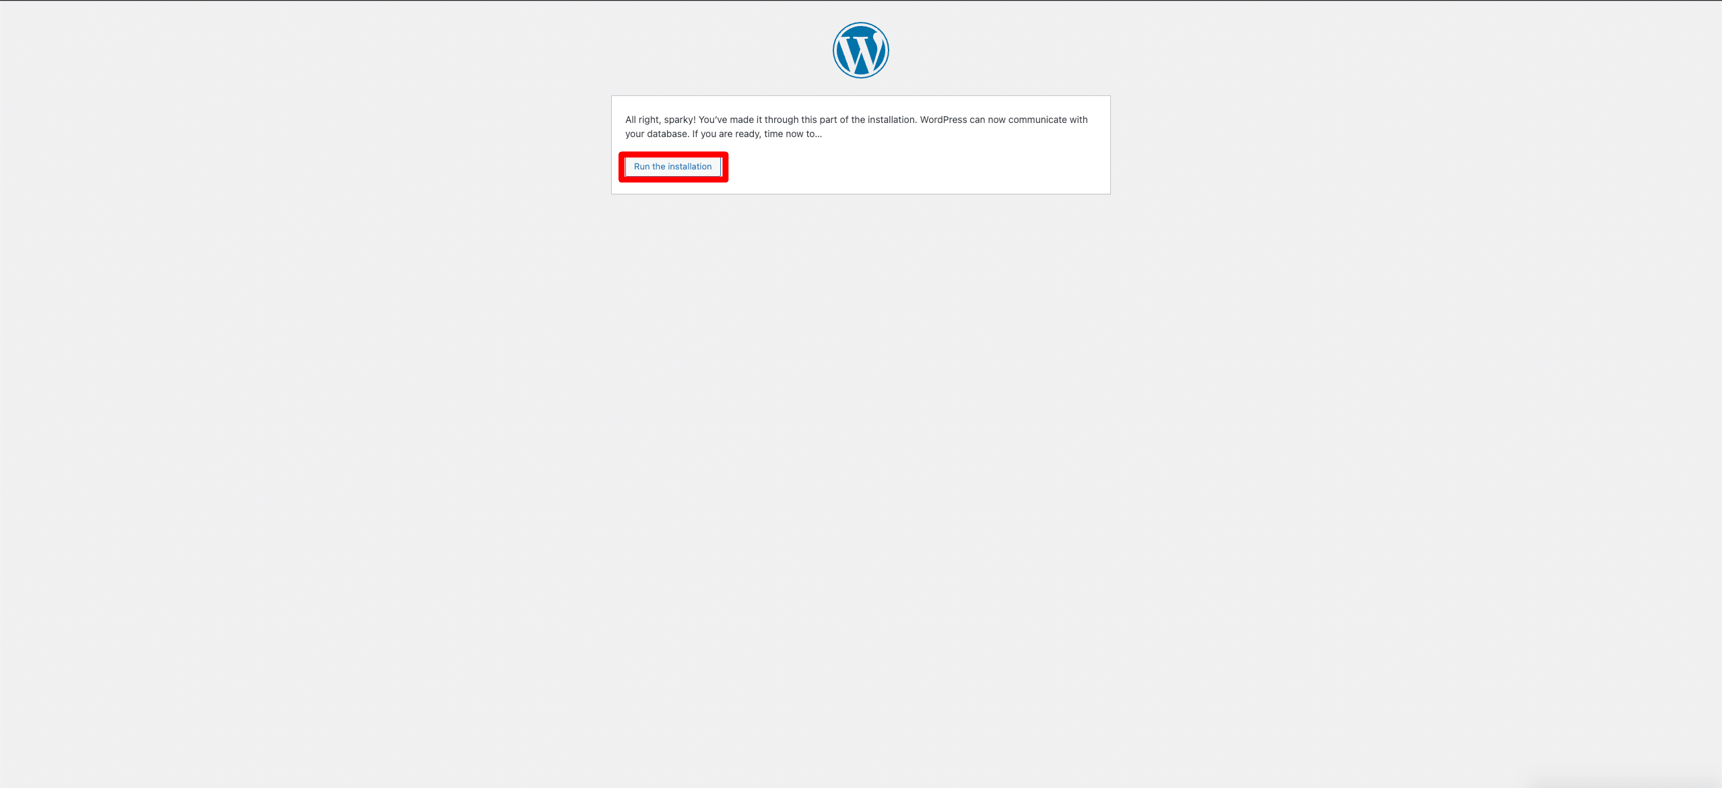
- Click on “Run the Installation”
On this page, we need to enter the details of our website.
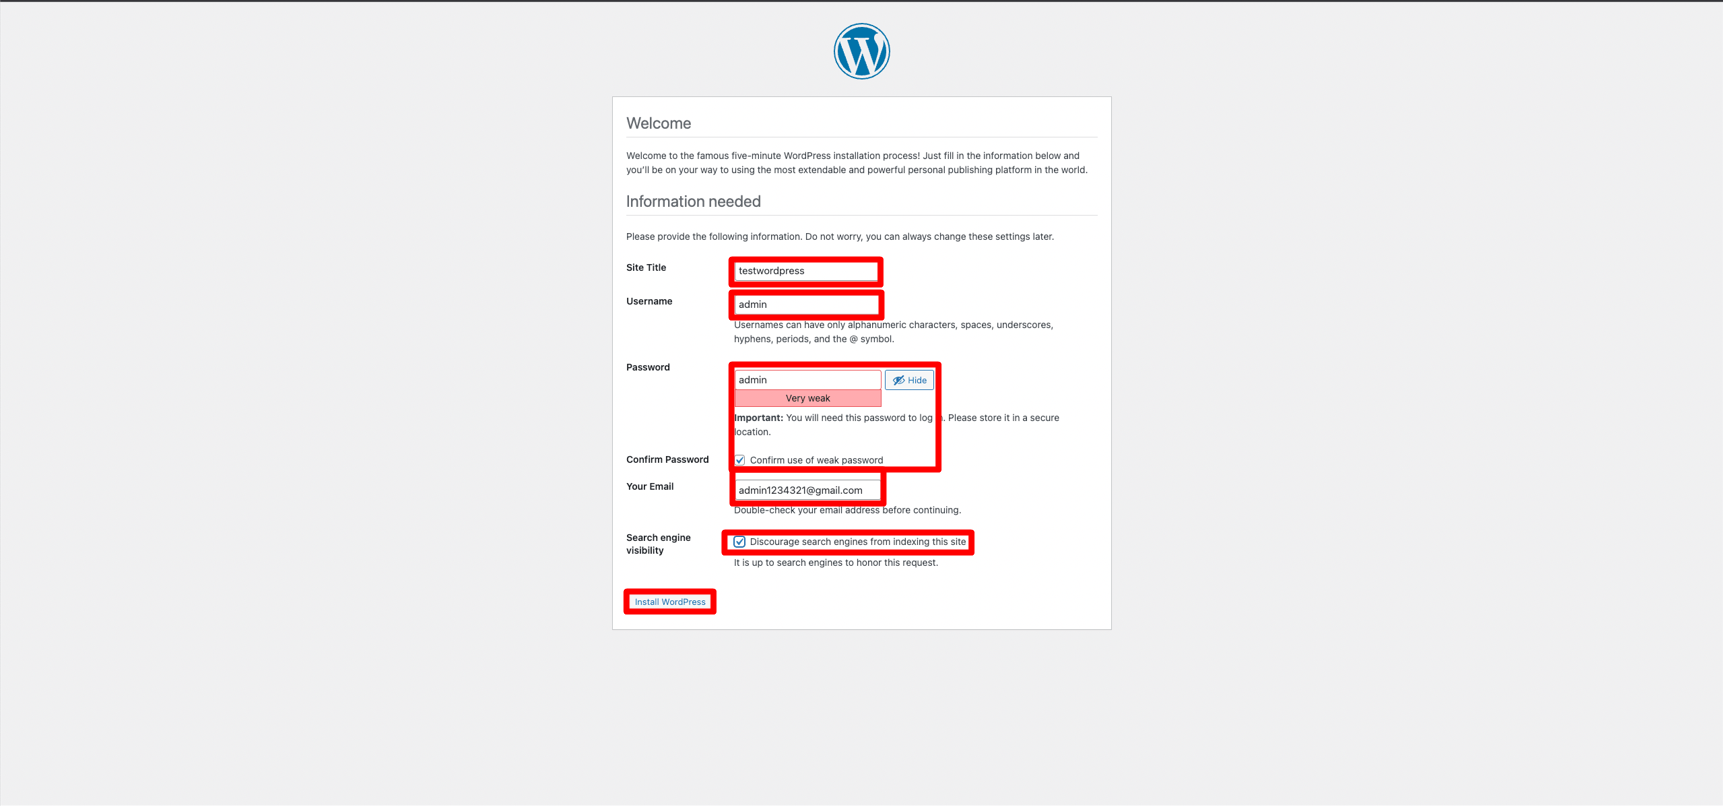
- Enter the site title
- Create a username
- Create a password
- Check “Confirm use of weak password” if needed
- Check “Discourage search engines from indexing the site.” If you don’t want the search engine to display your website. (You can change this later if you change your mind.)
- Click “Install WordPress”
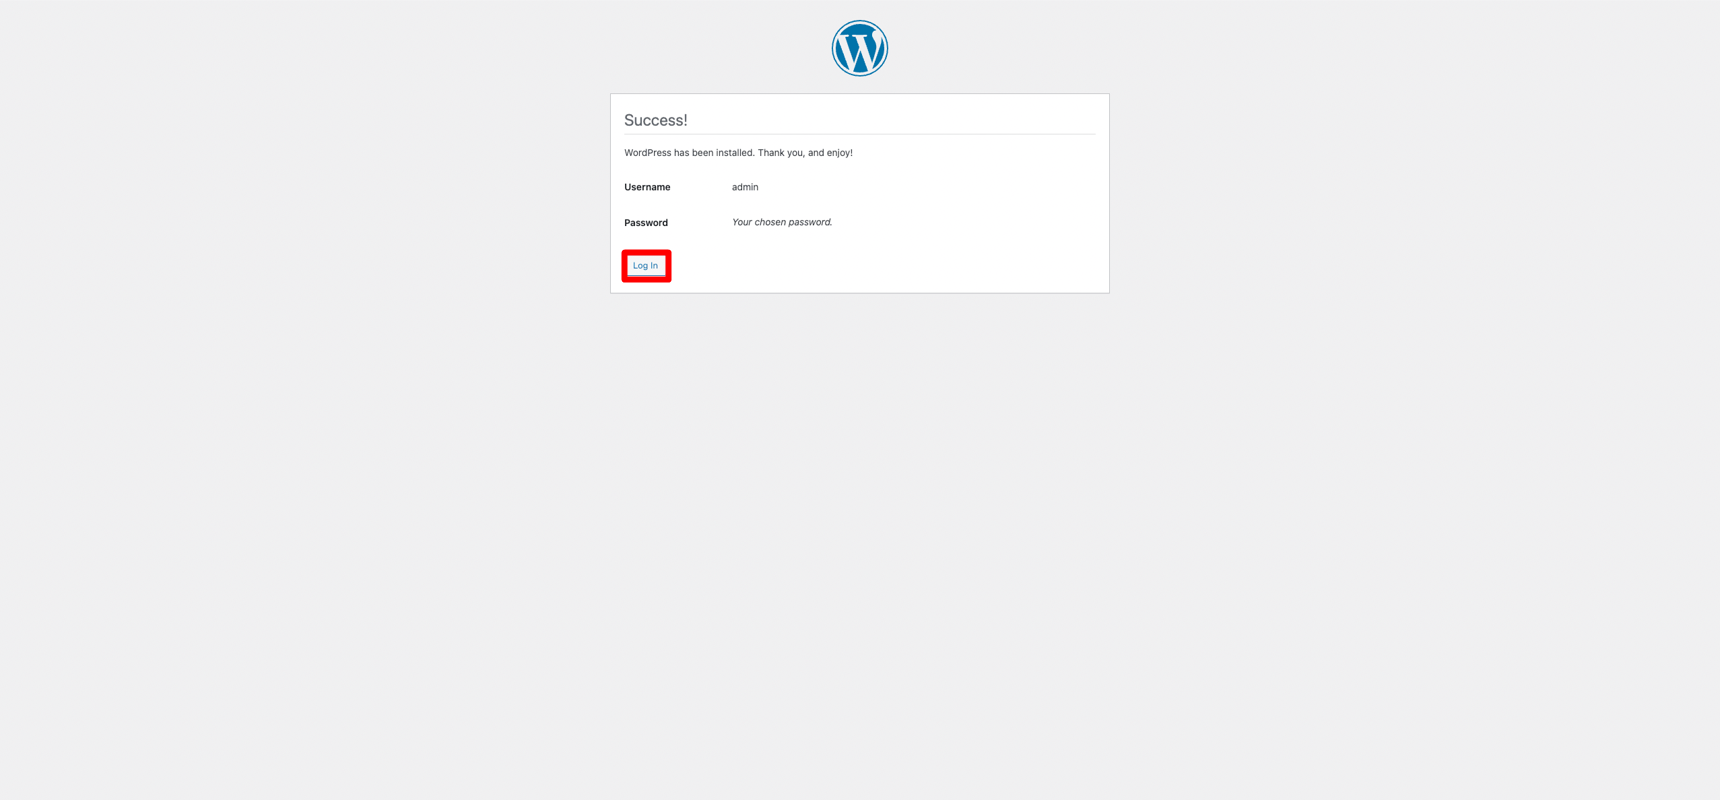
- Click on “Log in”

- Enter the login details
- Click on “Log in”
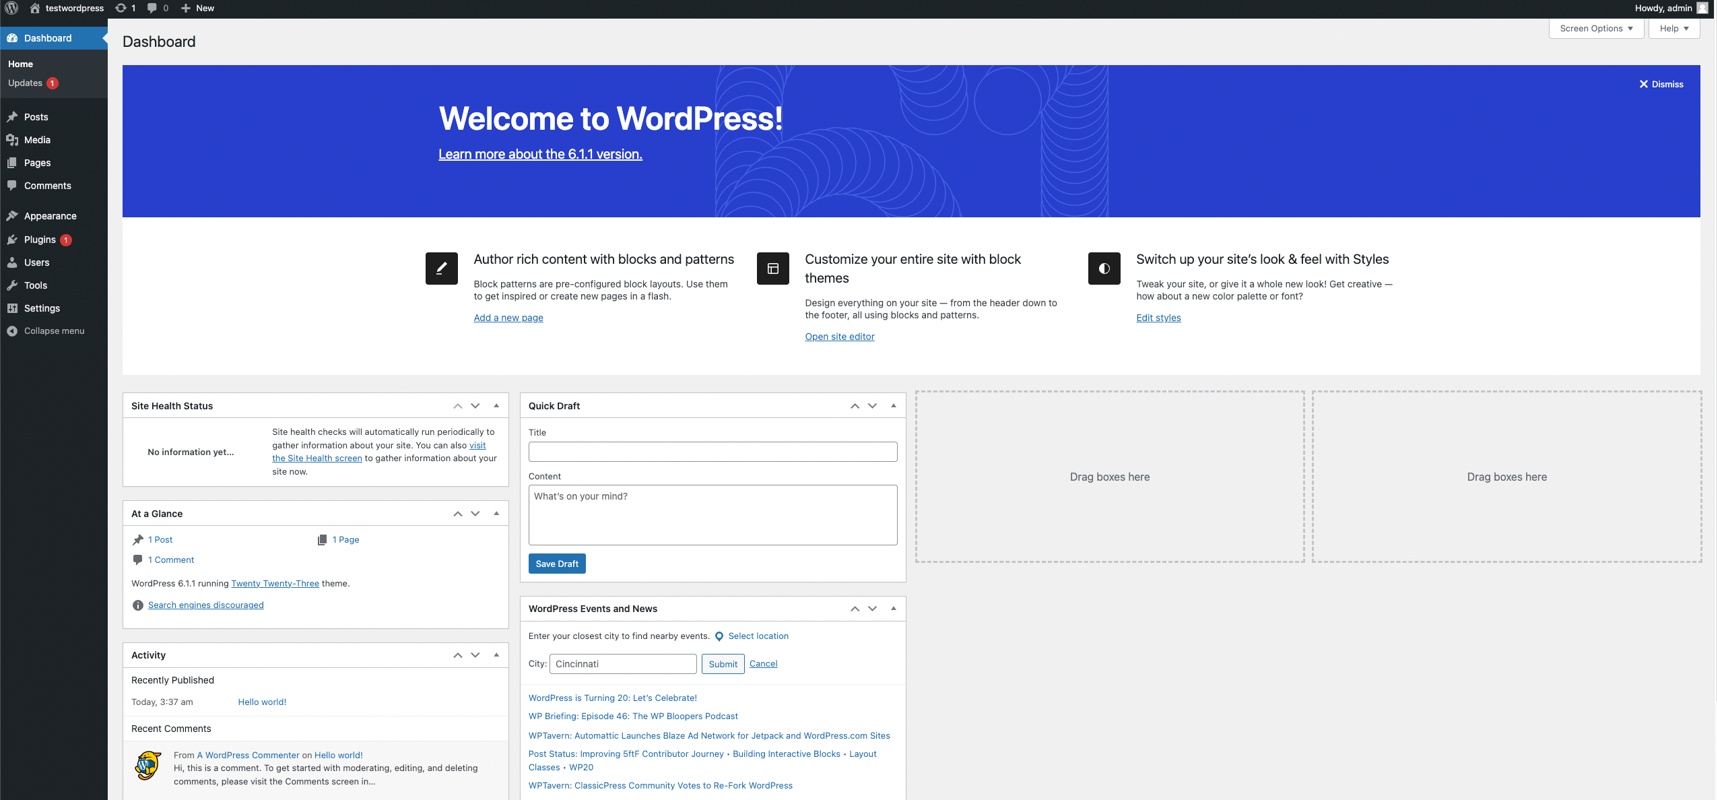
Our setup is completed and we are good to go! What we are seeing in front of us is the WordPress dashboard.
We can create pages, posts, and content that we want on our website. Learning how to build a website can be intimidating at first. Once we understand the basics of website development, we can get more creative with our approach.
There are countless tweaks and customization that we can make to our website, it can be fun to play around with different themes and plugins present in the ecosystem. To learn more about themes and plugins, click here.
We constantly keep updating our blog to help beginners and even seasoned developers. Stay tuned with WPLeaners for more guides, tips, and updates.