A menu is a tool to make our website more navigational and look much cleaner. WordPress has a default way of displaying our menus in the front end.
As great as the default menu layout appears, it may not be how we want it. But, we can customize it to meet our needs.
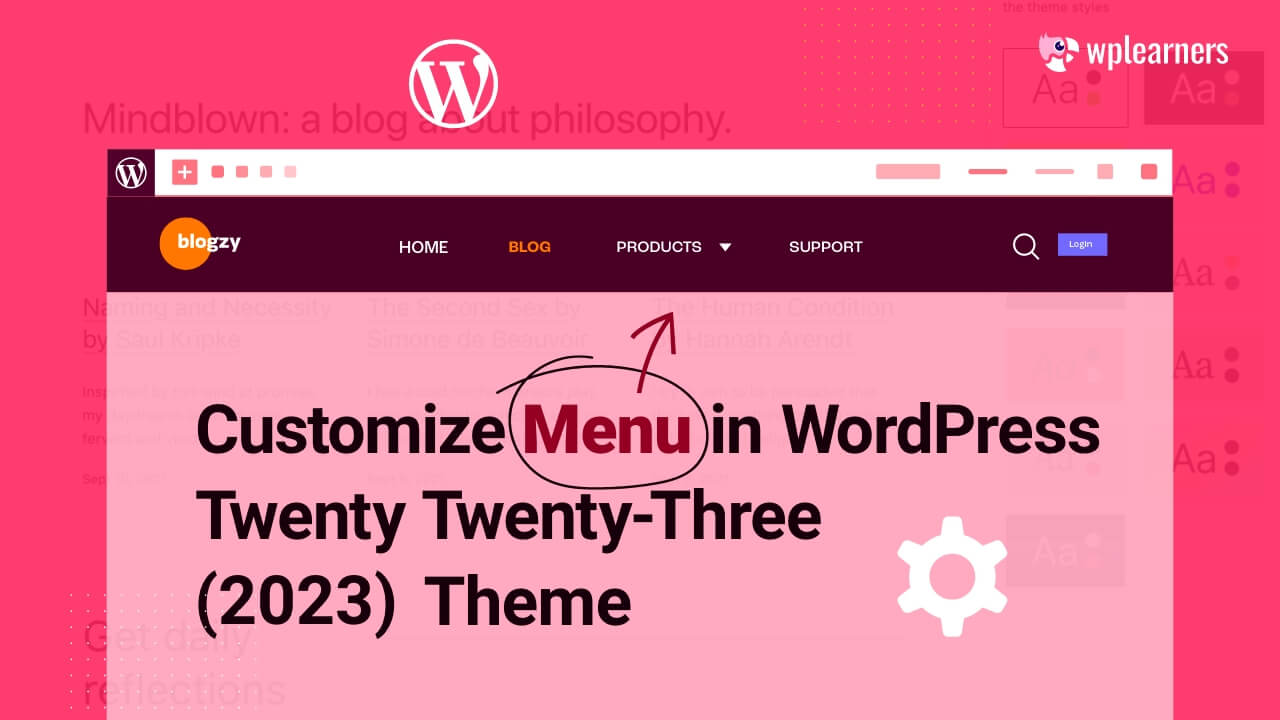
In this tutorial, we will show you how to customize menu in WordPress Twenty Twenty-Three theme and go through various customization options provided by WordPress, and how we can implement them to make changes to the menus of our website.
Why Do We Need to Customize Our Menus?
Menus are there to make life easier for people who visit our website by saving them time. We can provide links to pages or posts that they want to see or that we want to show them.
With the update to menus in recent years, we can customize different menus in different locations. Visitors can differentiate one menu from another.
We can now change the locations, typography, color, orientation, justification, and more with the help of the Full Site Editor.
So let’s get started!
How to Customize Menu in WordPress Twenty Twenty-Three Theme
Like its predecessor, the Twenty Twenty-Three theme doesn’t allow us to customize menus from the dashboard.
We must head to the Full Site Editor to create or make changes to the menu.
We can create or customize menus in the Full Site Editor using the Gutenberg Blocks.
In case you did not create a menu and don’t know how to create one, we covered that in our previous post, How to Create Menus in WordPress.
Once you have created a fresh menu, you can head back here to learn how to customize a menu.
Full Site Editor
The Twenty Twenty-Three theme uses Full Site Editor for customizing the menu. To get started, we must head to the backend of our website and click on the Editor tab under Appearance.
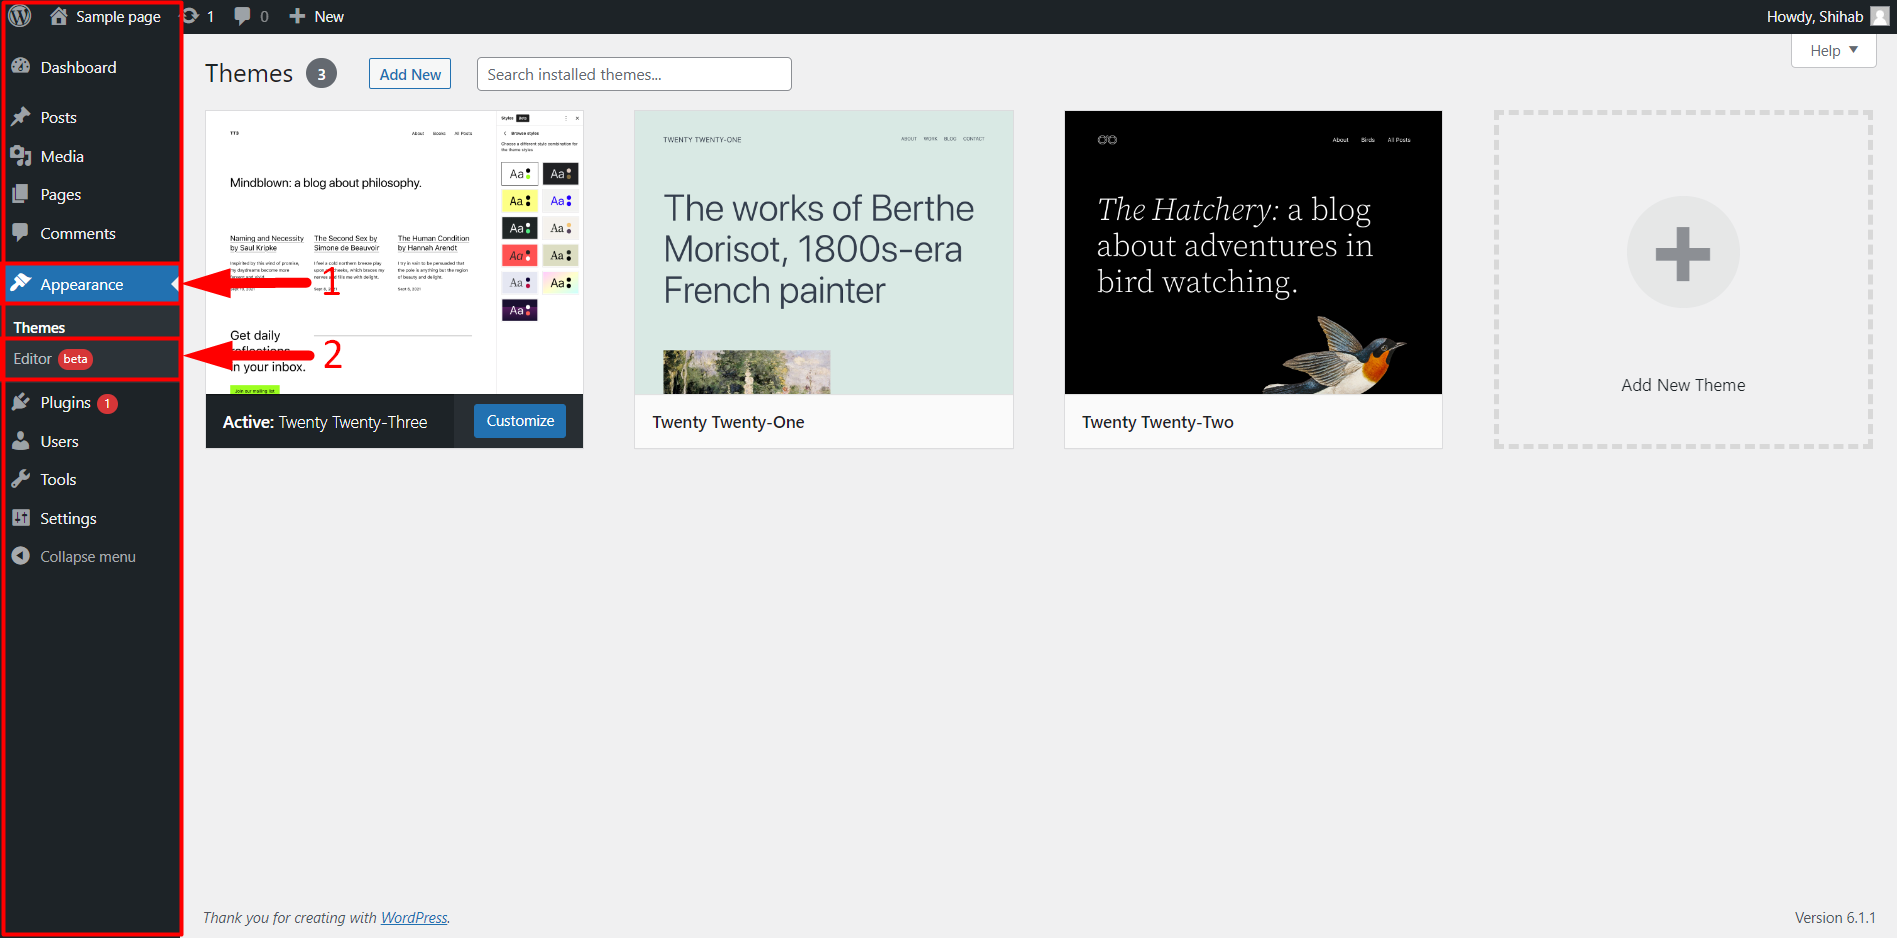
- Go to the Dashboard.
- Click on Appearance.
- Click on Editor.
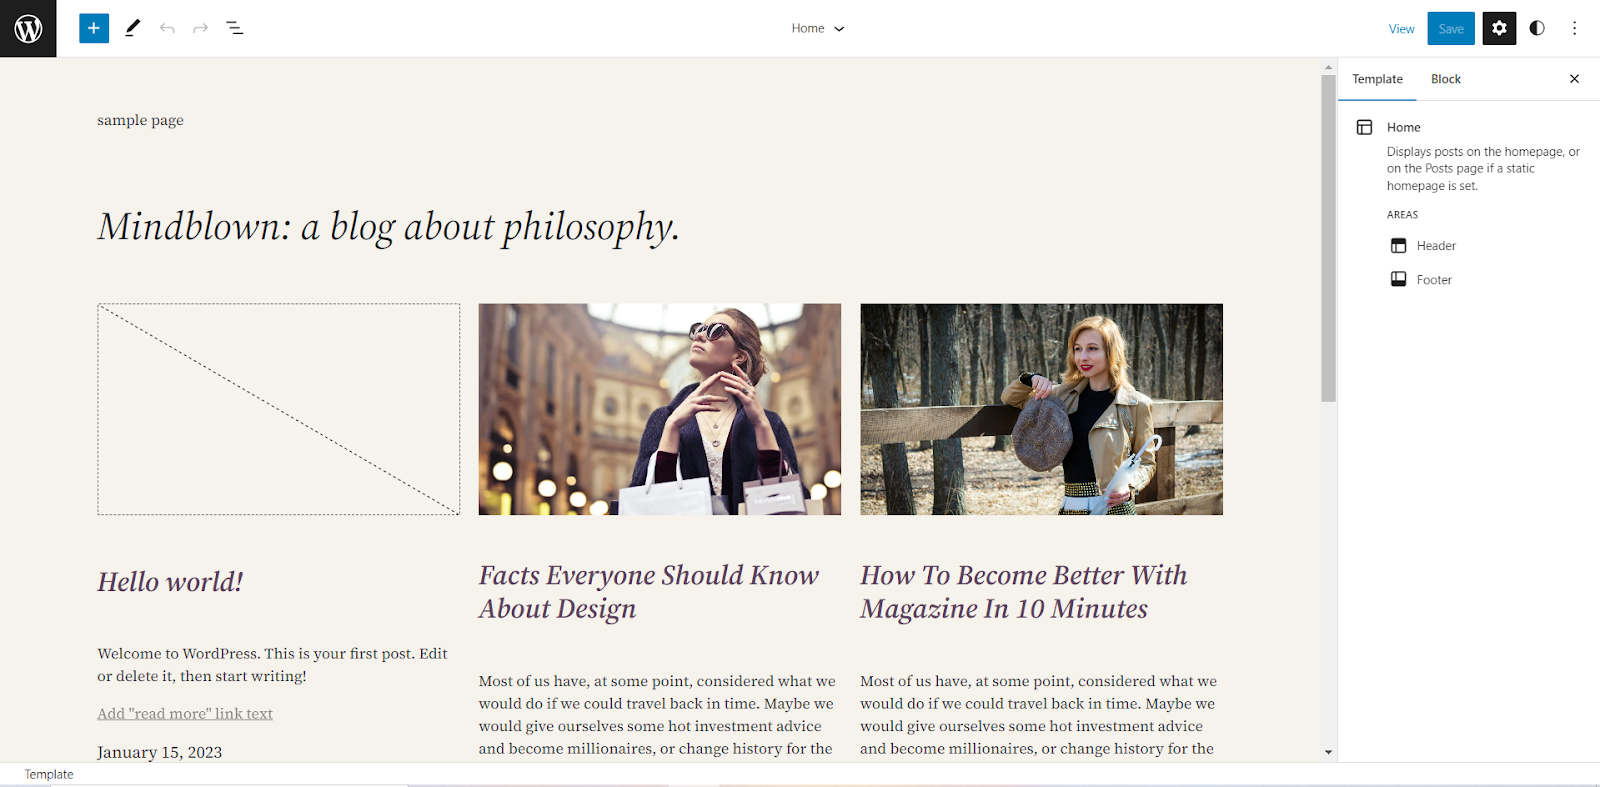
We are now in the Full Site Editor.
Location Selection
Unlike most themes, the Twenty Twenty-Three theme allows us to place the menu wherever we want. It’s not predetermined or preset by the theme that we are using.
We can set the location using the Gutenberg block, anywhere we could insert a block we can now insert a menu.
Full Site Editor uses navigation blocks as menus. To place a menu, we must click on Add Block and search for navigation in the toolbar. The navigation block serves as a menu in the front end.
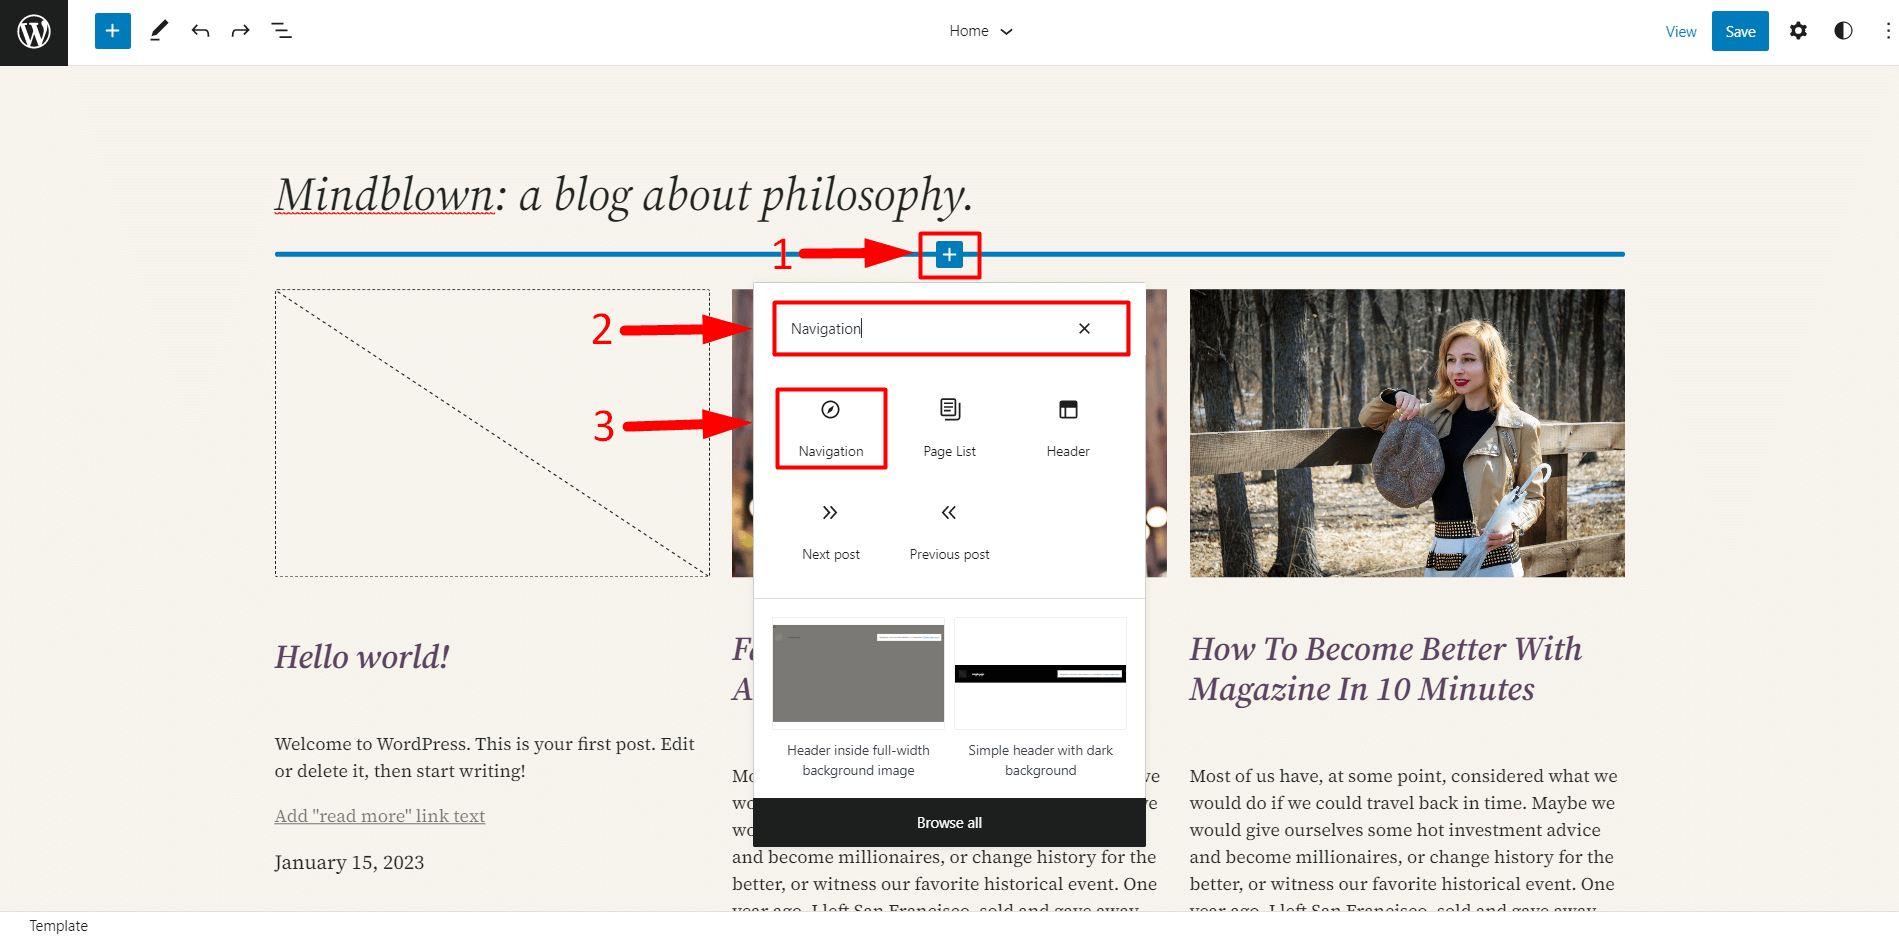
- Click on Add Block.
- Search for Navigation.
- Click on Navigation Icon.
Once we have set the navigation block in our preferred location, the latest menu that we created will show up. If we want to display another menu or create a new menu, we can do so from the block settings on the right side of our screen.
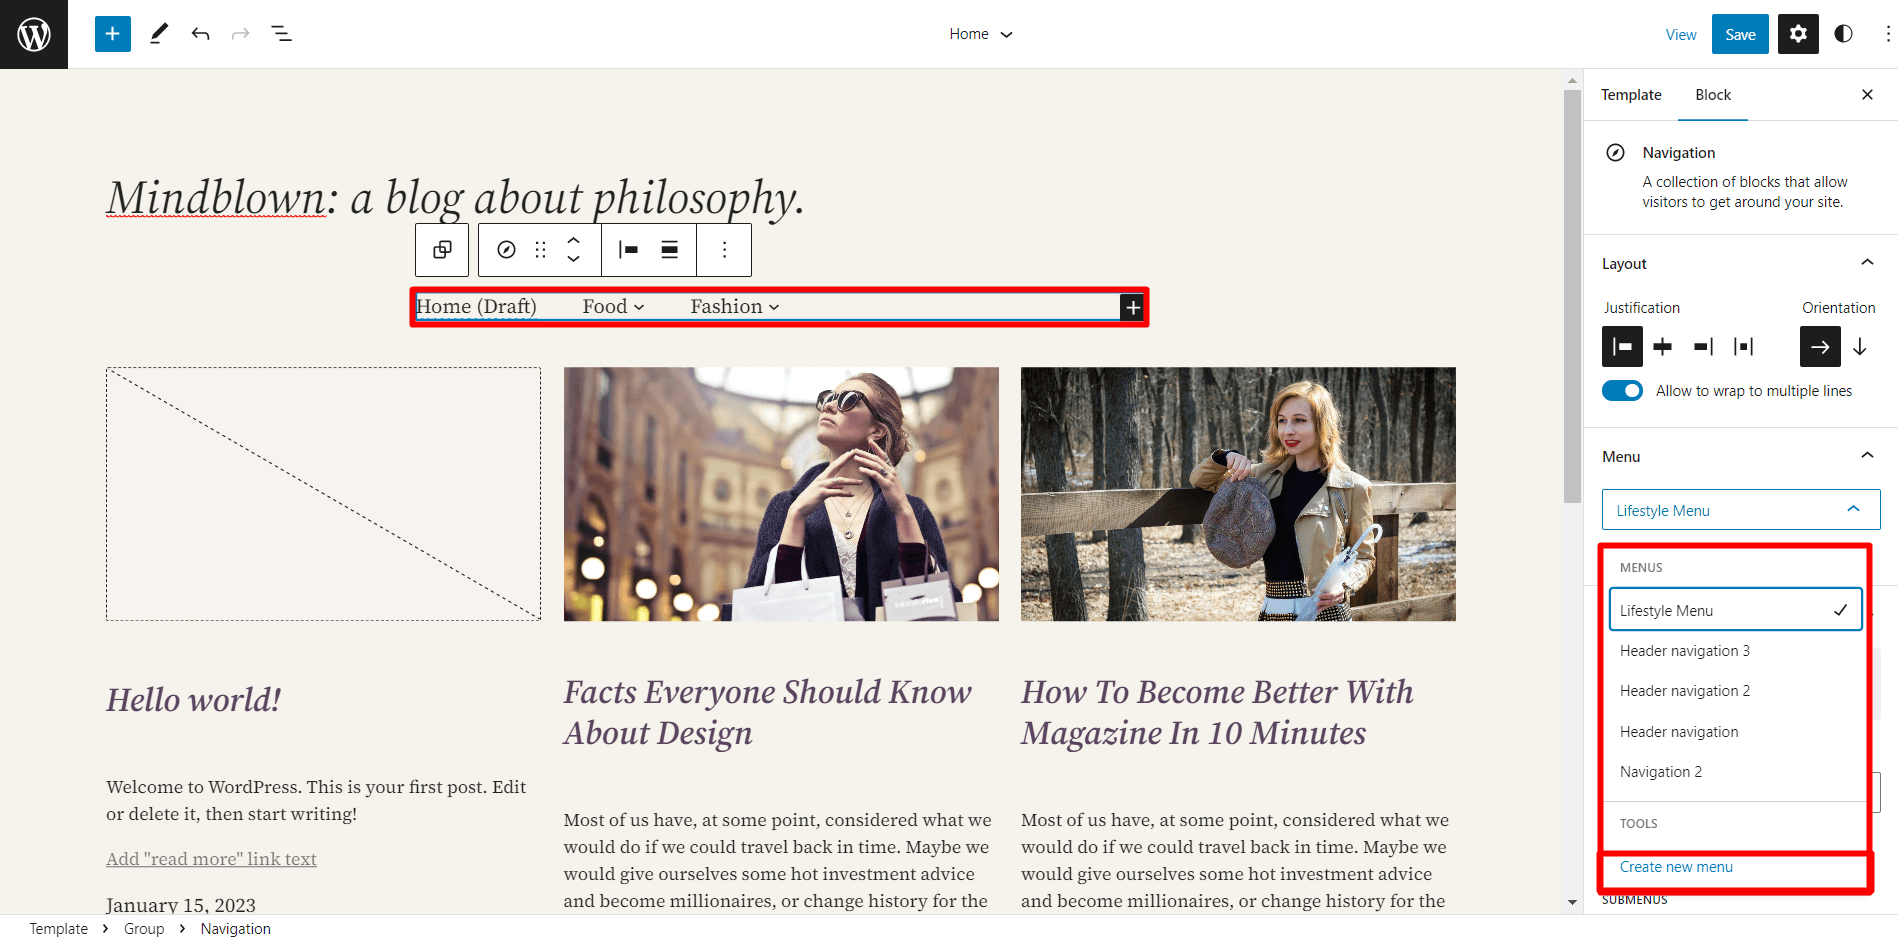
- Click on the Navigation block.
- Click on the submenu under the Menu tab.
- Select Menu or Create New Menu.
We have successfully created or selected the menu we want in our preferred location. We can create multiple menus in multiple locations. Full Site Editor allows us to be flexible with location choices compared to other themes, where the location of menus was predetermined.
Menu Customization
Now that we have the menu where we want it to be, it’s time to customize the layout of the menu. We can change the layout of the menu based on our website’s aesthetic so that the visitors find it visually appealing.
We can make visual changes to menus for them to look cleaner, and more organized
There are various built-in options, and we will go over all of them so we can make all the necessary changes that we want.
If someone visits our website through their phone, we can also control how the menu appears to them in the front end.
To access the customization, we must select the entire navigation block, not just the items. We can do so by just clicking on the block or selecting the navigation block that we want to customize from the List View.
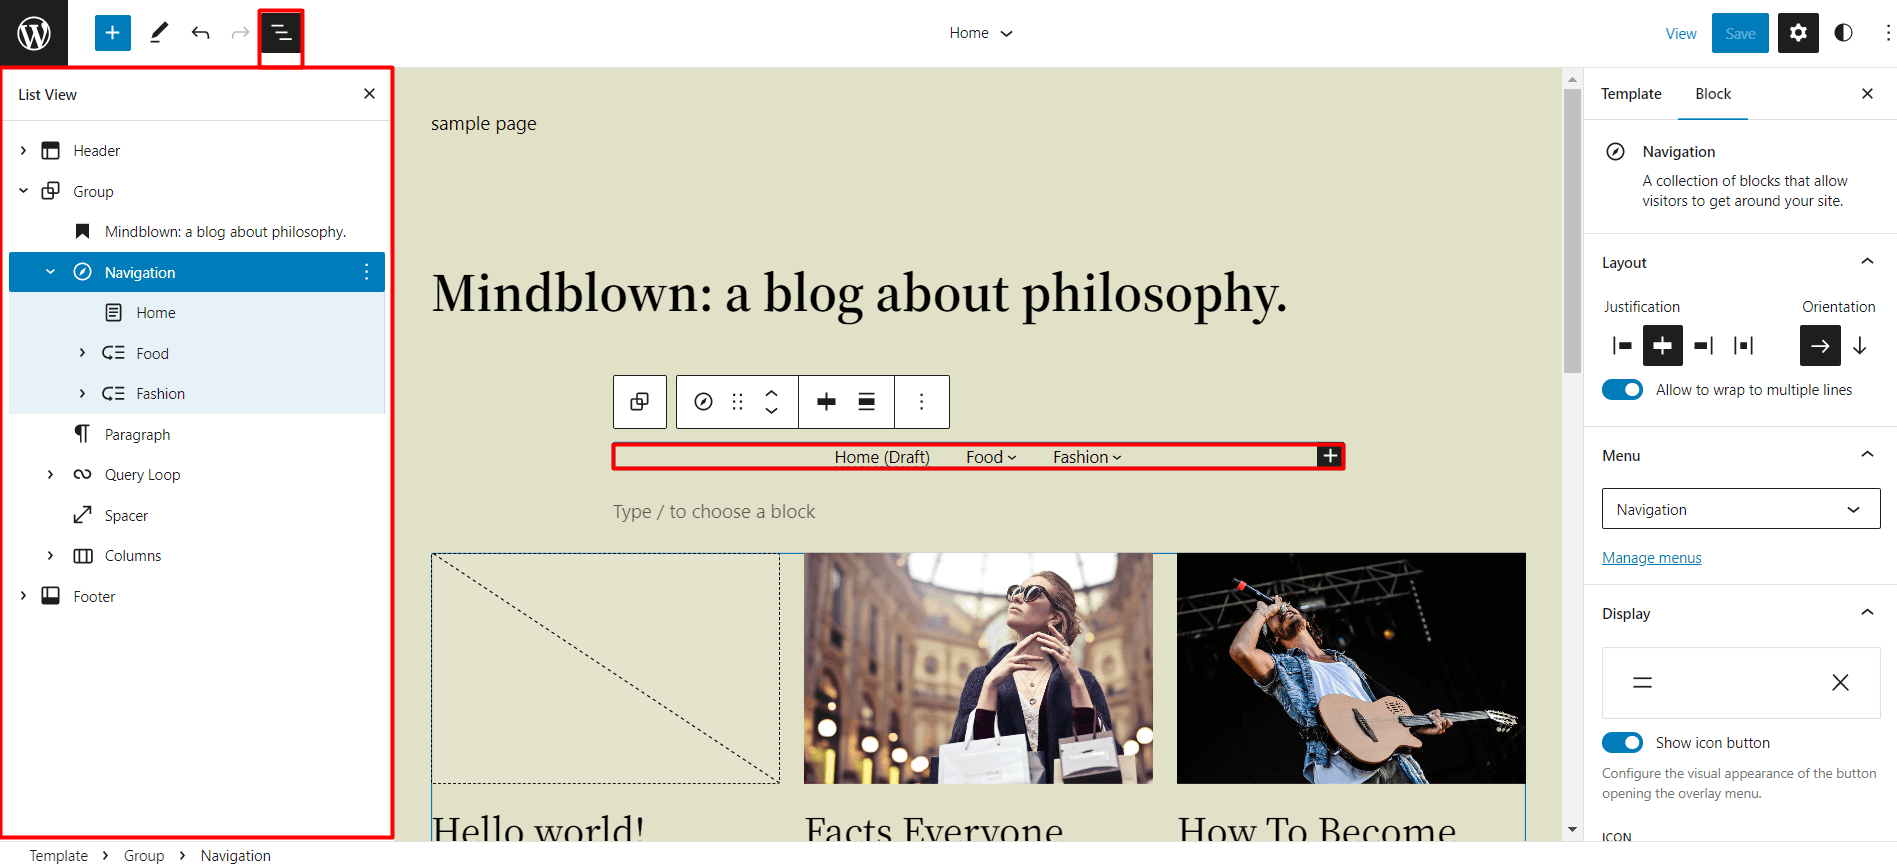
- Select the Navigation Block.
Menu Alignment
We can align the navigation block with respect to the width of our website. They can be aligned to the left, right, or center.
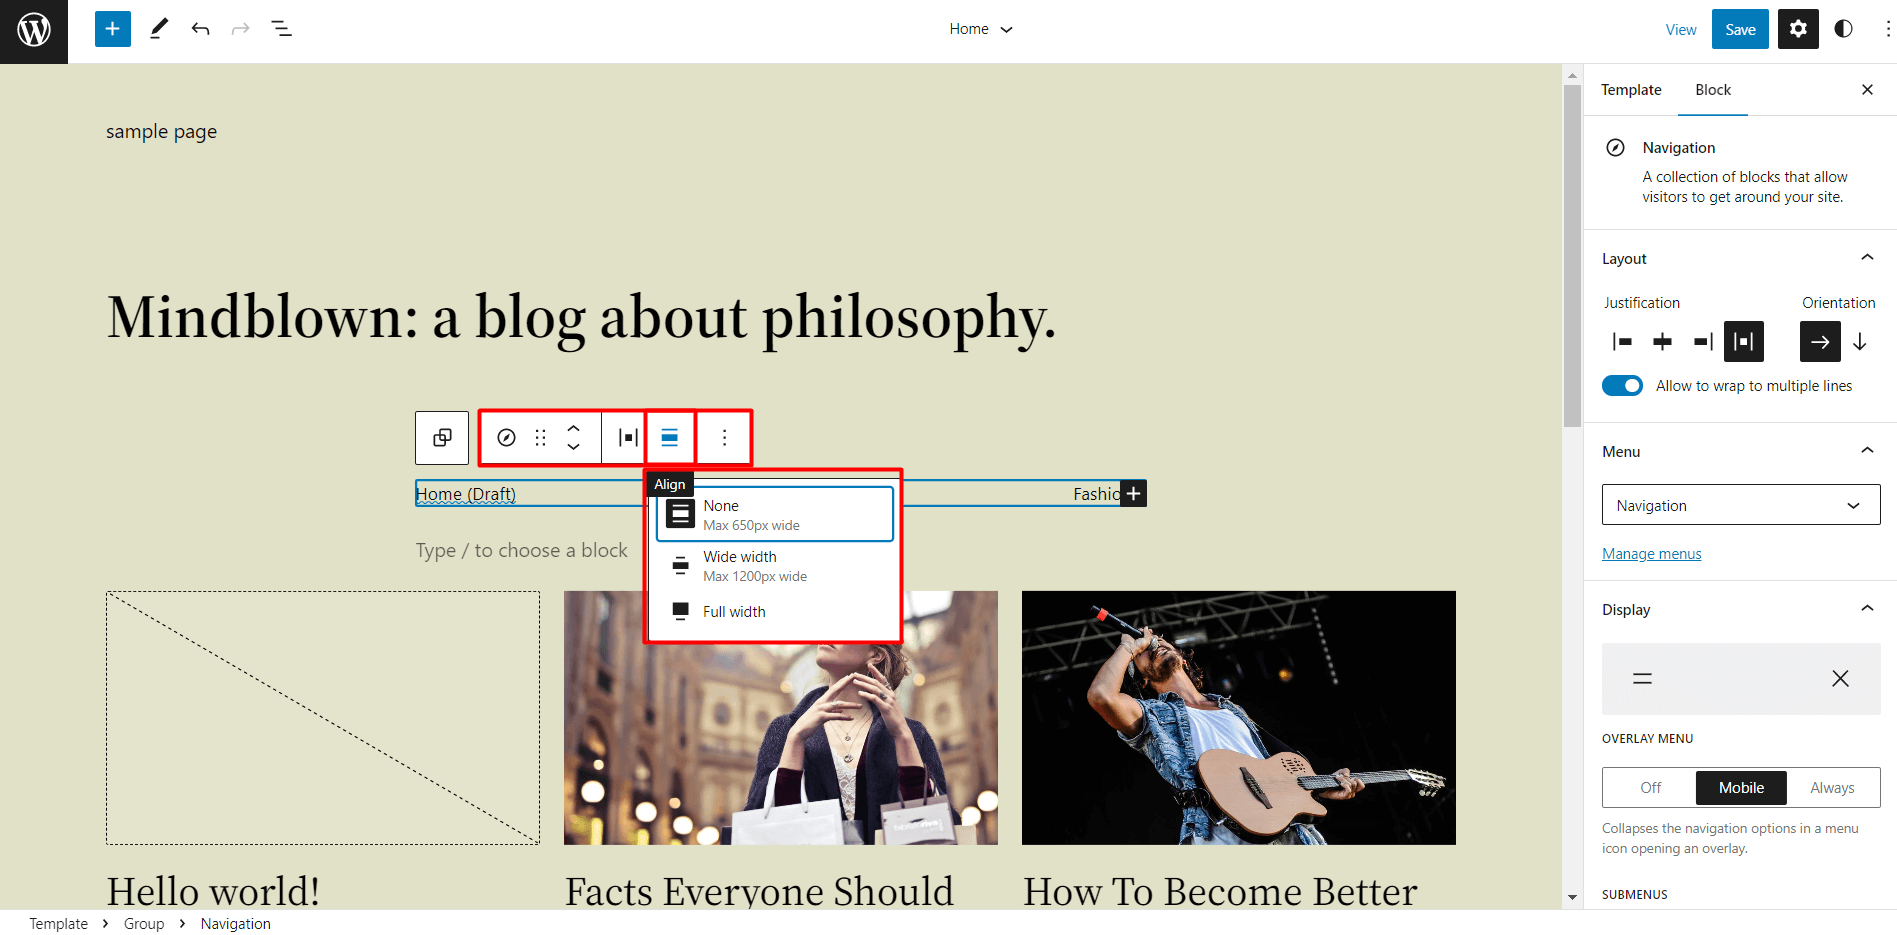
- Click on the Align option on the popup toolbar.
- Select your preferred option.
Menu Justification and Orientation
Justification options allow us to align items inside the block. We can justify items on the left, right, center, or based on spaces between them. We use this option from the popup toolbar or block settings on the right side of the screen.
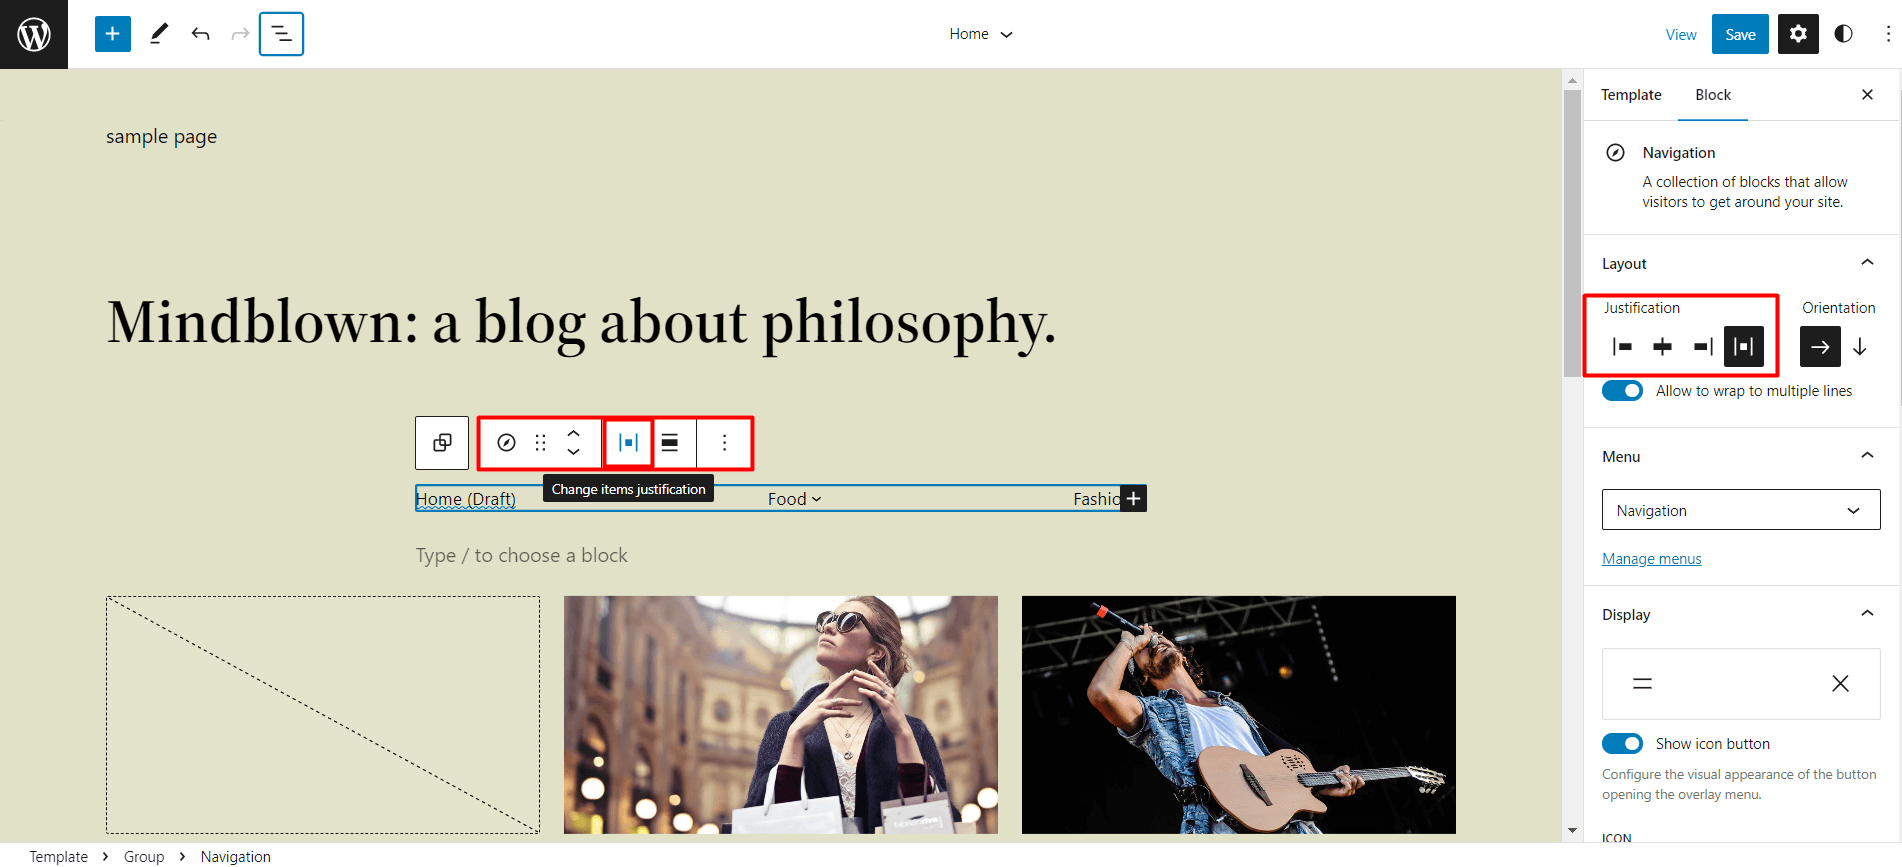
- Click on the Change Item Justification on the popup toolbar or on the block settings.
- Select your preferred option.
Orientation options allow us to display the selected menu in a horizontal or vertical manner. The options to change the orientation of the menus are available on the block settings, right next to the justification options.
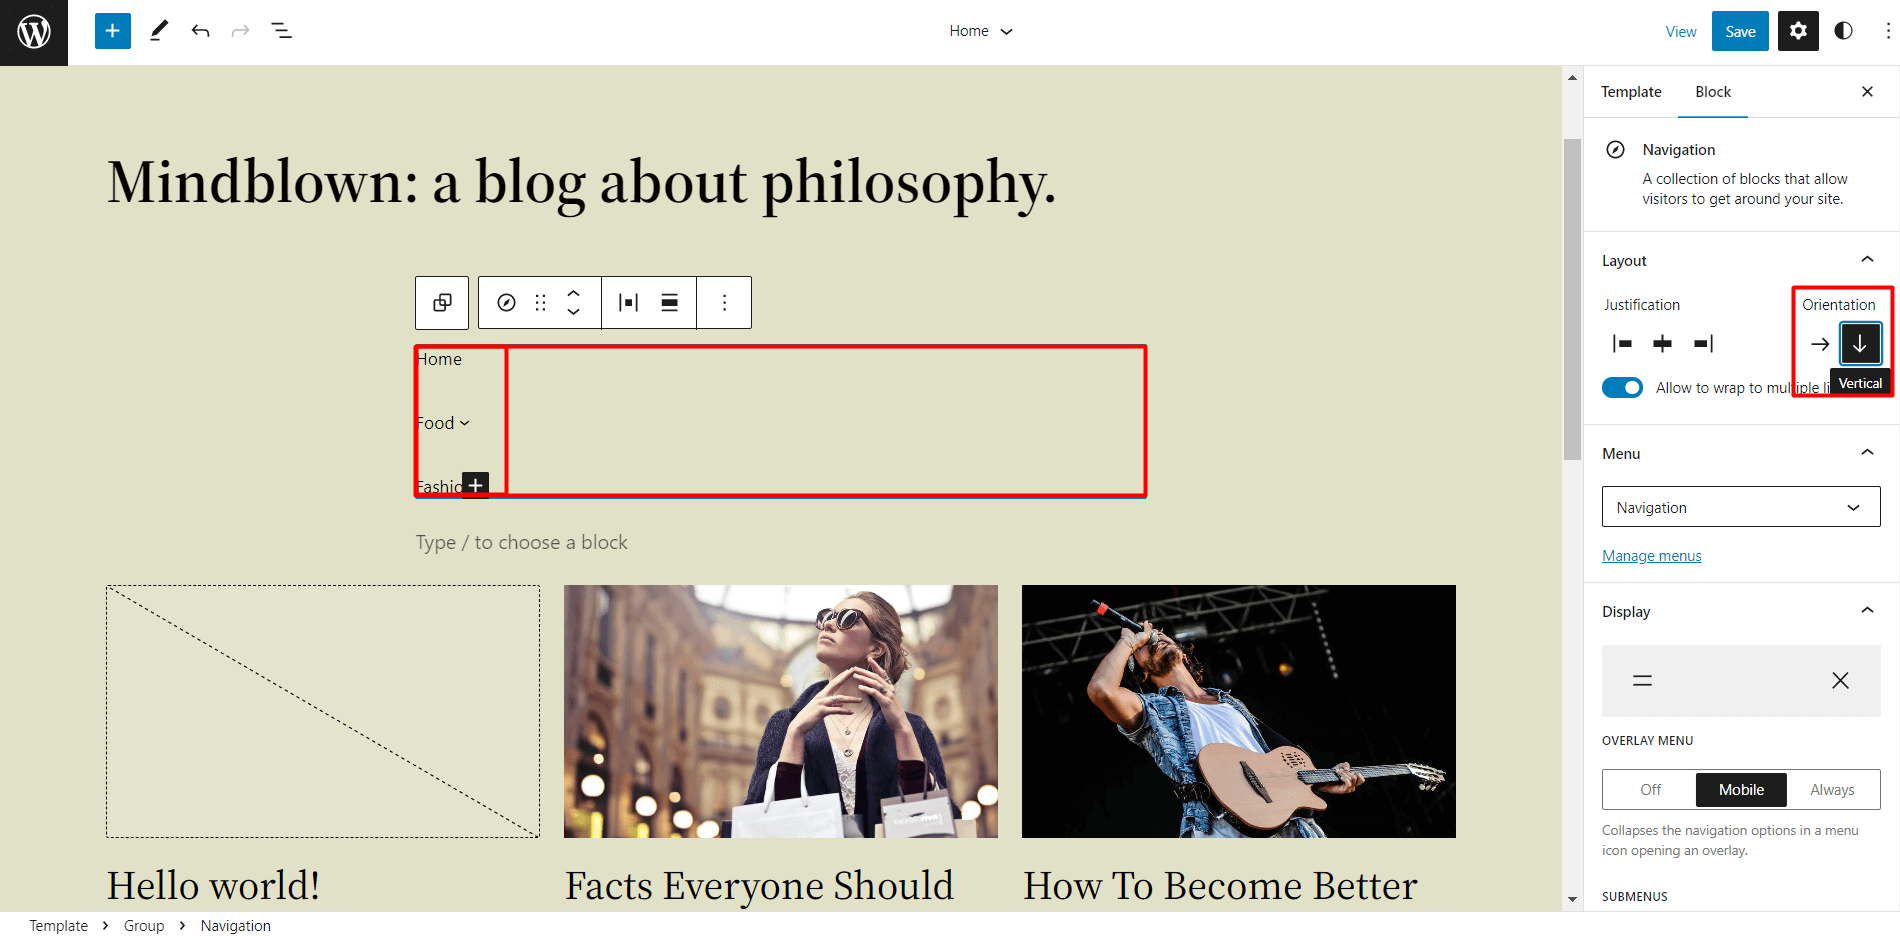
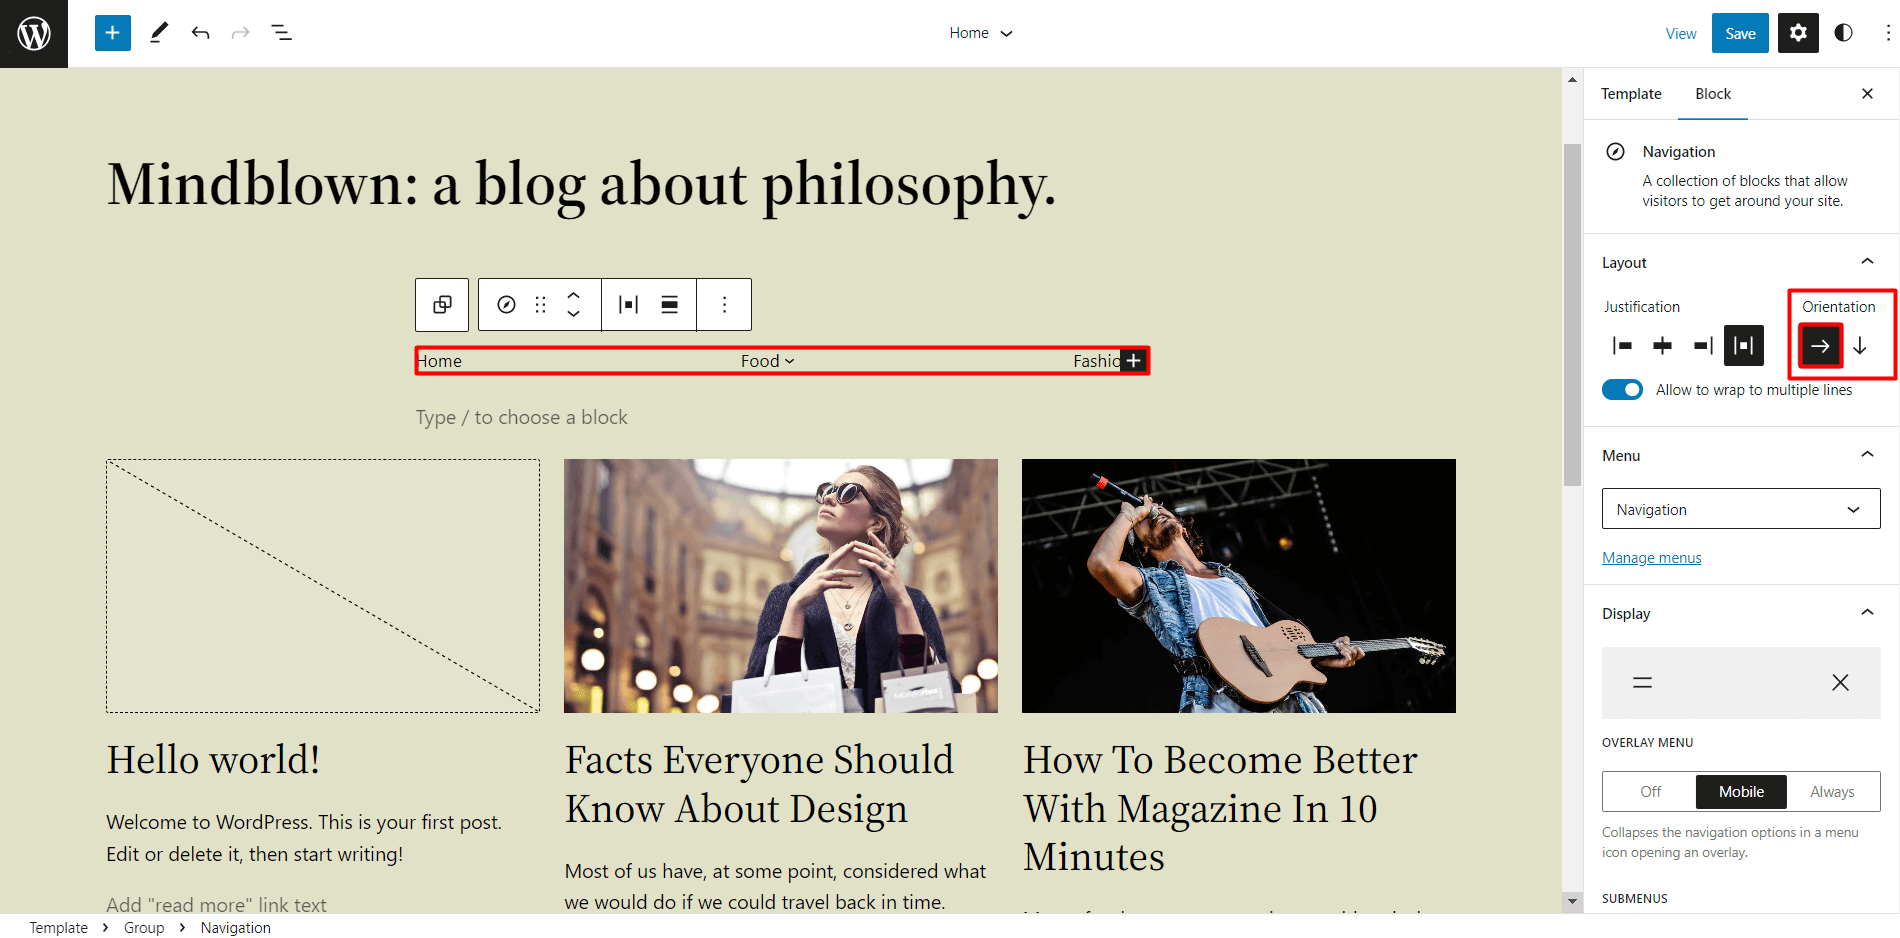
- Click on the navigation block.
- Select your desired option from the block settings.
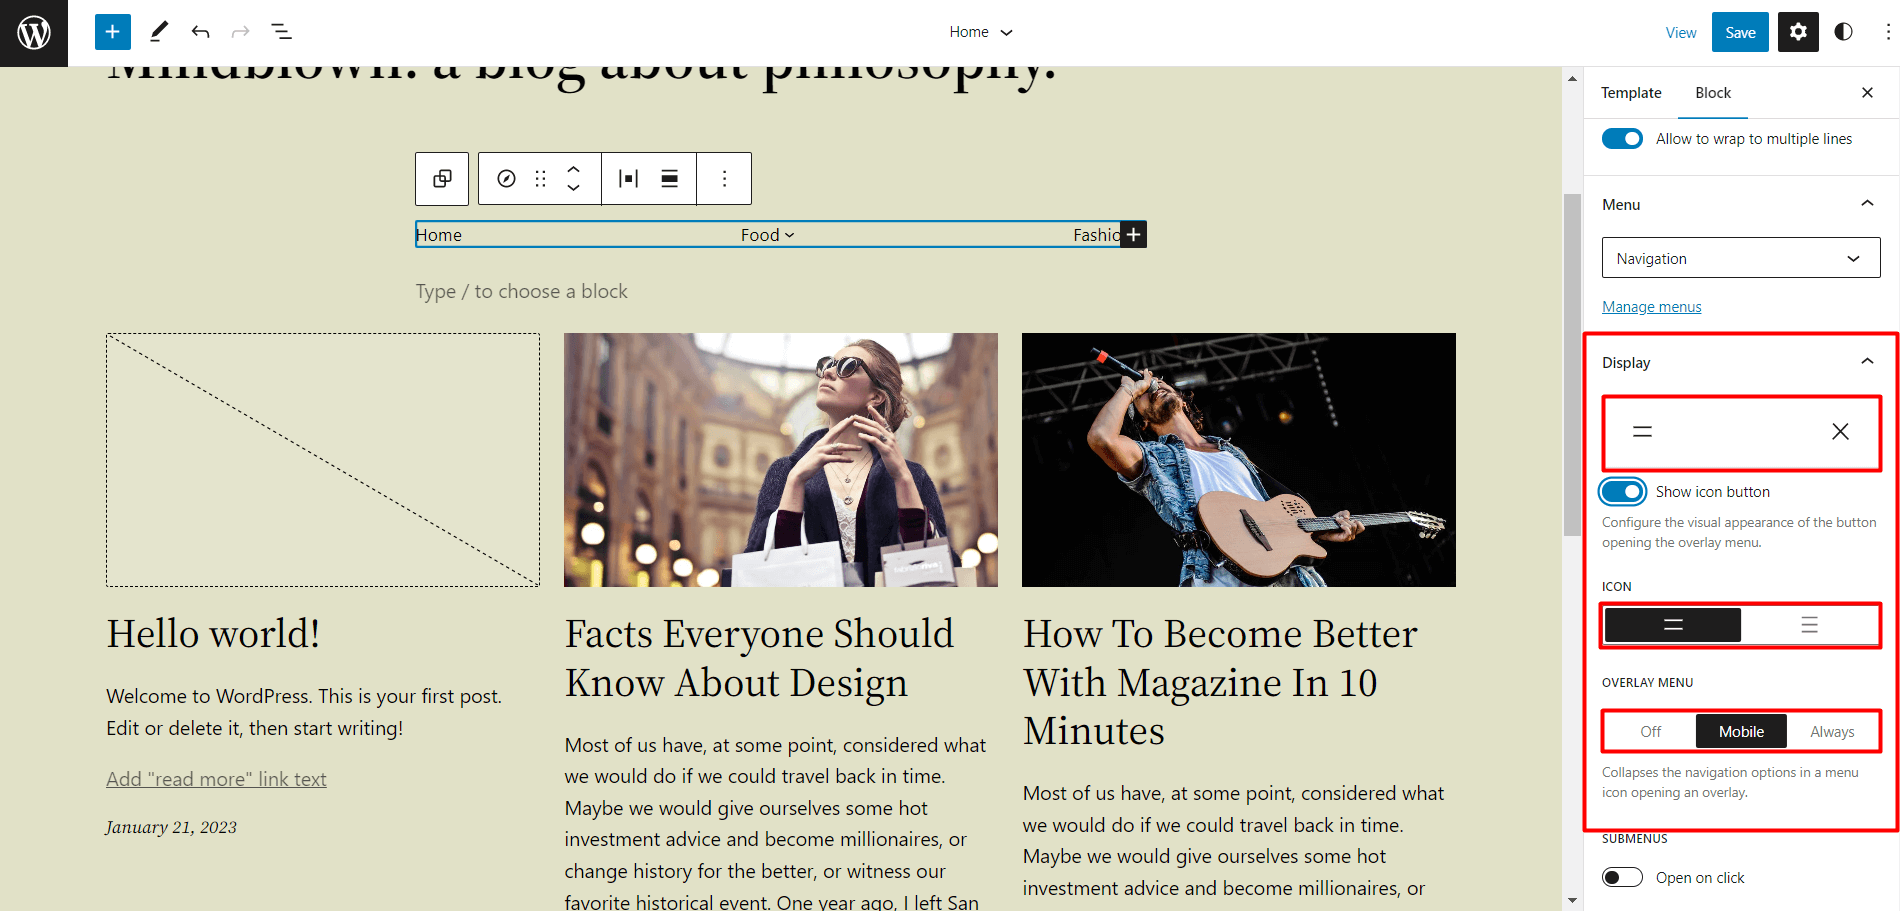
Overlay Menu
We can hide our menu behind an icon so they appear as an overlay menu when visitors click on the menu button icon.
Menus can be set to always act as an overlay menu or only when someone visits our website through their mobile. In case you don’t want the overlay menu to display on our website, even on mobile, we can set it off entirely.
There are also icon options available for the overlay menu button.
Colors and Typography
The text and background colors of the menu can be changed using the Full Site Editor. WordPress’s Twenty Twenty-Three theme comes with a preset color combination based on the style we choose but we can make changes to them if we want.
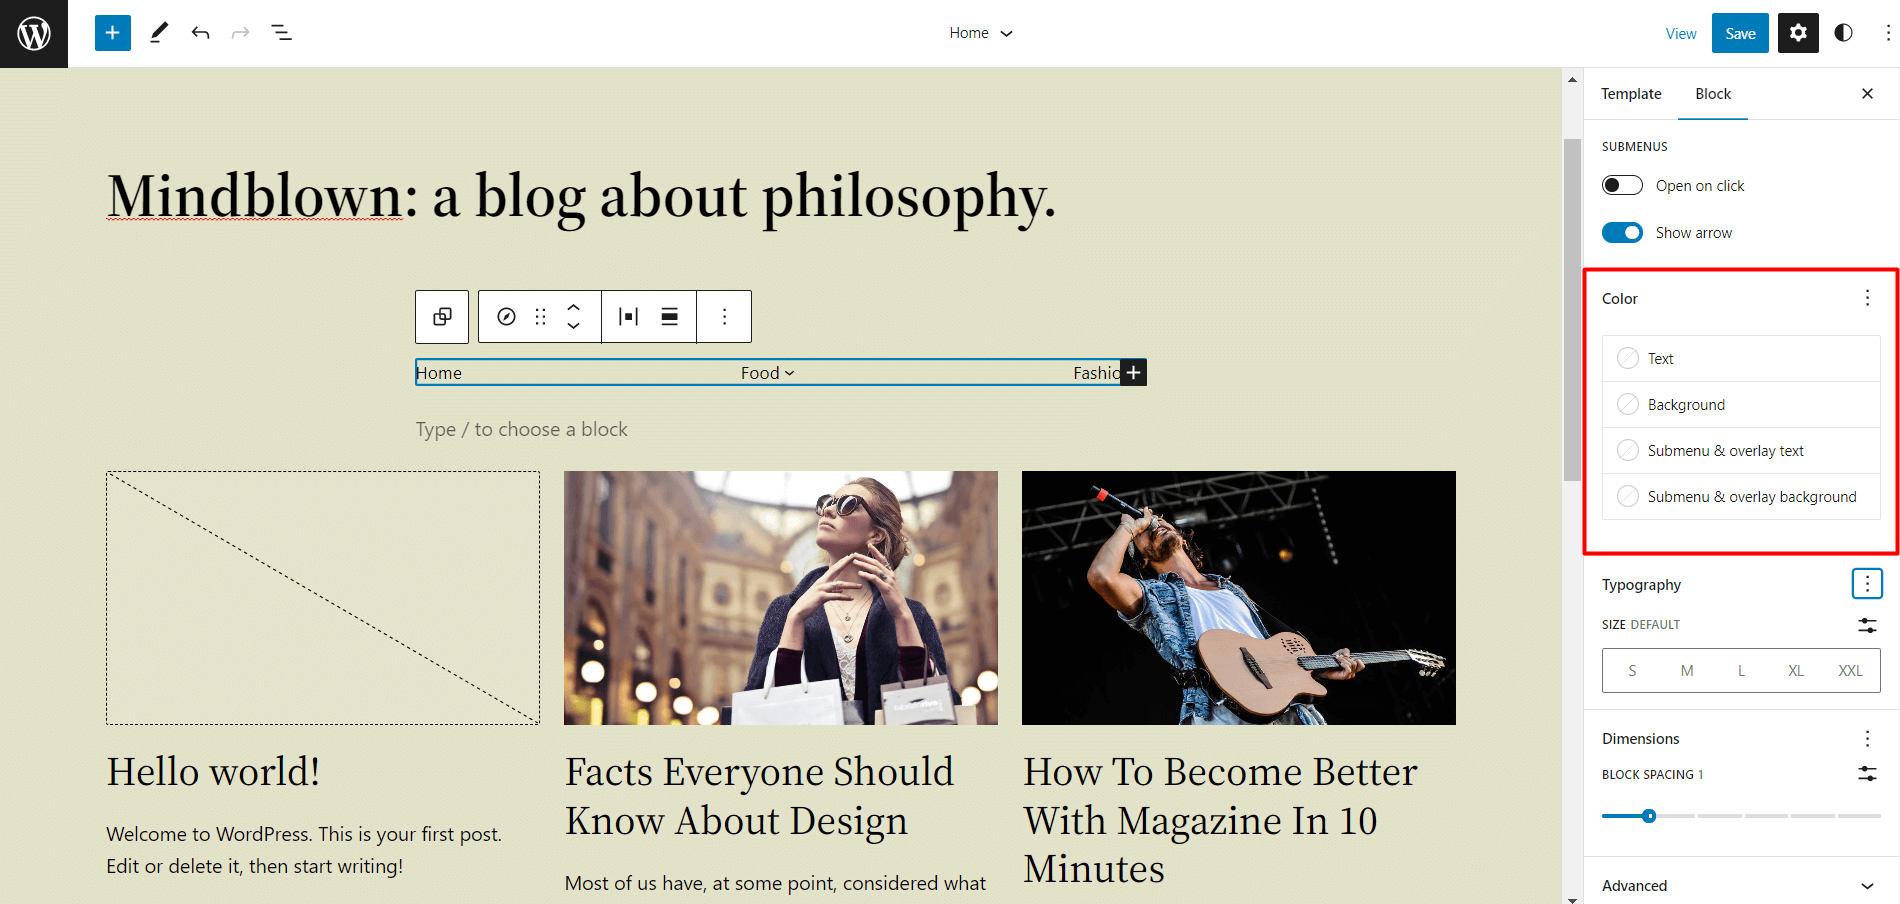
- Click on the part of the menu you want to change.
Making changes to the text is also an option, we change the font, line height, letter case, etc. from the block settings. There are additional typography options that are not shown to us, we can access them by clicking on the three dots next to the typography section.
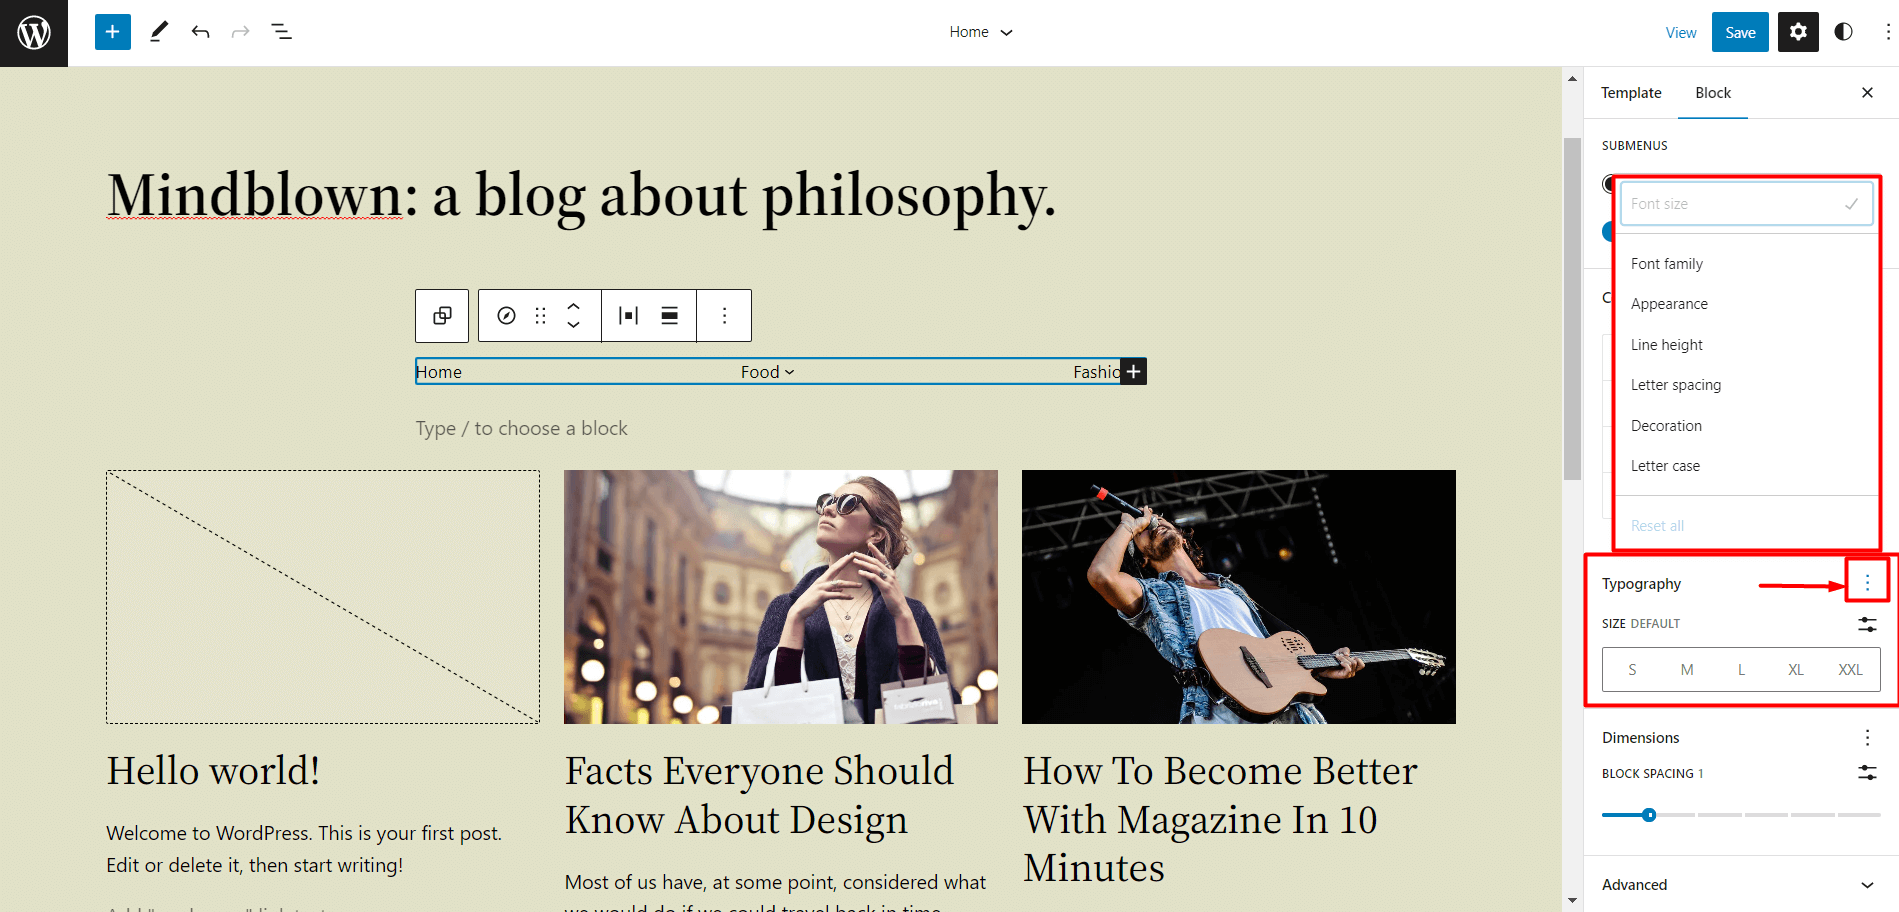
- Click on the Three Dots next to the Typography section.
- Select the option you want.
- Adjust the options.
Menu Items and Sub Items Customization
There are a few additional changes that we can make to the items and sub-items of the menus.
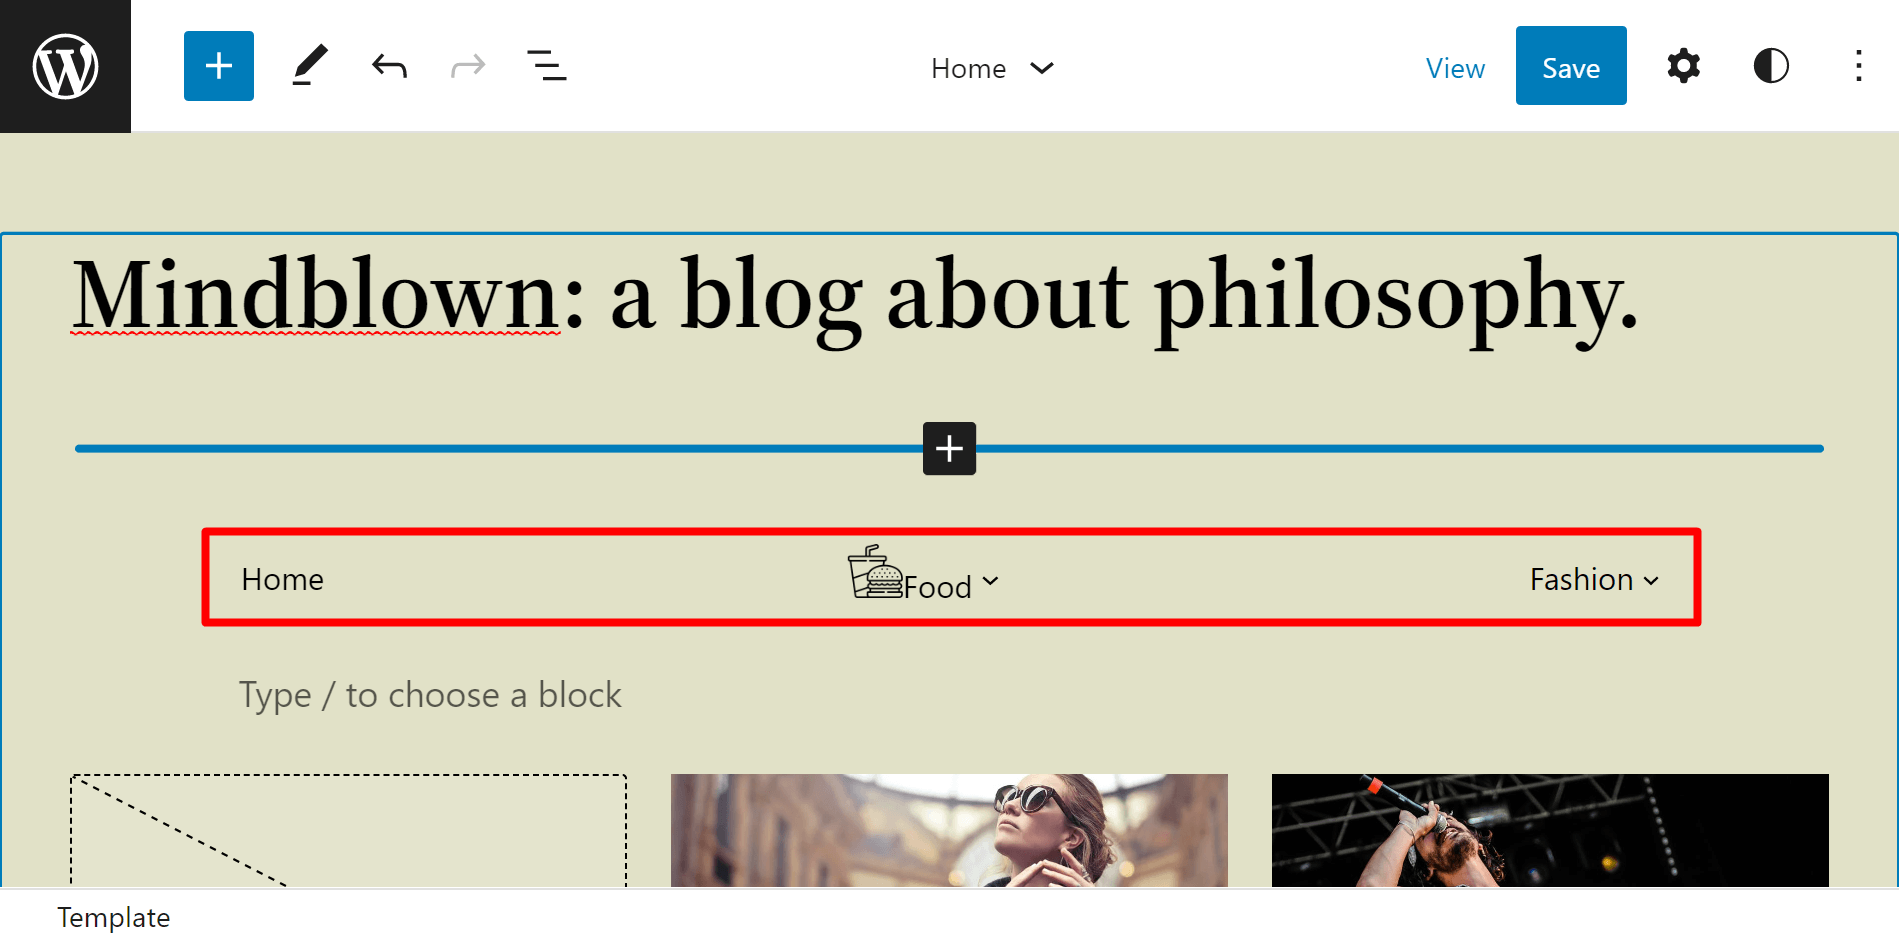
Add Image to the Items
We can add an image next to our items in the menu to make them look visually aesthetic. The same method can be used for sub-items as well.
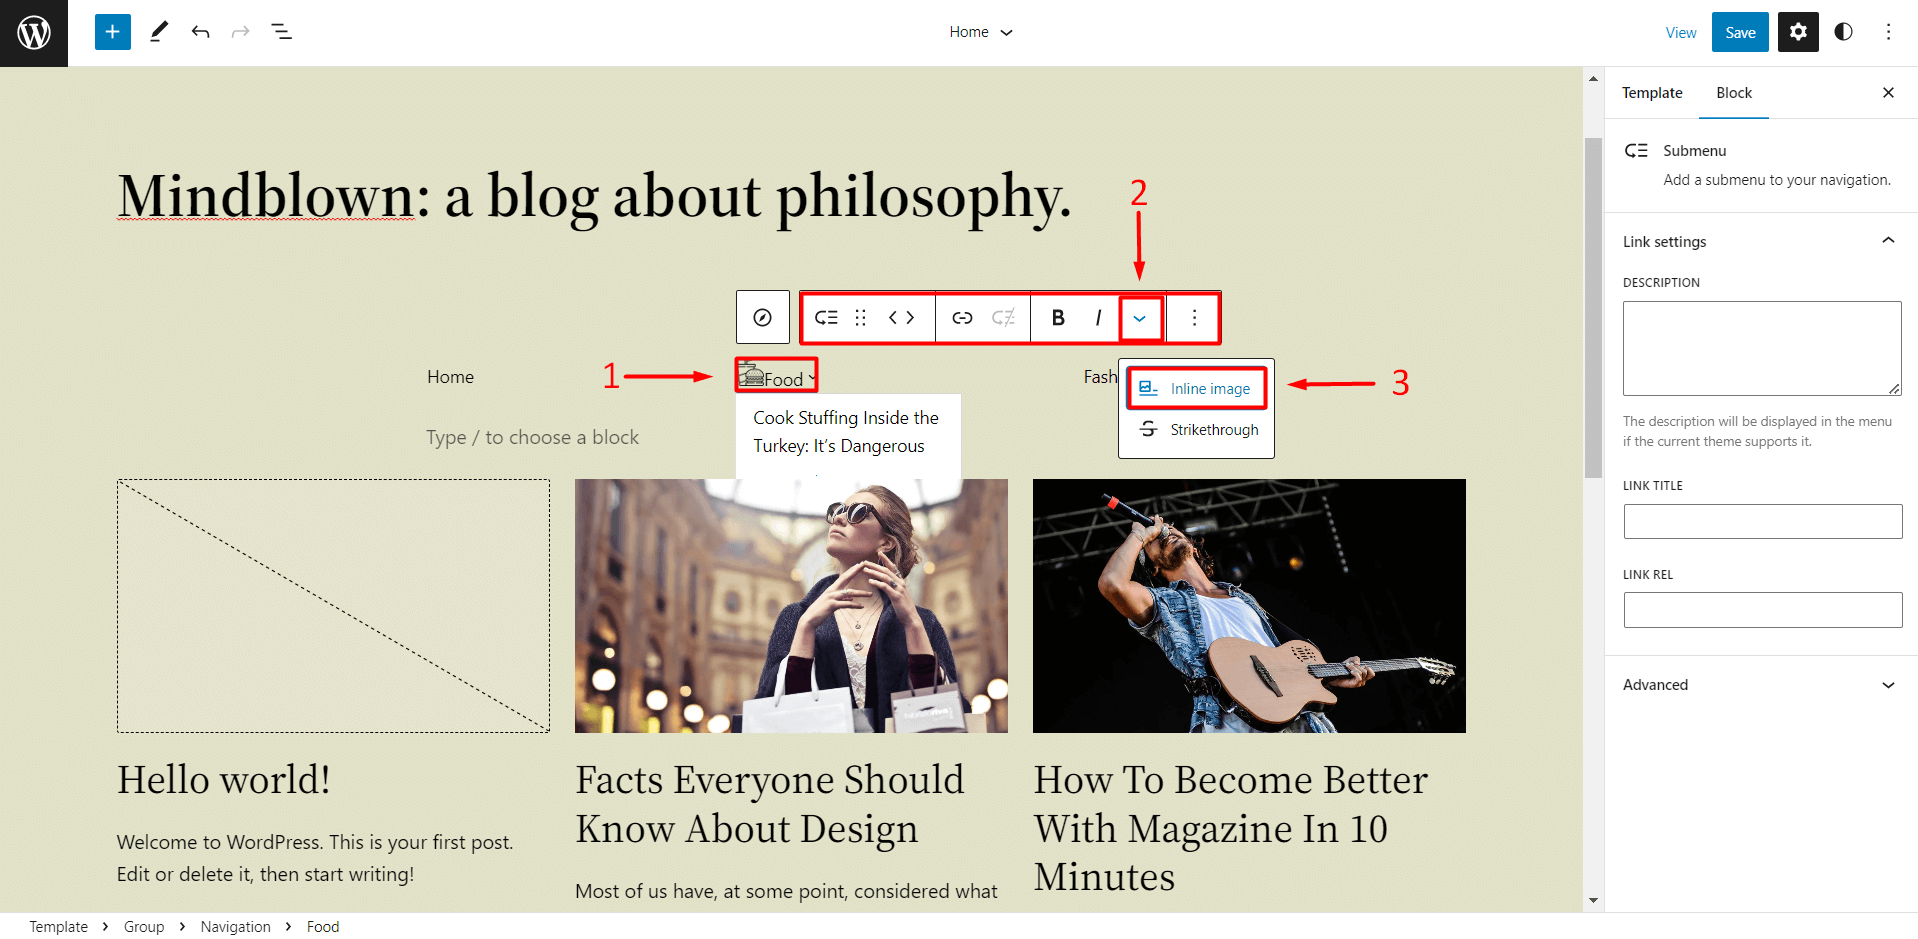
- Click on the Text of the item.
- Click on the downward arrow.
- Click on Inline Image.
- Select your preferred image.
Add Item description
Adding a description makes it easier to understand the purpose of the item. Visitors can see the title of the item when they hover their cursor over the item.
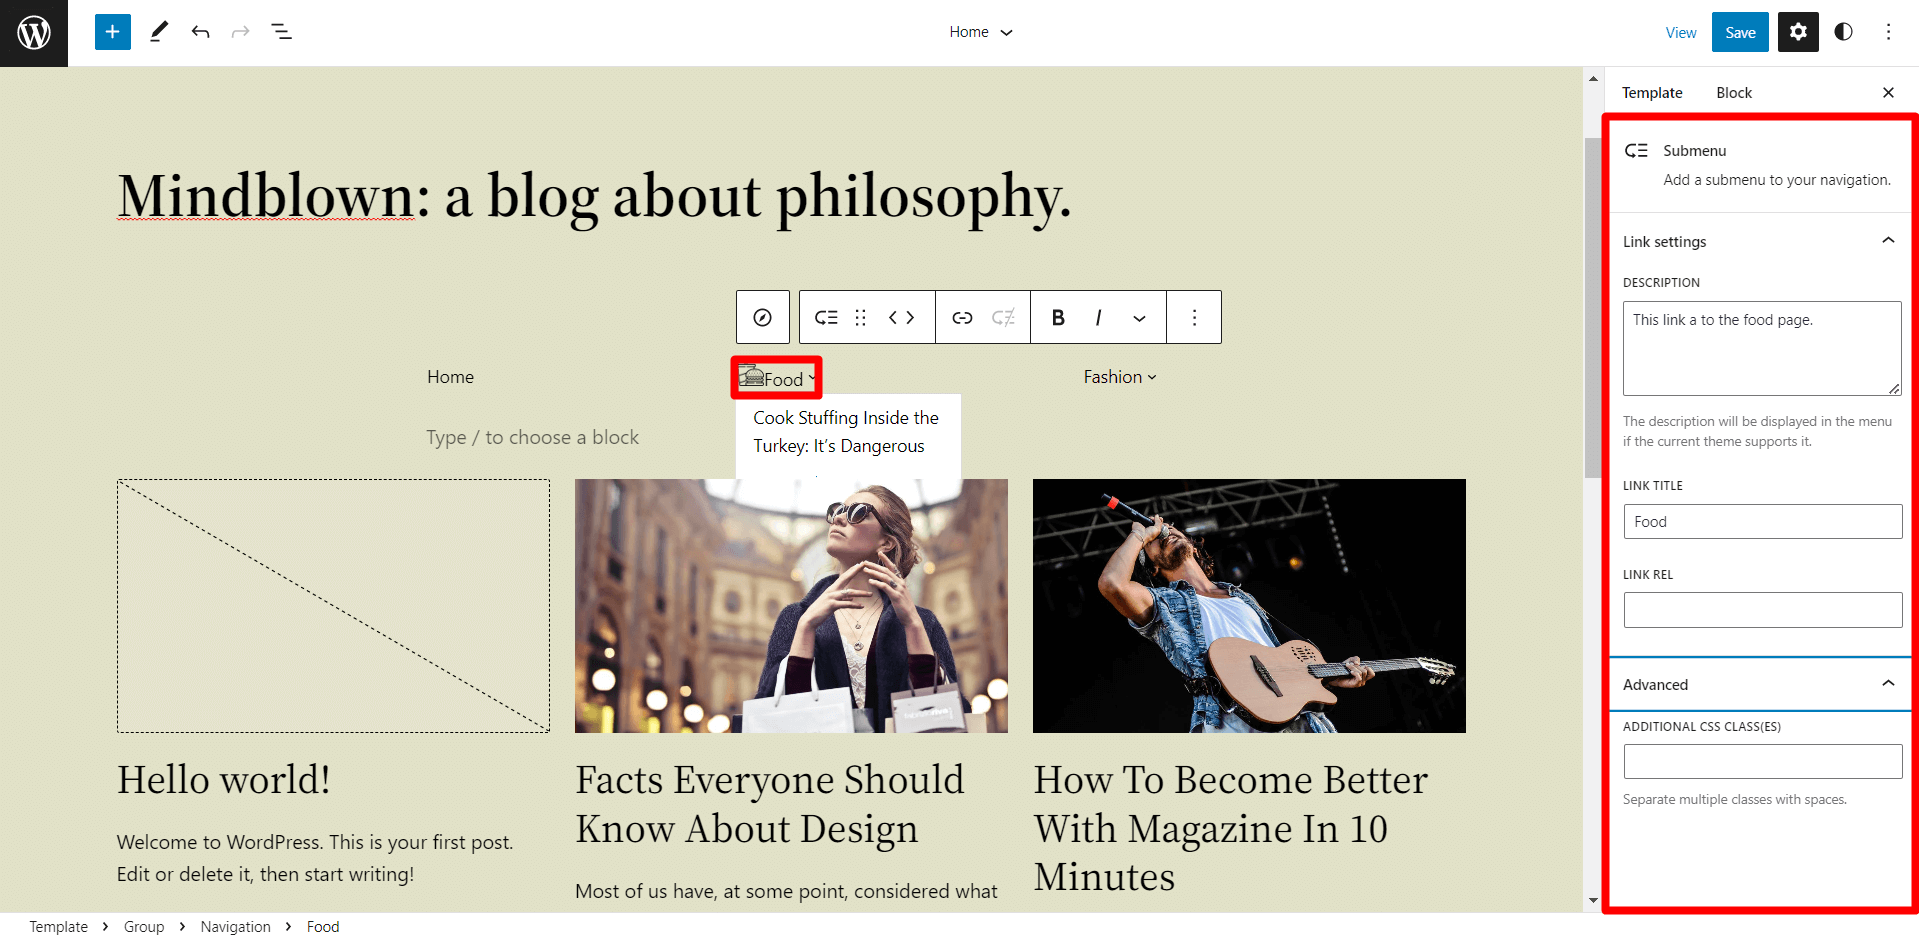
- Click on the item block.
- Fill in the necessary details.
Sub Menu behavior
We can set when our submenus drop-down. It can open when visitors click on the menu item or when they hover over the item. To make this change, we must do it from the navigation block settings. There is also an option if want to hide the arrow icon next to a submenu text.
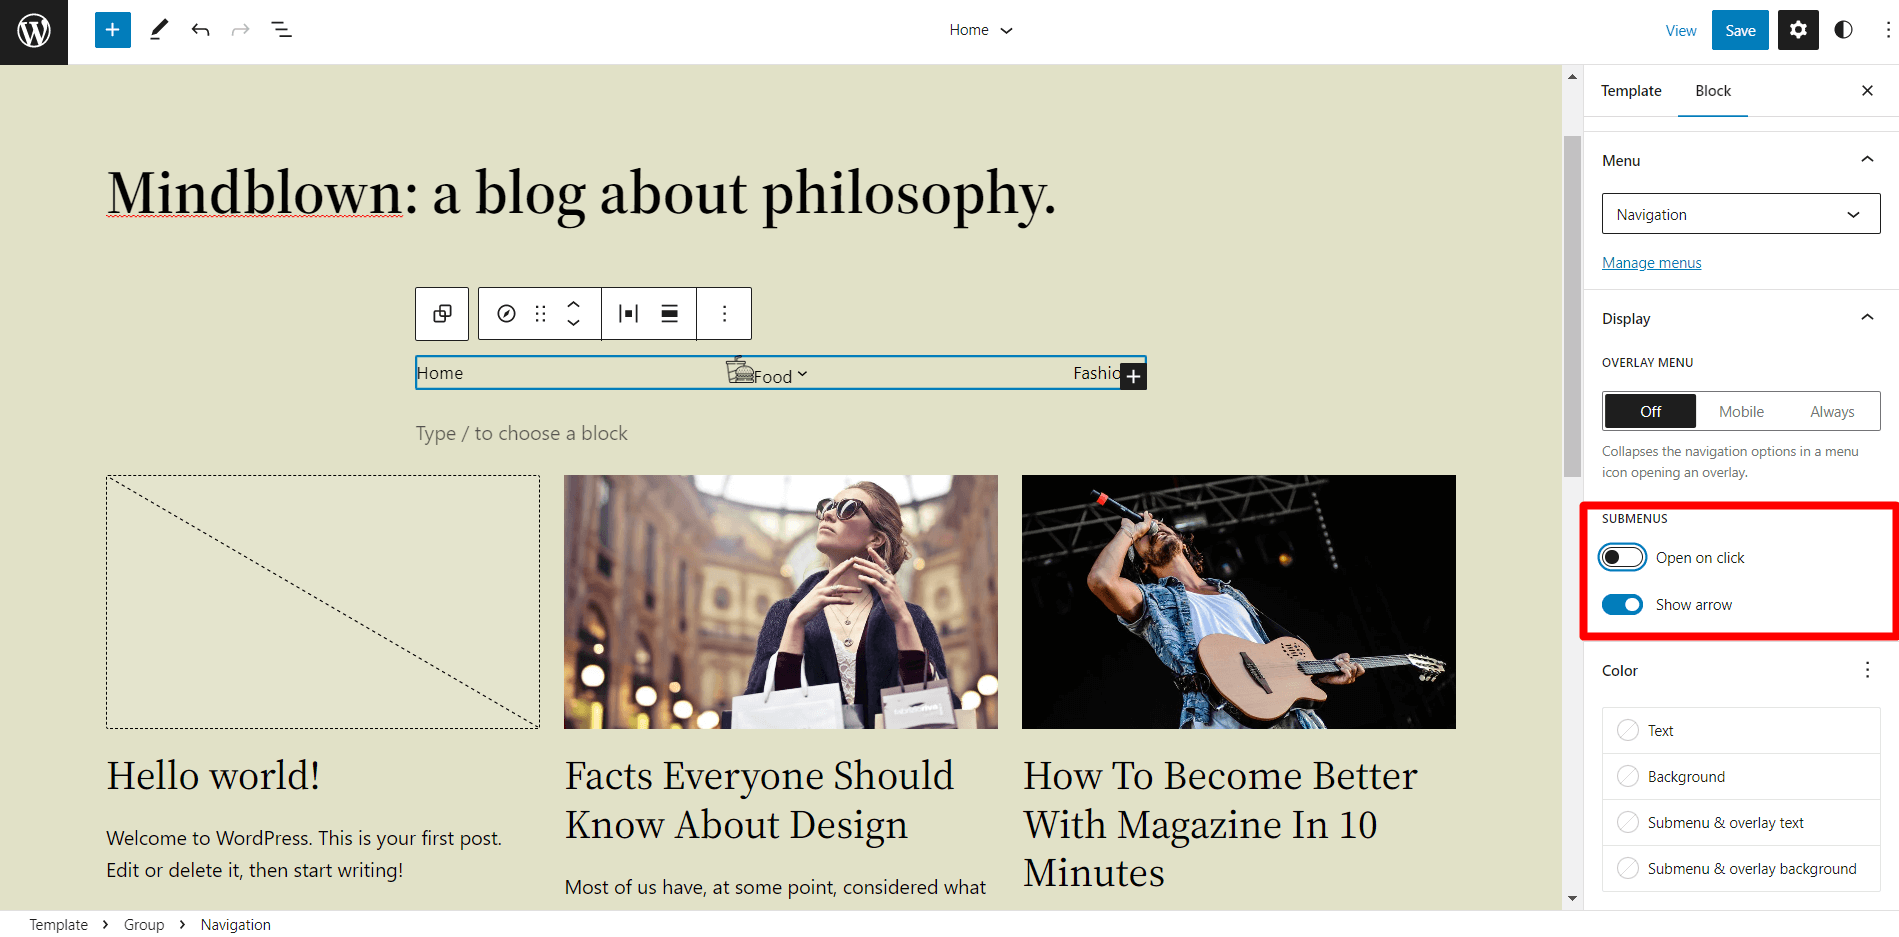
- Click on the navigation block.
- Scroll to the Submenu section.
- Toggle the option you prefer.
With that, we have come to the end of this tutorial but this is not it for the Twenty Twenty-Three Theme. There are more tips, tricks, and tutorials heading to our page, so stay tuned for that. For more WordPress-related topics, head to wplearner.com.